I started really using Daz Studio a few months ago and wanted to put down some of the most useful functions that I discovered. These are the things that may not be readily apparent (especially to a beginner), but were extremely useful for creating great renders.
Following, I will list a set of common issues I encountered, and then discuss useful tips and tricks that I found within Daz Studio, to solve them.
1. Dealing with Poke Through in Clothing
One common problem in 3D-posing software is that depending on pose, the body of our figure may sometimes poke through her clothing. In addition, when a figure is wearing multiple layers of clothing, an inner shirt may poke through an outer vest or belt. Similar poke through issues can also occur with hair and head-wear.
In the past, we deal with this issue by manually adjusting or enlarging various parts of our wardrobe. Another technique is to make a body part that is fully covered, invisible. For example, if our figure’s toe is poking through her boots, we may turn off the visibility of her entire foot.
In Daz Studio, we can address this thorny issue by using their collision detection function.
To get to this function, we access our clothing parameters.
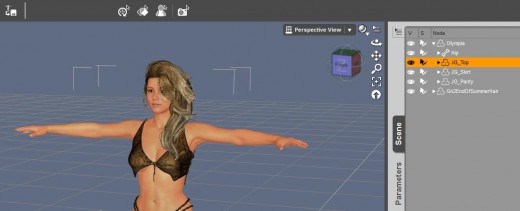
For example, in the screen-shot below, we have added some hair and clothing to our Olympia 6 figure. Next, we select our clothing top (JG_Top), and then click on the Parameters tab, which is right below the Scene tab.
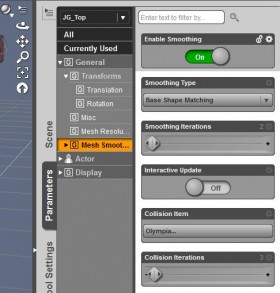
On the Parameters screen, we want to select Mesh Smoothing, which is where the collision detection feature resides.
Note that Enable Smoothing must be on for collision detection to work. We can then set the collision item and the number of collision iterations.
In the case of clothing, our collision item is usually our figure. However, if we are wearing multiple layers of clothing, we can also set the collision item to be another piece of clothing. For example, we may set the collision item of a belt to the pants, instead of to our base figure.
The default collision iterations of 3 usually works for most things, but if there is still poke through, we can try raising this figure to resolve it.
Most new clothing items already come with the Mesh Smoothing feature included. However, for older pieces of clothing, it may not be present. In this case, we can add the Mesh Smoothing function from within Daz Studio.
To do this,
- Go back to the Scene tab.
- Select the object that we want to add mesh smoothing to.
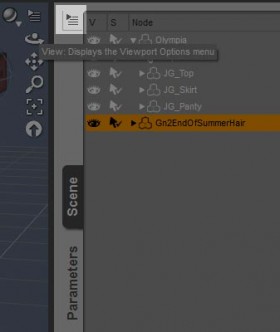
- Click the the button with a triangle and some lines on the top left of the Scene panel (highlighted to the right).
This will open up a drop-down menu. We want to mouse over the Edit option, which will open up even more object feature options. To apply mesh smoothing and collision detection to an object, we simply select Apply Smoothing Modifier from the top of the drop down menu.
Note however, that adding this mesh function will require additional calculations, which may slow down navigation and increase render time. Therefore, we only want to only include it as necessary.
In the case of mesh smoothing, additional calculations need to be made when our figure pose is changed, which can significantly slow down direct manipulation posing controls. If I have clothing items with high smoothing or collision iterations, I usually turn mesh smoothing off while testing and tweaking poses. There are also vendor products that can help with poke-through such as Zev0’s Fit Control
2. Getting Rid of Blocky or Jagged Figures and Objects
Sometimes, an object in our scene may appear blocky or jagged when viewed up close. This is because there are not enough polygons on the surface of the object (i.e. not enough resolution). Therefore, when we zoom in, we start to see the jagged corners of the now larger polygons that make up the surface.
This is similar to when we zoom into an image, and start seeing jagged edges, because each pixel is now much larger and we start seeing the jagged corners of the pixels.
Another very useful Daz Studio mesh function is the Convert to SubD option. SubD stands for subdivision surfaces. Using this option, we can automatically add more polygons onto our object surfaces. By increasing the resolution of our objects, we get rid of jagged edges and increase the quality of our renders.
We can increase the object resolution by using the same process as outlined above for mesh smoothing.
- Go back to the Scene tab.
- Select the object that we want to add mesh smoothing to.
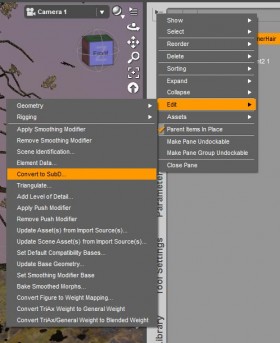
- Click the the button with a triangle and some lines on the top left of the Scene panel (highlighted to the right).
- Then, we select Edit > Geometry > Convert to SubD.
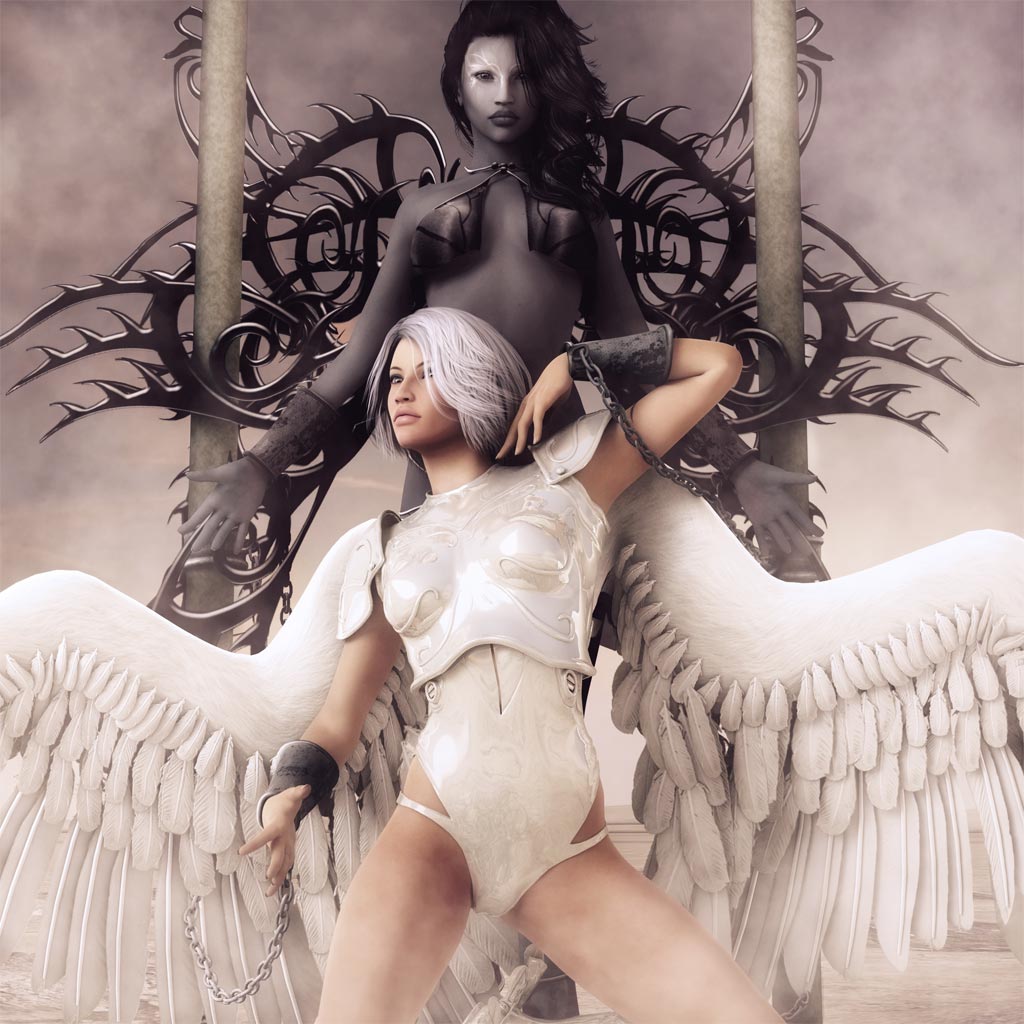
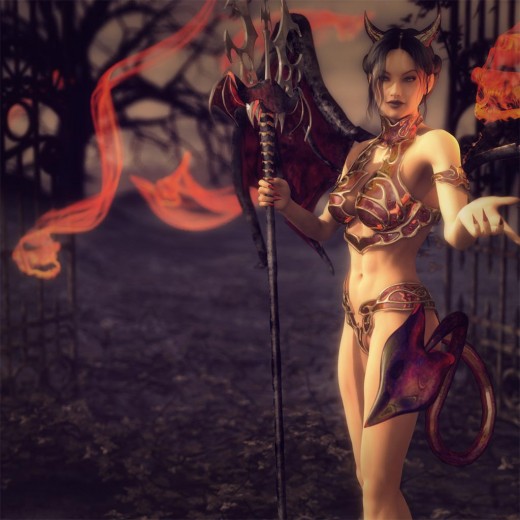
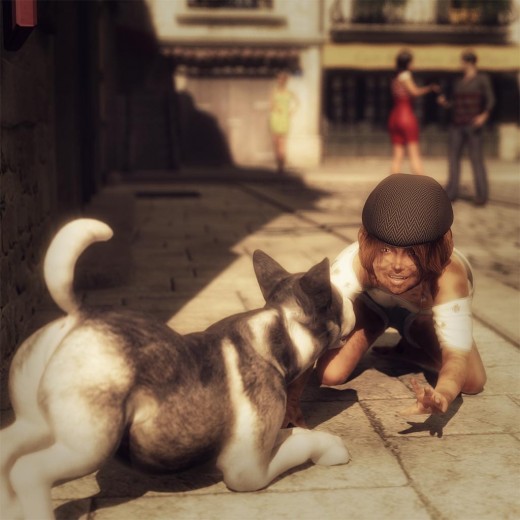
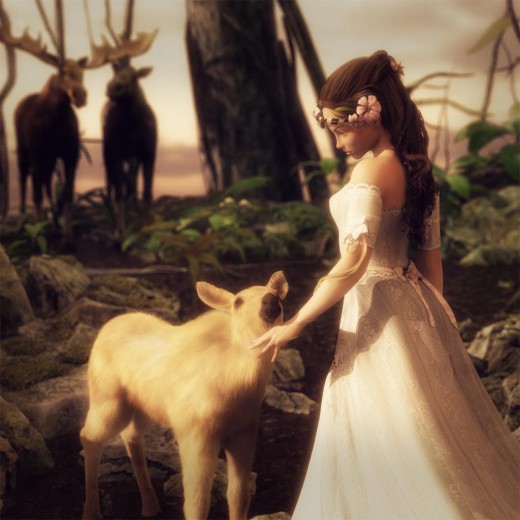
For example, in the dark angel picture below, I used the sub-division surface feature to increase the resolution of the wonderful End of Summer Hair on my figure. In addition, I also used the Mesh Smoothing operation we discussed in the previous section, to further smoothen out my hair edges.

We can access our sub division surface parameters by selecting the object, clicking on the Parameters tab, and then choosing Mesh Resolution.
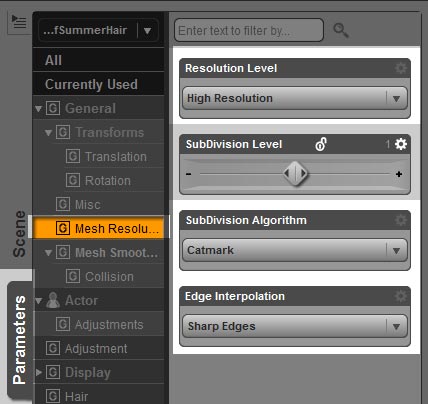
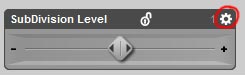
Note – if we want to increase our sub-division level by more than 2, we only need to click on the wheel icon at the right of the sub-division level panel (shown to the right).
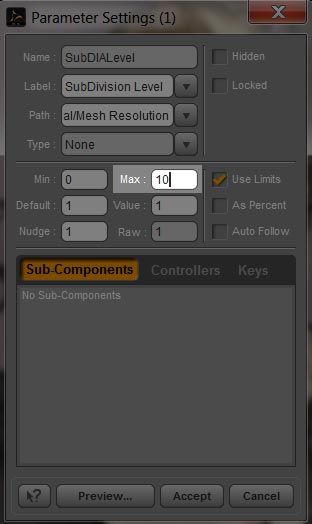
This opens up a drop-down menu, and we want to select the Parameter Settings option. Doing so will open up a pop-up window that allows us to increase the maximum sub-division level in our interface (shown below).
a) Remove Grid Lines on Sky-Domes
Sub-division surfaces are also really useful for removing lines in sky-domes. When certain environments are rendered, grid lines may sometimes appear on the sky-dome. When this happens, I simply select the sky-dome in my scene and convert it to a sub-division surface. Increasing its polygon resolution seems to get rid of all the grid lines.
b) Background Figures
Just as we can increase the resolution of foreground objects and figures in our scene, we can also use the sub-d controls to lower the resolution of background objects to increase rendering speed.
This is especially useful when we have multiple human figures far off in our background. These human figures have a lot of detail and are usually set to high resolution by default, which will unnecessarily slow down our rendering speed. I also make sure to reduce the mesh resolution of far away clothing and hair.
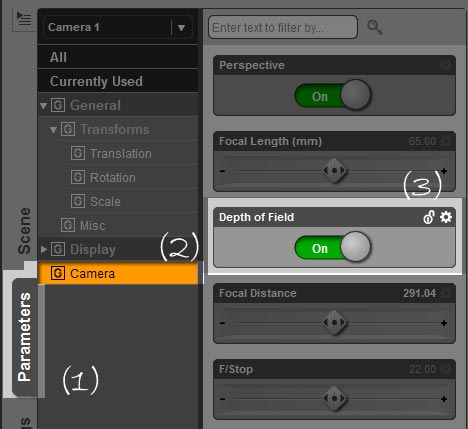
To get the blurring effect in the background,
1. Select your camera and go to the Parameters tab.
2. Select Camera from our list of parameters.
3. Turn on Depth of Field.
Here are some simple instructions from Flipmode on how to easily set our focal distance.
Here is a more detailed tutorial from Daz on Depth of Field.
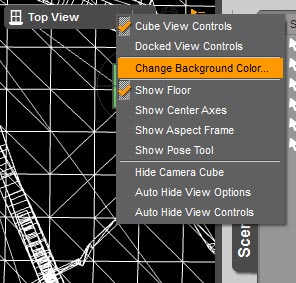
3. Change Background Color
Finally, it took me the longest time to find the controls for changing the background color of my Daz Studio scene. Changing background color is very useful for a variety of purposes including –
- We may want our scene background color to match our floor color or texture. For example, in pin-up scenes, we may set a white floor so that shadows will create a nice effect. In such a situation, setting our scene background to white also, will cause the floor to naturally merge into it.
- We may need greater contrast between the figures or other elements in our scene with respect to the scene background.
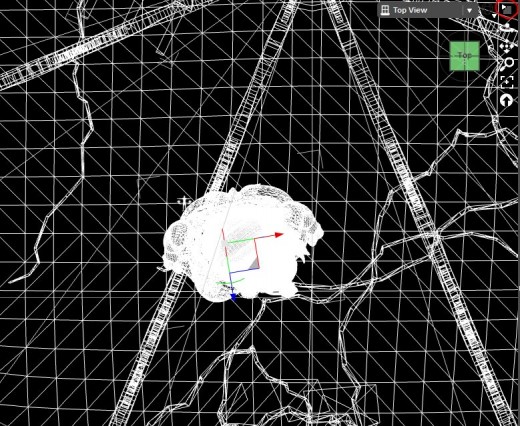
- For placing lights, it is absolutely invaluable to change our scene view to Wireframe so that there is no occlusion of our light objects. To better view a wireframe scene, we will need to change our scene background color to black or some other darker color.
To change our scene background color, we want to-
1. Click on the triangle with lines menu button to the right of the camera drop-down menu on the top-right of our scene. We circled this button in red in the image above.
2. This opens up a drop-down menu, and one of the options is Change Background Color.
3. Clicking on this option will open up a pop-up window with a color selector for us to pick our new background color. Once we are done, select Ok and voila, our scene background color is changed.
That’s All Folks
If you have useful Daz Studio tips and tricks, please share them with us in the comments section below. Have fun rendering with Daz Studio!


thank you shibashake, been needing this type of info, haven’t found a lot of info on these topics…thank you…feel free to contact me with any other useful tips & tricks…thank you X10
I am very glad. Thanks for your wonderful post. 😀
Thank you for these tutorials.
Thank you for writing and illustrating them in a way that is easy to understand.
Some tutorials are hard for the old dogs among us to understand.
Thank you Petercat and Happy New Year! 🙂
As a Daz newcomer I fell upon this site while Googling for rendering insights. Great stuff !! Yup, I now have it on speed dial although I consider myself a modeler. An artist’s skills are a little bit beyond me. 🙁
I too encountered “poke through” issues. Good tip on turning off interior parts. What I do is leave the model(s) nude until ALL else has been completed. Then the final step prior to rendering is to dress them. 🙂
What are you talking about?! Your book cover designs look great! 😀
Yeah great tips!. I’m new to all this and sometimes my model goes to the grey skin for smoothing but I can’t get it back to the models skin and clothes colour!. Is there a certain toggle button?. thanks!.
By “smoothing” do you mean when you turn on the mesh smoothing operation? Do you change anything else? Does the color/material change as soon as you turn on the mesh smoothing option? Does the color/material only change in the interface or also in the render?
In general, mesh smoothing shouldn’t cause changes to color or material.
what you did. Please email me if you put any more useful tips. I can use all the help I can, lol.
Does anybody know how to CREATE hair out of nothing in DAZ Studio? I’d kill for the tip.
If I am in a bind I will start with one of the hairs that cone with Daz, such as Aldora or basic. Sometimes I’ll use both. Then I will “turn off” the parts I don’t need by lowering the opacity to zero, or deleting them in the geometry tool. For curls I just use spiral primitives and use hair textures and transparency maps for the surfaces. They come out awesome. Hope this makes sense and helps, I’m writing this on my phone and my keyboard blocks my dialog box.
Tank you very much! The tips are very useful!
Thank you! I really needed that tip about getting rid of grid lines in sky dome render.
thank you for a very informative article that I found very useful for DS 🙂
Just a quick note to say that I found your article very interesting and helpful. I have only recently started looking at this type of software and have been a bit confused about different applications and which one to use.
I am also probably looking at using this technology slightly differently as I see considerable use in Business communications and specifically within Report delivery which is clearly not what these products are traditionally being used for but perhaps the games industry has created a far more versatile tool and we do not even realise it. Anyway good article very helpful