One really fun thing that I can do with Daz Studio, is create images of my favorite tv or movie characters, and put them in my own story. I can pose them in whatever way I want, set the environment, include dragons, dinosaurs, fairies, and anything else that captures my fancy.
A great character that I am having fun with recently, is Frozen’s Queen Elsa.
While trying to create a likeness of her, I found that the two most important things are hair and clothing. In this case, the face and poses also matter, but to a lesser degree.
Queen Elsa’s Hair and Clothing
Patron Freebie!!
Tier 2 and above patrons can download my Iray material settings for the Frost Queen outfit here.
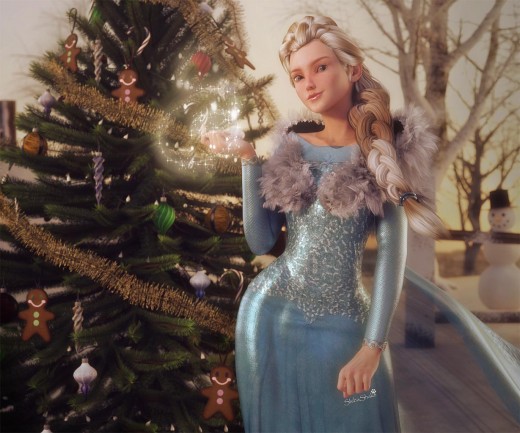
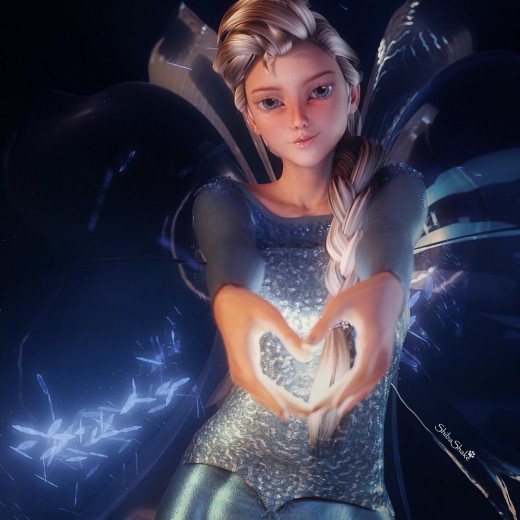
The wonderful thing about Queen Elsa is that there is already a clothing set and hair that closely matches her’s. In the image above, we used the Frost Queen outfit and Aphrodite Hair.
We also added a furry wrap around her, to give it a more Christmas feel.
To get the clothing to look good in Daz Studio Iray, I also made the material more shiny and silky. For the hair, I used PHC : Aphrodite textures and simply applied the Iray Uber shader to it.
With the clothing and hair done, I am most of the way there! 😀
Queen Elsa’s Face
In the two images above, we used Daz’s Aiko 6 base as our Queen Elsa. For her skin, we applied Tempesta3d’s Bambolina texture and the standard G2F Iray settings from Daz.
Aiko 6 has a more stylized look, which makes her appropriate for a toon character like Elsa. However, Aiko 6 also has a more realistically shaped face. Her eyes are smaller, her face is taller, and less round. With the right clothes and hair though, she still looks like Queen Elsa, but a more realistic version.
If we want to make our Aiko 6 look more toony, we can morph her face and enlarge her eyes. To do this,
- I go to Shaping > Editor.
- I open up Aiko 6 > Actor > Head.
- I put Aiko in the search box and dial in some of the Aiko 5 morph by using Generation 5 Legacy Shapes for Genesis 2 Female(s). This makes her face wider up top and narrower at the bottom.
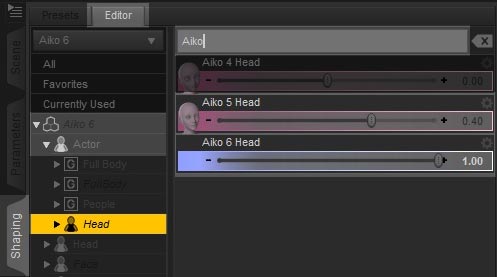
In the image below, I have Aiko 6 head set to 1.0 and Aiko 5 head set to 0.4.
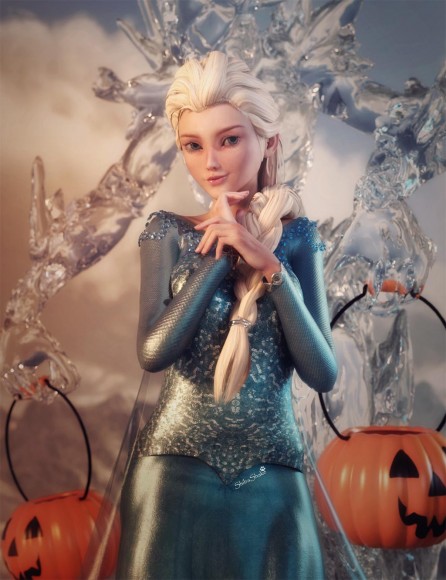
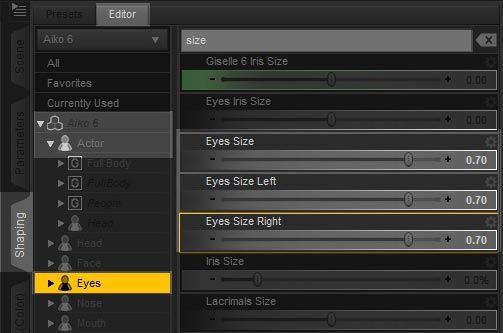
I can also enlarge my figure’s eyes by –
- Going into Shaping > Editor.
- I open up Aiko 6 > Actor > Eyes.
- I put size in the search box and dial in a larger eye size.
In the image below, I have Aiko 6 head set to 1.0, Aiko 5 head set to 0.4, and Eye Size set to 0.7. If we compare this version to the first image, we can see that she looks a lot more toony, and more like the original Elsa.
Queen Elsa’s Expression and Pose
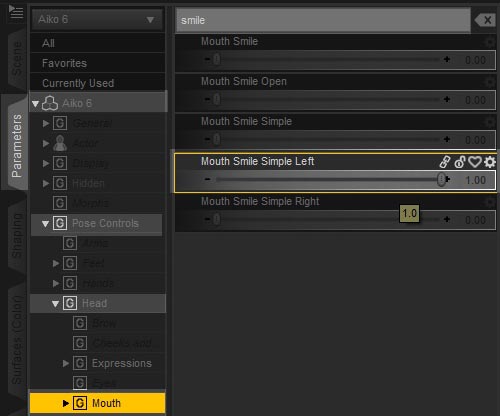
Finally, expression, pose, and setting also play a role. For example, Elsa appears with a cheeky, crooked smile, in some of her popular images. We can add that to our character as well, to help increase likeness. To do this,
- I go to Parameters > Aiko 6 > Pose Controls > Head > Mouth.
- I put smile in the search box to narrow down the options.
- I set Mouth Smile Simple Left to 1.0.
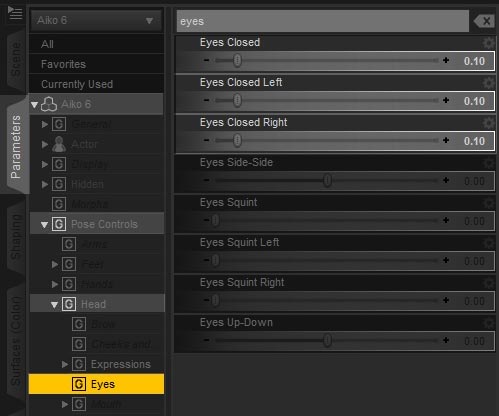
- I also close her eyes slightly by going to Parameters > Aiko 6 > Pose Controls > Head > Eyes.
- I put eyes in the search box, and set Eyes Closed to 0.1.
These are the settings I used in the image above.
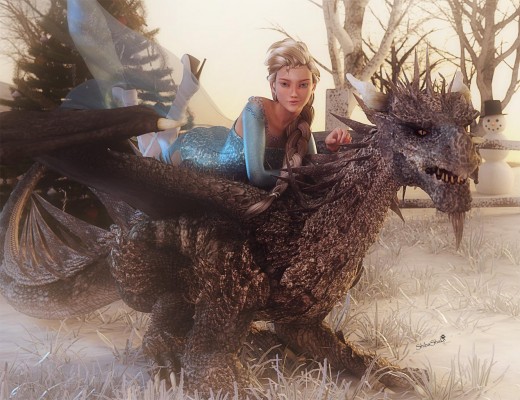
Elsa also does ice magic, so if we do magic poses with added spell effects, that would help increase similarity. To further strengthen my images, I used winter scenes and ice familiars, e.g. an ice golem.
Most important of all, have fun and let your creativity run free. 😀


I been looking at doing this myself, and trying to find the right dress was impossible – until I stumbled upon this. The dress is perfect – However runtimedna no longer exists and the “Frost Queen” dress is one of those items that has not transferred over to DAZ3d.
I can only find the dress on hacked sites – which I DO NOT want to use, I’d rather support the original creator.
Do you know where, by any chance, the original creator of the dress has gone? and have they re-posted this dress to another site?
My guess is that it is no longer available. I think it belonged to RDNA. There is an Elsa 2 like dress at Renderosity I think. Let me check my wishlist – https://www.renderosity.com/mod/bcs/a93—ice-princess-outfit-for-g8f/140844/
Wow this was the first article I saw on your site and I absolutely love how you walk step through step in DAZ. I’ve been using it for over 2 years all on my own with no one to talk with about it and this was probably the best short form tutorial for how to make an image I’ve ever seen and I can’t wait to explore your site some more.
Thank you very much! I am also on deviant art and there is a pretty large Daz Studio community there.