In the tutorial How I Light My Iray Scene, I describe the common lights that I use in Daz Studio Iray. I render each light into a separate layer and then combine those lights in Photoshop.
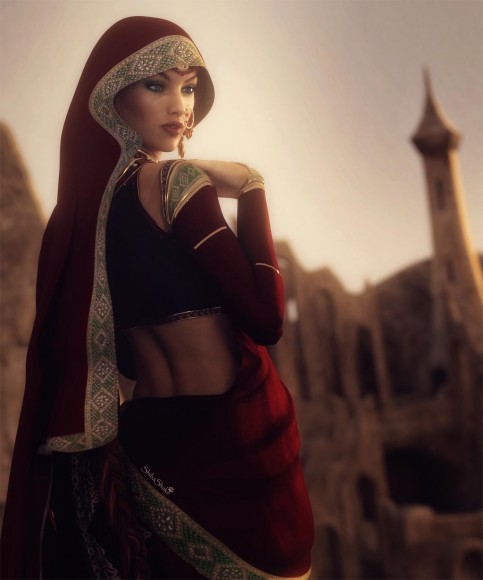
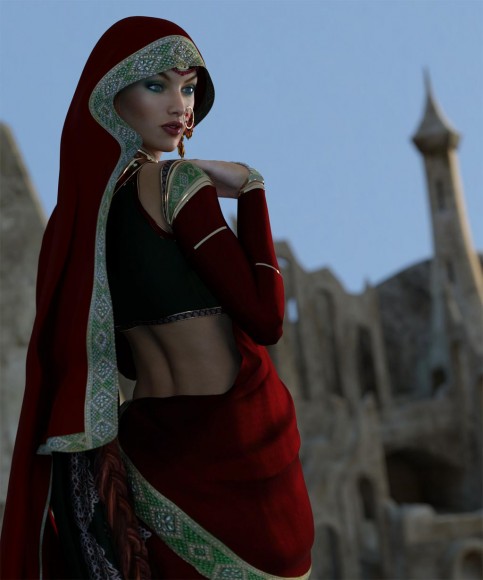
Here, I describe the light combination process. In particular, I talk about adjusting light intensities, tinting, and more. Again, I start with the simple Princess of the East image. This image uses the NeoIndia Outfit and Hair Bundle as well as the Mandgadfor ruins in the background.
In the Princess of the East image, I have the following light layers:
- An IBL light layer using Barcelona Rooftops from sIBL Archives.
- A Key, Back, and Fill layer, following the three-point light system.
- A volumetric spotlight layer.
Step 1 – Control IBL layer intensity
- I open all light layers in Photoshop.
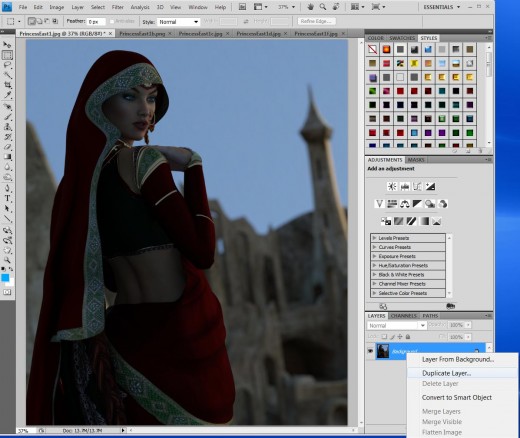
- I go to the IBL light file.
- I right click on the IBL layer and select Duplicate Layer. I rename the duplicate layer IBL.
- I select the Background layer, then go to Edit > Fill, and choose Black in the pop-up box. This should fill our Background layer with a solid black color.
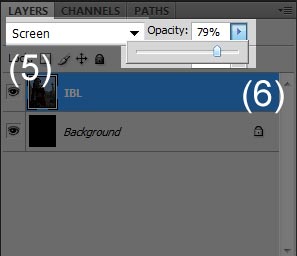
- I select the IBL layer, and set the layer blend mode to Screen.
- Now I can control the intensity of my IBL light by increasing or decreasing the opacity of that layer.
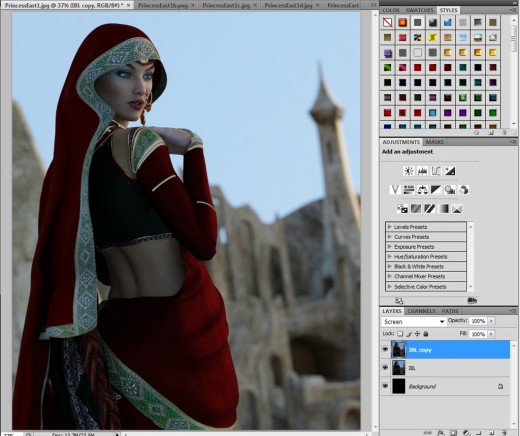
- If I want to increase the intensity of the light by more than its original, then I simply duplicate the layer.
Step 2 – Add in Key, Back, and Fill lights
- I copy my Key, Back, and Fill light layers, and paste them into my working file in Step 1.
- These layers quite often have speckle noise. To remove this, I go to Filter > Noise > Despeckle. I repeat this operation on each layer until most of the noise is removed.
- I set the blend mode of each of these layers to Screen.
- I adjust intensity by changing layer opacity or duplicate the layer, if necessary, similar to what we did for the IBL layer in Step 1.
In this case, I want a strong silhouette to the right, so I want a very strong back light. I achieve this by duplicating the Back layer to double its strength. To further emphasize the strong back light, I weaken the Key layer, by setting its opacity to 30%. I leave my Fill at 100% to lighten my entire figure.
Finally, I also create a duplicate IBL layer and set its opacity to 30%. This allows me to lighten everything in the image, including the backdrop.
Step 3 – Toning, Tinting, and Masks
A few other Photoshop operations that come in especially handy for combining my Iray lights include:
- Changing light tones with the Levels Filter.
- Tinting lights with Photo Filters.
- Lighting areas selectively by using masks.
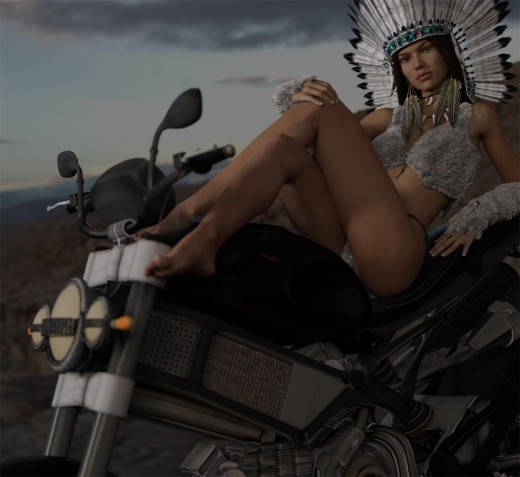
I illustrate these additional operations using my Luthbelli Classic image. Another useful lighting tip that I use here, is to add another Back light on the left-back side of the scene. In this way, I can add light rims on both the left and right sides of my figures.

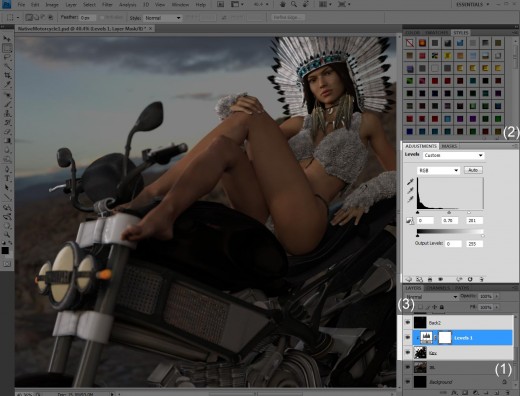
1. Changing light tones with the Levels Filter
I use the same process described above to combine my Iray light layers and control their intensities. In this image, I set my IBL opacity to 50%. When I add in my Key light, I find that it is adding too much light to my figure. In particular, I want there to be greater contrast between the left and right sides of the girl’s face.
To change this,
- I select my Key layer, and then add a Levels adjustment layer by going to Layer > New Adjustment Layer > Levels. I make sure to check “Use Previous Layer to Create Clipping Mask” in the pop-up window, so that my Levels adjustment only applies to my Key light.
- I reduce the level of mid-tones in my Key light (0.70), and increase the level of highlights (201). This article has a detailed description of the Levels adjustment filter in Photoshop.
- I add my second back light to get a rim on the left side of my figures.
- The final result is that there is greater contrast between the left and right sides of my pin-up girl’s face.
2. Tinting lights with Photo Filters
To make things more interesting, I add my main back light to the image, and tint it blue so that I get a blue rim around the right of my figures.
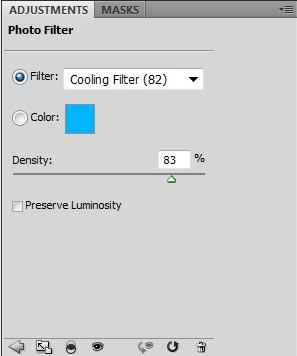
- I do this by going to Layer > New Adjustment Layer > Photo Filter. Again, I check “Use Previous Layer to Create Clipping Mask” in the pop-up window, so that my Photo Filter adjustment only applies to my main Back light.
- I set my Photo Filter to Cooling Filter (82), which is a blue color. I then adjust intensity until I get the right level of blue for my Back light, which in this case is at 83%.
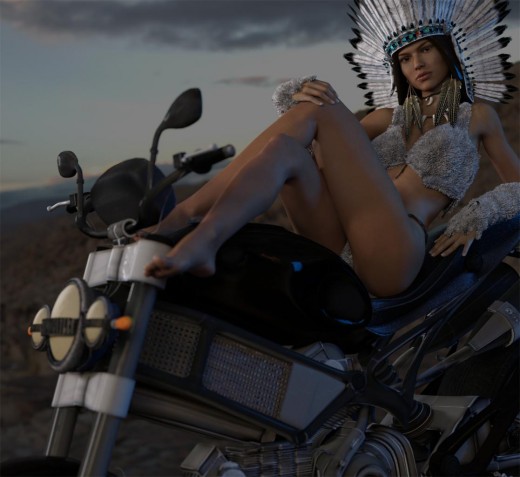
3. Lighting areas selectively by using masks
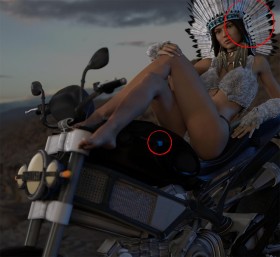
Unfortunately, I do not like some of the blue highlights in my current image. In particular, I do not like the sharp highlight on the body of the motorcycle and the blue on my girl’s headdress. To remove these unwanted highlights, I can mask them out.
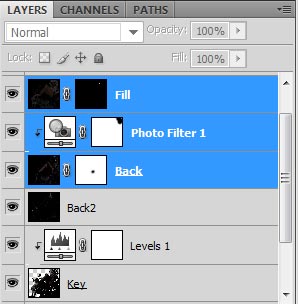
- For the headdress highlights, I just want to remove the blue color. Therefore, I mask out the area in my blue Photo Filter adjustment layer. I do this by selecting the mask layer on my Photo Filter and then painting the area black.
- For the motorcycle body, I want to totally remove the highlight. To do this, I go to my Back light layer and do Layer > Layer Mask > Reveal All. This creates a layer mask for my Back light. I select my layer mask and paint the area I want to remove black.
- I add in my Fill light, but I only mask in the eyes area to brighten my pin-up girl’s eyes. To do this, I go to my Fill layer and do Layer > Layer Mask > Hide All. Then, I select my mask layer and only paint the eye area of my figure white.
Finally, I create a layer with all of my lights combined by doing Ctrl-Alt-Shift-E. I set the layer blend mode to Screen and name the layer All. This allows me to brighten all of my lights. In this image, I set the opacity of my All layer to 50%.
And just like that, we are done! In the next tutorials of this series I will discuss my post-work techniques including adding glow, softening effects, creating contrast, and more.


When do add the Atmosphere layer back into the image? Or did I miss that?
I meant to say the volumetric layer…
I add it in after the Key, Fill, etc. The screen effects are additive so you can add it in whenever.
Do you render everything for key, fill, and back? For instance, the key layer looks quite unlike back and fill. Has this layer been masked in Photoshop?
My new images have at least all of those lights. I combine them in PS using the Screen option as described. I can set the intensity of each light by controlling opacity and duplicating layers.
I understand the layers (have been working with Photoshop for a long time). Just wanted to know whether you render the entire scene for each layer. I suppose you must or else the effect of the light itself would change.
Thanks! For replying and all your articles. You’ve been IMMENSELY helpful in helping me get a hand on DAZ. I’m much looking forward to checking out your postwork articles. 🙂
I usually render the entire scene when I can. Sometimes when there is occlusion, I do not.
Sorry but the step 2 Add in Key, Back, and Fill lights, i need more explication.
I dont understand where you take the ligths or how you extract there on the iBL?
I render those lights separately based on the light positions described in the first article – https://thinkdrawart.com/how-i-light-my-daz-studio-iray-scenes
So I have Key, Fill, and Back lights. Then I turn on *only* Key light, render, save. Turn on *only* Fill light, render, save, etc. It is possible to do it all at once with canvasses, but there are other limitations there.
Lately I’ve been playing with iray canvases & 32bit multi pass renders comped in PS. Have you tried this process? Lots of tweak-ability but a pain in the butt to set up, plus AO occlusion pass has in to come from interactive mode.
Opps, sorry for the late reply. Lots of stuff cropped up this month. In terms of canvasses, yes I tried it although not very deeply. Like you, it seemed cumbersome to me with no file type choices. Lux Render has a great “canvas” type system. Hopefully, DS will build this up in the future.
Btw. this tutorial has some cool functionality of canvasses. https://www.deviantart.com/snowsultan/art/Iray-Canvas-Tutorial-565641976