We do not normally think about it, but real-world lighting is very complex. Any single point can receive light from an infinite number of directions. It may receive light from outside, there may be shadows cast from nearby objects, and there may be indirect lighting from nearby surfaces.
Physically based renderers, such as Iray, tries to approximate the physics of reality. For each point on the screen, it shoots out a ray from the camera to that point, then tries to determine its color/value. However, it is simply not possible to calculate the value of a point with real-world accuracy, because we would need to sample light coming in from an infinite number of directions.
Therefore, our Iray renderer must guess what the value of a point is by sampling light from a set of different but finite angles. The more samples we collect or iterations we run, the more time it takes, but the better our guess will be. As we collect more and more samples, we will ultimately converge on a likely answer.
Noise arises when we guess incorrectly, so the value of a particular point widely differs from what it should be. As you may have noticed though, some scenes take longer to converge than others, and some scenes are more noisy than others. What then determines the amount of noise in an Iray scene?
What Determines the Amount of Noise in an Iray Scene?
Based on my own Daz Studio experiences, Iray scene noise seems most pronounced when there are small, extremely bright areas in the scene. For example, when most of the scene light is coming from small and bright light sources, specular indirect lighting, or doorways and windows.
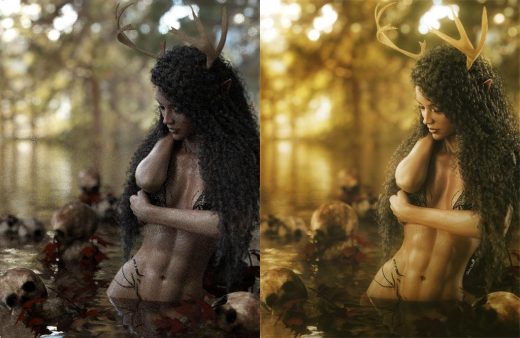
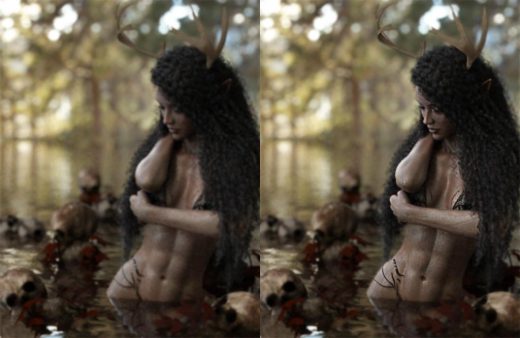
In the Fantasy Girl with Horns scene above, there are many bright but small areas of light in the environment map because the sun is peeking through the trees. These small areas of light create noise on the water, which gets compounded as it bounces off that surface and hits others objects in the scene (indirect lighting).
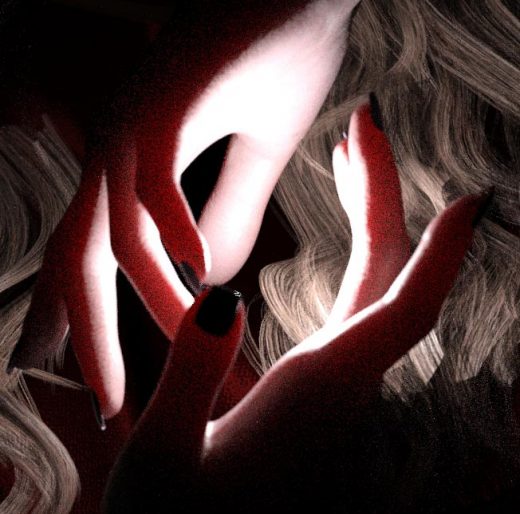
For a more simple case of noise and small, very bright areas, I placed a point light between a fantasy woman’s hands. A point light has a small surface area. When it is the main source of light in a scene, there will likely be a lot of noise.
In some cases, our collected samples may miss the small light altogether, creating a dark spot. In other cases, we may randomly sample in the direction of the light, creating a higher value than reality. Depending on the strength of the light, this value may be very high, thereby significantly skewing our average guess.
Below, we have a zoomed in image with just the point light turned on (all other lights are off). Notice that there is quite a lot of noise when a small bright light is producing most of the illumination in the scene.
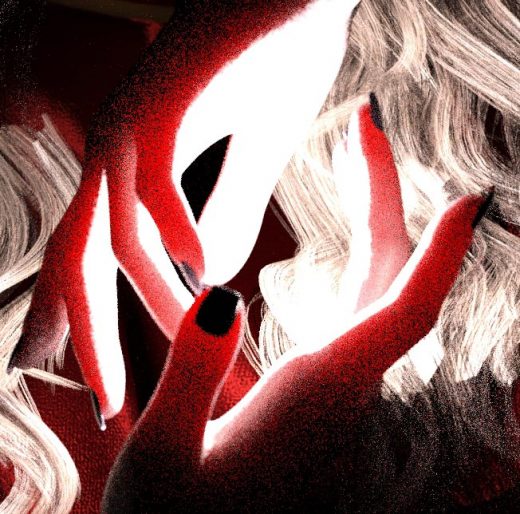
If we increase the strength of the point light, then the picture noise increases (see below).
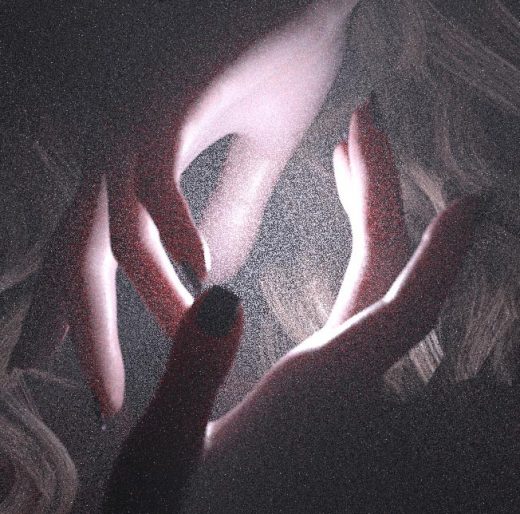
If we render the point light in a volumetric space, there is even more noise. This is because we are sampling for the entire volume (including the points in-between the hands), which increases the frequency of errors.
Another noise problem area is when there are caustics. Water, for example, bends light (refraction) and focuses it, essentially making the lighted areas smaller and brighter. This creates interesting light patterns on the water floor. However, because of this light bending property, the direction of our pixel samples become even more important and more susceptible to light misses or accidental hits.
The general take-away here is that –
Small bright areas with high values create more noise than wide bright areas.
Specular, reflective, or refractive surfaces can further increase scene noise. Specular and reflective surfaces increase the number of small and bright areas, each of which serves as an indirect light source. By understanding the source of noise in our Daz Studio Iray renders, we can better control it in our images.
How Do We Reduce Noise in Our Iray Render?
I use four key methods to reduce noise in my Daz Studio Iray images.
- Adjust Iray Render Settings.
- Increase the amount of light in the scene.
- Render at a higher resolution (larger image), then resize down to average out the noise.
- Remove some of the noise in post-work by using despeckle or blur operations in Photoshop.
1. Adjust Iray Render Settings to Reduce Noise
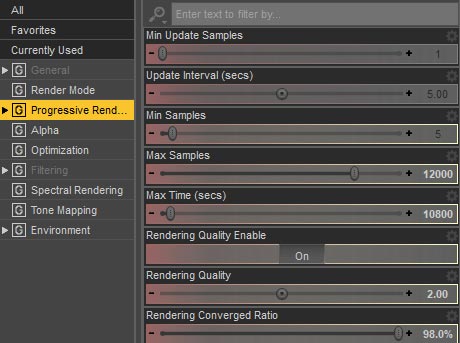
One of the easiest ways to reduce noise in our Iray renders is to increase the number of samples we collect. The more samples we collect, the better our guess will be (i.e. the closer our guess converges to the actual value). We can do this by going to the Render Settings tab, and then selecting Progressive Rendering.
Many of these parameters control when rendering stops, and may override each other.
- Max Samples – Controls the number of samples collected per-pixel. The more samples we collect, the better our guess will be.
- Max Time – Controls the maximum amount of time before rendering stops. Note that the render will stop when either Max Samples or Max Time is reached. If we have a slower graphics card, we may want to increase Max Time.
- Rendering Quality – Based on Tobor’s experience, this controls when the Iray renderer considers a pixel to be converged. I.e. a higher quality value will take longer to reach a given level of convergence. Of course speed of convergence also depends on our hardware and scene.
In more practical terms, Sickleyield defines this parameter as a multiplier for Max Samples and Max Time. I.e., it is a quick way to increase or reduce the time at which rendering stops. For example, when doing test renders we may reduce Rendering Quality and then push it up again for our final image. - Rendering Converged Ratio – As I understand it convergence is a measure of how close our pixel value guess is to its real value. As such, we will never reach 100% convergence, because that is when our guess is 100% accurate, which can only happen when we have the ability to collect an infinite number of samples. As we have seen above, this measure is also partly determined by the Rendering Quality parameter.
I usually render each of my lights separately, so I end my renders manually based on the light layer. There are three more Render Settings parameters that pertain to noise.
- Firefly Filter Enable – Go to Render Settings > Filtering and make sure that Firefly Filter Enable is on. This will get the Iray renderer to filter out some of the noise in our image.
- Caustic Sampler – Go to Render Settings > Optimization. Turn on Caustic Sample *if* we have caustics in our scene. Note that this enables some additional tests in the renderer thereby increasing sampling time, so only turn it on as necessary.
- Architectural Sampler – Go to Render Settings > Optimization. Turn on Architectural Sampler if we have an internal scene with a lot of indirect lighting and light only coming from portals such windows or doors.
This post by Dave Smith has more detail on these Render Setting parameters. Increasing the number of samples collected is probably the most accurate way to reduce noise. However, it can also take a long time to converge.
2. Increase the Amount of Light
Earlier, we saw that scenes with more noise have light primarily coming directly or indirectly from small bright areas. For example, internal scenes where light is only coming from windows or doors.
One way to reduce noise is to increase the amount of light in our scene, for example by adding large mesh lights in an indoor scene or removing unnecessary walls and ceilings. Larger light sources will reduce the amount of noise in our picture. In addition, if we are getting light from many different directions, then the probability of totally missing a light source or getting overly skewed light values will be significantly reduced.
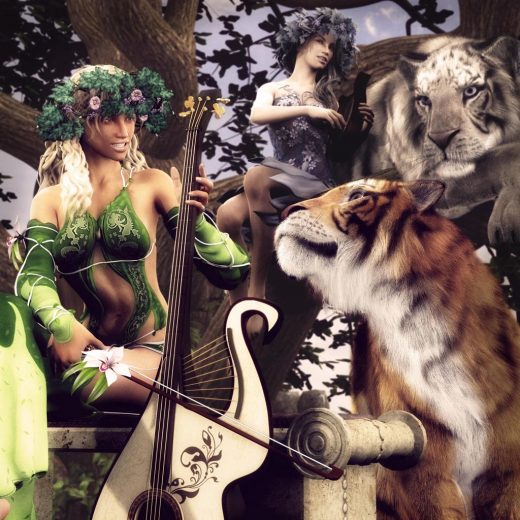
However, a problem with this approach is that we may flood our scene with too much light, thereby losing shadows, shape definition, and scene depth. The image below is an older image of mine where I used a lot of ambient light in 3Delight.
3. Render at a Higher Resolution
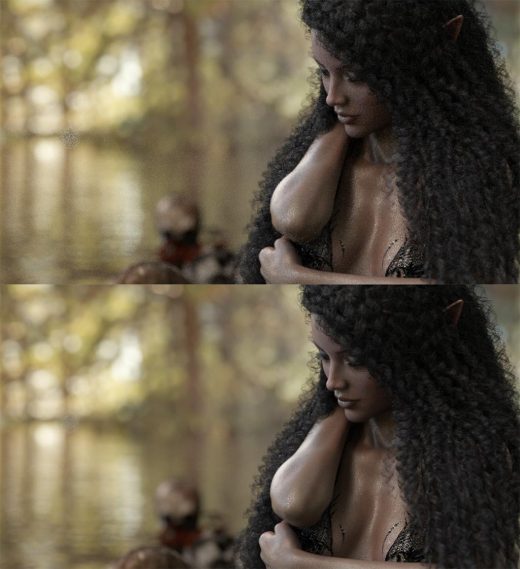
Another simple way to reduce Iray noise is to render our images at a higher resolution (larger size). When we shrink our image down in size, some of the noise will get averaged away. This is a better method than just using blurring techniques to average away the noise because it will retain picture sharpness and detail.
For example, the top image below is rendered at 1024 by 1331 pixels, at 300 iterations, and then cropped in height. The bottom image is rendered at 3000 by 3900 pixels, at 300 iterations, and then reduced in size to 1024 by 1331 pixels (similarly cropped in height). There is a lot less noise in the bottom image without a loss of sharpness or detail.
4. Remove Scene Noise in Post-work
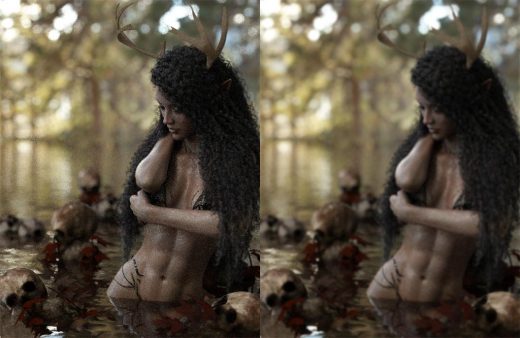
We can also remove some of the render noise in post-work using blurring or de-speckling operations. In Photoshop, I use Filter > Noise > Despeckle for less noisy renders and Filter > Blur > Gaussian Blur for noisy renders. The left image below is the original noisy render and the right image has been blurred with Gaussian Blur radius 3 pixels.
The problem with Despeckle or Gaussian Blur is that we lose a lot of detail and sharpness, especially in our primary fantasy girl figure. One way to fix this is to create another render with just the girl. By removing the water, we remove a key source of noise in our scene. With a simpler scene, we can also render more iterations for a given time. Then, we use this low-noise image to sharpen the figure in our blurred image. To do this, I select the figure-sharpen layer and set the blending mode to Overlay. Then, I do Filter > Other > High Pass with a radius of 5 pixels.
Conclusion
I reduce noise in my Daz Studio Iray renders by using all four of the techniques above. However, I make sure to properly balance them out so that I do not weaken scene lighting, lose scene detail, or spend too much time rendering.
There are other methods for controlling noise in a path tracer like Iray. For example, seeding the renderer differently, clamping maximum light values, and more. However, as far as I know, such render settings are not currently available in Daz Studio. In any case, they each come with their own weakness.
With just the techniques described here though, I am able to get results that I am happy with. The completed Fantasy Girl with Horns image is shown below. We have added all our lights, removed noise, and applied our post-work process.
