Think, Draw, Art!

for art lovers

  • Home
  • Gallery
  • Contact
  • Recent Articles
  • Article Categories
    • Daz Studio
    • 3D Art
    • 2D Art
    • Contest
You are here: Home / Daz Studio / Water Shader Tutorial for Daz Studio Iray

Water Shader Tutorial for Daz Studio Iray

We are a Daz3d affiliate and we use affiliate links in our pages.

by shibashake 11 Comments

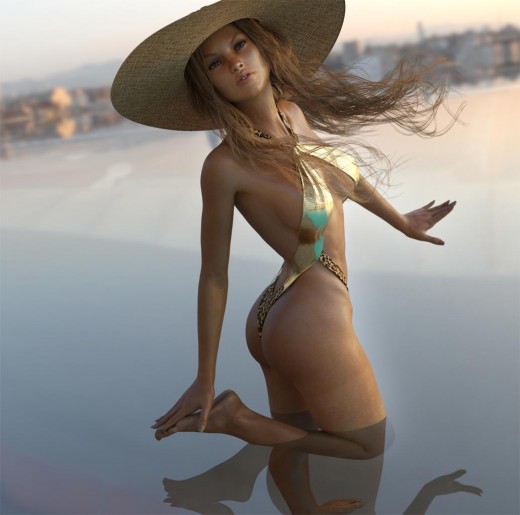
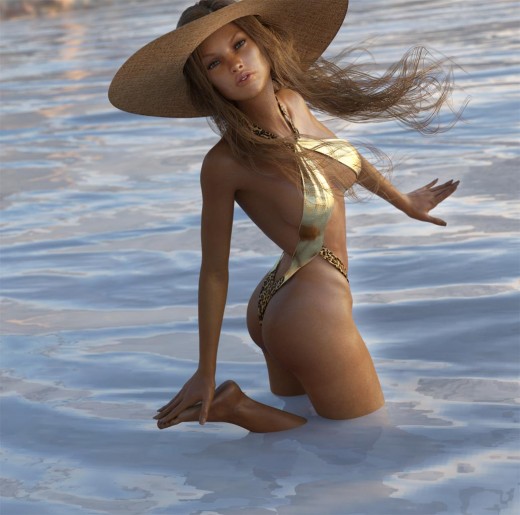
There are three types of water shaders that come with Daz Studio Iray – water, water dispersive, and water thin. I started learning about Iray water shaders by creating a very simple scene – just a girl wearing a swimsuit, who is standing in water.

The image below is the finished product of my water shader experiment. In this tutorial, I talk about the different parameters of the Iray water shader, and what I focused on to create my pin-up render.

Pin-up image of girl in swimsuit and beach hat, standing in water.
Water Shader Tutorial for Daz Studio Iray

1. Water Shader

Reflection of my image based light (IBL) on a flat plane with the water shader.
Barcelona Sunset environment map with zero rotation.

I create the scene as I normally would. Here I am using FWSA Gillian HD and LF Sorbet Swimwear, which fits in very well with a water pin-up scene. The only extra change I made here, is to make her skin appear more wet by increasing Glossy Reflectivity to 0.9, and decreasing Glossy Roughness to 0.4, for all skin surfaces.

Once I am done, I make a plane primitive and apply the Iray water shader to it. When I look at the surface properties of my water plane, there are two key properties – reflection and refraction.

a) Reflection

To get a good reflection on my water, I want to pick a good environment map and rotation angle. I like the Barcelona Rooftops HDR that I got from sIBL Archives, so I use it here, starting with zero rotation. Unfortunately, at this rotation, it is filled with large buildings and palm trees, which is not a very pleasing reflection on my water. Therefore, I adjust the rotation until I get an interesting far-away skyline, that I am happy with (rotation = 270 degrees).

A more far-away and open sky-line creates a better reflection on my water plane.
I adjust the rotation of my Environment Map until I get a more open, far-away, skyline that I am happy with.

b) Refraction

Slight change of the camera angle so we can see more of the refracted foot.

Another important aspect of the Iray water shader is refraction. Light travels at a different speed in air than in water. Therefore, when light enters water, it gets bent (at the point of crossing), thereby allowing us to see more of the leg that is submerged. Without refraction, her foot would not be visible.

Submerged objects always appear to be shallower than they are because the light from them changes angle at the surface, bending downward toward the water.
~~[HyperPhysics]

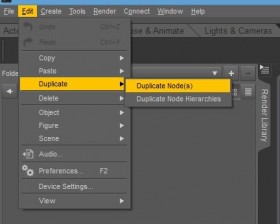
Screeshot of how to duplicate objects in Daz Studio 4.8 Pro.
Create a Ground Plane by duplicating my water plane.

However, because all we have is our water plane and there is no ground plane, her foot looks like it is not standing on anything. To fix this, I duplicate my water plane by going into Edit > Duplicate > Duplicate Node(s). This creates a duplicate plane which I call ‘Ground Plane’. Next, I apply the Concrete Iray shader to my ground plane, and then move it down so that my pin-up girl is standing on it.

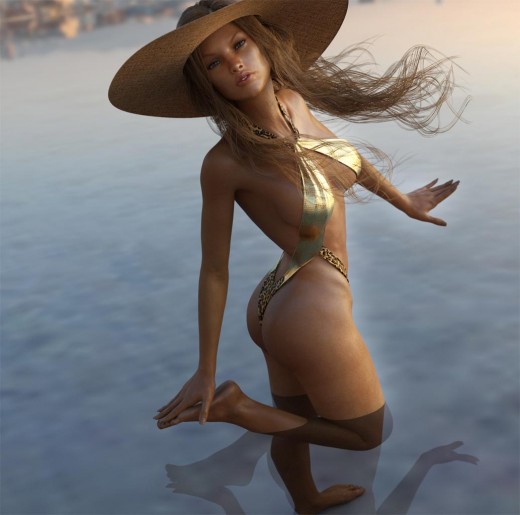
Notice that there is now a shadow under her foot, and there are also interesting patterns on the water due to refraction of the ground plane.

Added a ground plane so that the pin-up girl is now standing on something solid. This also adds interesting texture to the water because of refraction.
I add a ground plane so that the pin-up girl’s refracted foot, under the water, is standing on a solid surface.

c) Waves

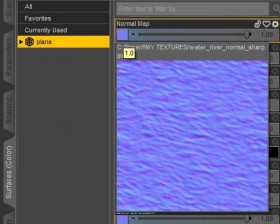
You will notice, that there is wind in our render that is blowing out our pin-up girl’s hair. This wind will also create waves/ripples on our water. To add waves to our currently flat water plane, we add in an appropriate normal map. We can do a search for “water normal map” or we can get a normal map from one of our existing environments.

Screenshot of how to add waves to a water plane by loading in a normal map.
Load my water normal map into the Normal Map parameter of my water plane.

Next, I edit my water plane surface, and load in my water normal map. I can increase the number of Horizontal and Vertical Tiles in my shader parameter, if I want to make my water be more wavy. Finally, I can also color my water plane, for example make my water appear more blue, by changing the Base Color parameter of my water plane.

Added waves to my Iray water shader.
Added waves on my water plane by loading in an appropriate water normal map.

2. Water Thin & Water Dispersive

The Water Thin Iray shader is just like the Water shader except that it has the Thin Walled parameter turned on. This just means that the water shader is only applied to the surface of the object, instead of the entire volume of the object.

Thin Walled – This property sets the volumetric effects of the surface. Compare a bubble (on) to a marble (off) for example.
~~[Daz Documentation Center]

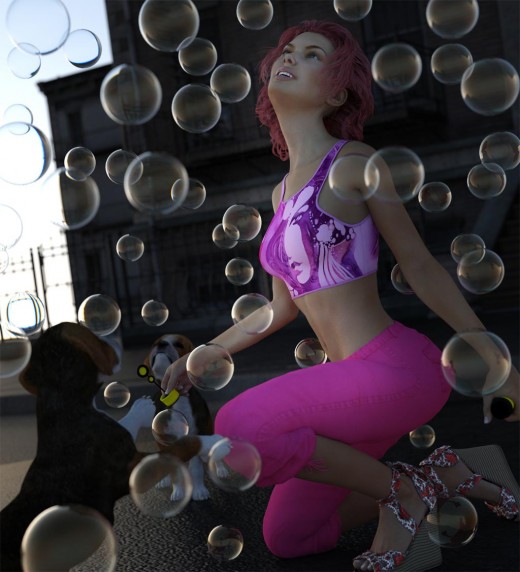
Girl in pink with lots of bubbles around her. Two Beagle puppies also playing with the bubbles.
When Thin Walled is Off, the bubbles look like droplets of water.

For example, cornea surfaces are often set to Water Thin. Another great example of a thin surface object are bubbles. In my first bubble image, I have the Thin Walled parameter set to Off. In this example, my bubbles look more like droplets of water rather than bubbles.

Girl in pink with lots of bubbles around her. Two Beagle puppies also playing with the bubbles.
When Thin Walled is On, the bubbles look a lot more like bubbles.

In the next image, I have the Thin Walled parameter set to On. As you can see, our bubbles are now starting to look a lot more like bubbles.

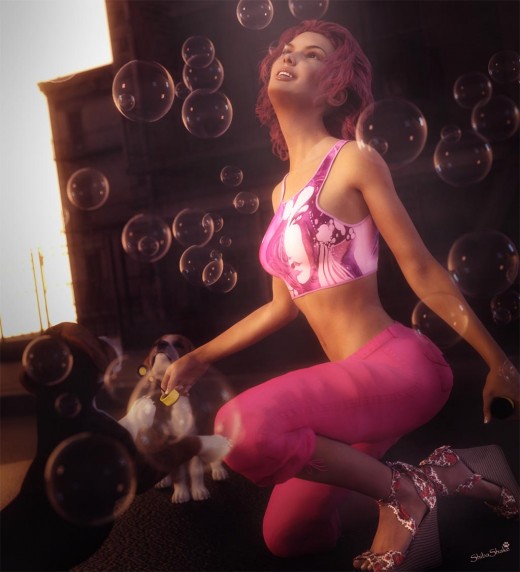
Girl in pink with lots of bubbles around her. Two Beagle puppies also playing with the bubbles. Postwork in Photoshop.
Completed Pink Lady and Bubbles image.

Another very cool aspect of bubbles is that they have chromatic dispersion. These result in the many colors we may see on bubbles, in an oil slick, or in a rainbow.

A bubble film is a sort of sandwich: a layer of soap molecules, a filling of water molecules, and then another layer of soap molecules. When light waves reflecting from one layer of soap molecules meet up with light waves reflecting from the second layer of soap molecules, the two sets of waves interfere. Some waves add together, making certain frequencies or colors of light brighter. Other waves cancel each other, removing a frequency or color from the mixture. The colors that you see are what’s left after the light waves interfere.
~~[Exploratorium]

That is what the Water Dispersive Iray shader addresses. It has an additional parameter called Abbe.

Abbe is a conatant chromatic dispersion. Lower numbers (but greater than 0) give more dispersion on the surface, and the higher the value, the less dispersion. This works on surfaces with volume, not on Thin Walled surfaces.
~~[Daz Documentation Center]

Note that Abbe does not work on Thin Walled surfaces. Therefore, to test this out, I need a double layered bubble (i.e. a bubble that is geometrically represented by both an outer and inner layer). I found such a bubble in the 3D Bubbles product by MindVision G.D.S.

Two sided bubbles look a lot more substantial, and end up looking a bit more like glass.
Water Dispersive Iray shader applied to two-sided bubbles. Abbe set to 2.

Chromatic dispersion works here. However, the two sided bubbles look a bit too substantial for bubbles, and ends up looking more like glass. Personally, I like the Thin Walled version best.

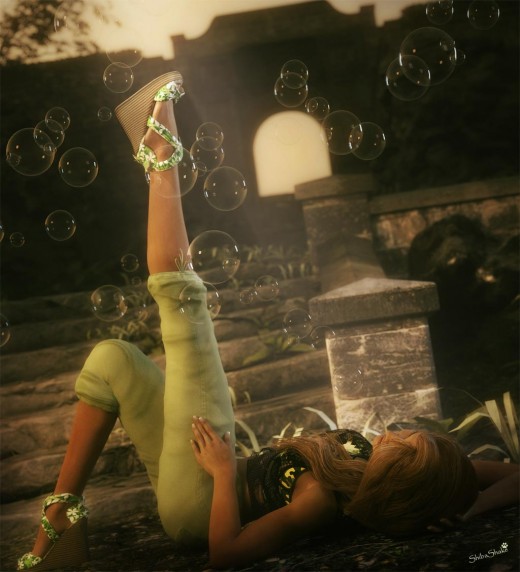
Girl in green with one of her legs up and bubbles all around her. Stonemason's Path to Cloud Temple used as backdrop.
Another example image with Thin-Walled bubbles.

3. Under-Water Scene

There are two important aspects in an underwater scene, volumetric or atmospheric effects and caustics. I achieve my underwater atmospheric effect by using AtmoCam for Iray by Marshian. We can also set up our own volumetric cube by following some of the guidelines discussed here (in the Daz3D forum).

In optics, a caustic or caustic network is the envelope of light rays reflected or refracted by a curved surface or object, or the projection of that envelope of rays on another surface.
~~[Wikipedia]

In water, cool caustic patterns are made by the curves of surface waves. To generate these caustic patterns in my underwater scene, it is easiest and most time effective to fake it using a Gobo light.

  1. I first did a search for “water caustics texture” and download some patterns that I like.
  2. Then, I placed a spotlight up high up in my scene, and point it down at my focus area. I want it high enough so that it casts a bunch of almost parallel rays into my scene.
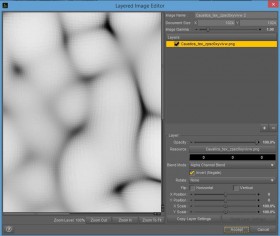
  3. Screenshot of how to invert my water caustics pattern using the Layered Image Editor.
    I invert my caustics image using the Layered Image Editor.
  4. Next, I create a plane and apply my water caustics texture to the Cutout Opacity parameter of the plane. White represents opaque and black represents transparent. Therefore, I want my caustics lines to be in black and all the rest to be in white. If necessary, I can invert the image using the Layered Image Editor.
  5. Finally I position the plane in front of my light so that it casts the proper shadows onto my underwater floor plane.
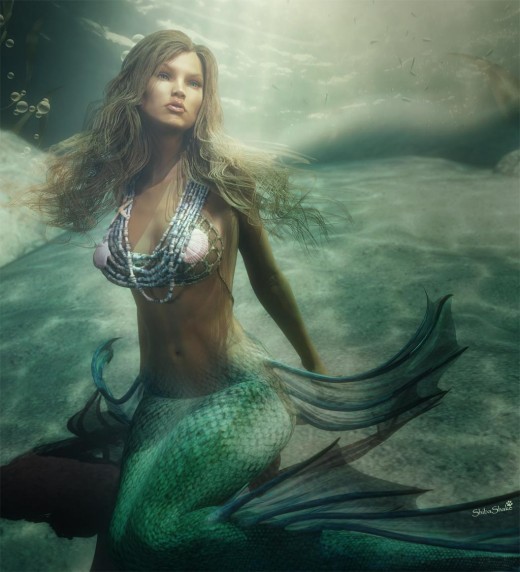
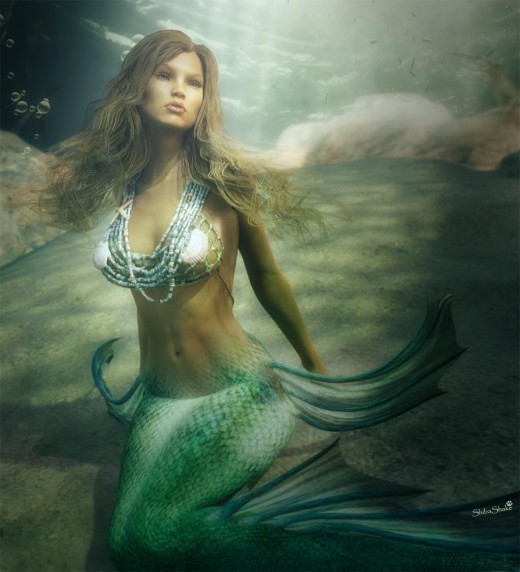
Underwater mermaid with fake caustics from a Gobo light.
Finished underwater mermaid scene with caustics from a Gobo light.

Another way to achieve caustics is to do it for real by setting up an appropriate scene with appropriate shaders, and then letting the Iray renderer physically generate the water caustics pattern. This will take much longer to render, but will create more realistic looking results.

It was a big challenge for me to get Iray to generate caustic patterns in my underwater scene. I was finally only able to do it by using Overcomeon’s underwater caustic test scene.

Remember that the caustic patterns are formed by reflection and refraction off the curved surface of waves, on our water. Therefore, we will need waves on our water plane. In addition, reflection also plays a very important role to bounce off our light rays, thereby increasing the area where the patterns are created. To get caustics in my scene, I needed to place several large planes around my scene to bounce off my sunlight.

Finally, we also want to go to Render Settings > Optimization and turn ON the Caustic Sampler parameter. This will hopefully increase render efficiency of caustics in our scene. Note that this is just an optimization or render efficiency setting.
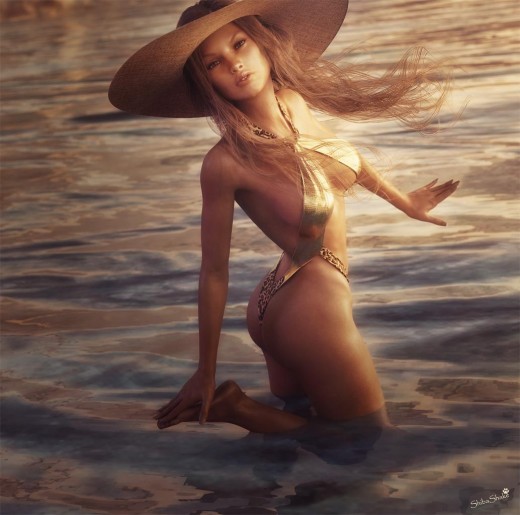

Underwater mermaid with real caustics from the Daz Studio Iray renderer.
Finished underwater mermaid scene with real caustics from the Daz Studio Iray renderer.

Related Articles

Daz Studio Iray Tutorial for Beginners

This tutorial describes how I create a simple scene, from start to finish, for the Daz Studio Iray renderer. In particular, I discuss how to assign Iray materials, and how to create simple but realistic lighting in Iray with an image based light (IBL).

Daz Studio Iray Tips and Tricks

I am really loving the results that I am getting from Daz Studio Iray. Here, I talk about some of the useful Iray techniques that I have learned from the Daz3D forums, from talking to other Dazaholics, and from my own Iray experiments.

Daz Studio Lighting - Beginner to Now

One of the biggest thing that sets a 3d-image apart from others is the lighting used. Lights can add depth, change mood, create tension, guide the eye, and much more. In this article, I talk about my Daz Studio lighting journey. I describe all the different lighting setups that I have gone through, what I have learned from each one, and why I switched to something else.

Check Out the Latest Sales at Daz3D

DAZ Studio FREE 3D MODELS AND SOFTWARE

Comments

  1. Cherie Bell says

    January 18, 2019 at 1:53 pm

    I can’t seem to get the same results with the water and the HDRI. I don’t know what I did wrong. Can you please help me?

    Reply
  2. sean says

    March 16, 2018 at 5:04 pm

    Your page is so a great help. Thank you on sharing how you create such wonderful art.

    Reply
    • shibashake says

      March 16, 2018 at 5:43 pm

      You are very welcome and thank you! πŸ˜€

  3. JD says

    December 18, 2016 at 11:43 am

    Very nice tut

    Reply
    • shibashake says

      December 22, 2016 at 2:58 pm

      Many thanks JD. πŸ˜€

  4. Rick says

    February 7, 2016 at 4:44 pm

    Great tutorial! The only problem I have with rotating the environment, is the built in light source rotates with it.

    Reply
  5. Raxatech says

    February 4, 2016 at 2:25 pm

    I had a fun time following through this and putting it into practice. Thank you for taking the time to put it together for us! Here are my results:
    http://raxatech.deviantart.com/art/Ocean-Afternoon-588710767

    Reply
  6. Jaebea says

    November 21, 2015 at 8:08 pm

    Wonderful job explaining those terms! I understand it now, thank you!!

    Reply
  7. Folly says

    November 20, 2015 at 4:14 pm

    Your tutorials are always so helpful! /cheers

    Reply
  8. oomu says

    September 8, 2015 at 6:22 am

    thanks a lot for the useful advices. I used them for simple but nice pics πŸ™‚

    Reply
    • shibashake says

      September 9, 2015 at 8:35 am

      You are very welcome! πŸ˜€

Leave a Reply Cancel reply

Your email address will not be published.

Recent Posts

  • Item used: VR X01 BYOS Modular by Studio360.3D-Art Contest Winners ~ April 2020
  • Qualifying item used Inside Linday's Daz Studio Iray Scenes by Linday3D-Art Contest Winners ~ March 2020
  • Qualifying item used –Z Beauty Poses for Kalea 73D-Art Contest Winners ~ February 2020
  • Qualifying item: - Li'l Scrap Boy HD for Genesis 8 Male by Pixeluna3D-Art Contest Winners ~ January 2020
  • Qualifying items used –Ancient Tomes by Merlin Studios3D-Art Contest Winners ~ December 2019
  • Shiba contest qualifying Item used: Mech Dancer Outfit3D-Art Contest Winners ~ November 2019
  • Shiba contest qualifying items used – Greeble City Blocks, Greeble City Blocks 2, Greeble City Blocks 3; and Greeble City Blocks 04 by Stonemason.3D-Art Contest Winners ~ October 2019
  • Shiba Contest Featured Vendor Petipet. Used: Car Edi, Unicycle Bob, Bus Maxis, Bus Pegasus & Motorbike ZAZ3D-Art Contest Winners ~ September 2019
  • Qualifying item for shiba contest - Z Almost Human Poses by Zedicuss3D-Art Contest Winners ~ August 2019
  • Qualifying items used – Rei HD for Genesis 8 Female by Mousso.3D-Art Contest Winners ~ July 2019

Recent Comments

  • Cute cat girl fantasy pin-up art with folded arms and standing in a forest or woods. Fantasy art rendered in Daz Studio Iray.Best Fantasy Women Skins, 3D-Art
    • - Can I ask how you got the Tigerlily skin on a G8F figure?
  • Girl reaching upward for a flying bird (signifying knowledge, dreams, or more) while another holds her down to earth.Daz Studio Iray Tips and Tricks
    • G.Carlo
      - Very Helpful, thanks!!!!
  • Blonde haired sci-fi elf girl with sword, standing next to an owl robot. Fantasy sci-fi woman art. Daz Studio Iray image.What Is Daz Studio?
    • Shanique
      - Hey please check your inbox on deviantart ASAP, I’ve been trying to reach out to you. Thanks
  • Screenshot of the Environment Map interface in Daz Studio Octane.How to Set-Up Camera, Lights, & Displacement in Daz Studio Octane
    • dmc
      - In my case I turned up the intensity of the spherical light. In Octane:(1) Select the Sphere-Default ...
  • Girl with pink hair, pink dress, and pink petals blowing in the wind. Daz Studio dForce Iray picture. Fantasy Art.How to Save a Daz Studio dForce Frame as a Morph
    • emu
      - I have been trying to apply this to dForce hair, but the result does not really match the original simulated ...
    • Esse
      - Just great! Thank you so much.
  • Warrior woman riding on a tiger while shooting a bow and arrow.How to Combine Multiple Poses in Daz Studio
    • Jan Freeman
      - Totally awesome tutorial!! I was able to lock Mavka in DS in her violin playing pose, then pose her ...
  • Catwoman sitting on a papasan chair with several cats around her. Moon in the background.How to Save a Single Frame in Daz Studio
    • Perficimus
      - Well thanks for this!Problem + good solution poster = happy user!!! ;-)
  • Queen Elsa with ice wings and forming the heart or love sign with her hands. Magic or spell lights in the background and around her hands.How to Create Frozen’s Queen Elsa in Daz Studio
    • lord lethris
      - I been looking at doing this myself, and trying to find the right dress was impossible - until I stumbled ...
  • Woman exercising with two weights and covered in sweat. Daz Studio Iray render.How to Get Wet Skin in Iray
    • sreenivassan T
      - select skin under "character name" in the surface box.

Copyright © 2021 · Genesis Skins by ShibaShake · Terms of Service · Privacy Policy ·