1. Pd Iray Shader Kit 1
The Pd Iray Shader Kit 1 by parrotdolphin is one of my favorite products of 2015. It allows me to not only make previous 3Delight materials look good in Iray, but also effectively use many made-for-Poser cloth materials, with just a few clicks.
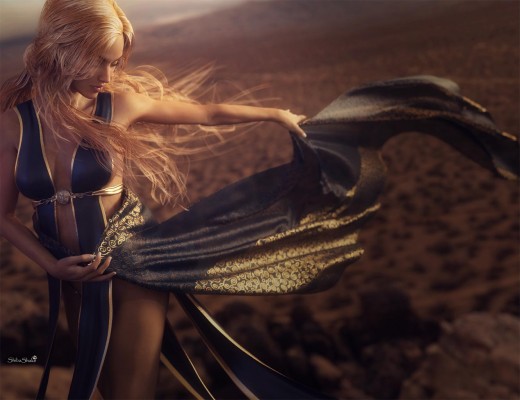
There is also the ability to add a metallic sheen to my cloth surfaces, or to add cool metallic patterns. In the example image below, I added the gold metallic sheen to the trim of the Fantasy Wrap dress, as well as the gold metallic patterns to the cloth she is holding.
Most clothing sets that I use have a combination of mostly cloth, metal, and leather parts. Therefore, combined with basic Iray metal shaders and Khory’s Iray leather shaders (described later), I can make most clothing sets render well in Iray without too much effort.

2. AtmoCam for Iray
I use AtmoCam for Iray by Marshian in almost every one of my Iray images. AtmoCam allows me to render light-rays, create atmosphere, fog effects, underwater effects, and more.
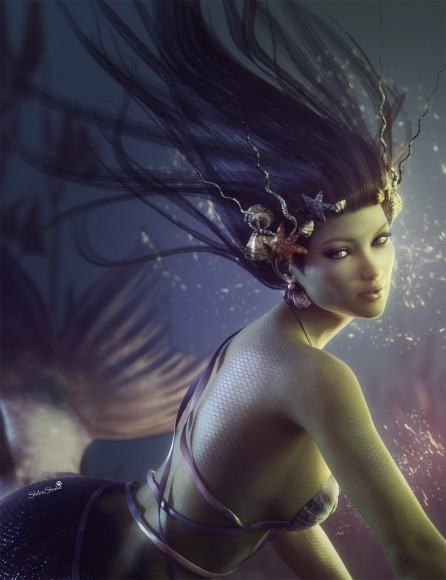
In the mermaid image below, I used AtmoCam to create my underwater effect. To do this, I rendered a light layer using the AtmoCam AzureSea setting and the AtmoCam HDR Env Render Setting.

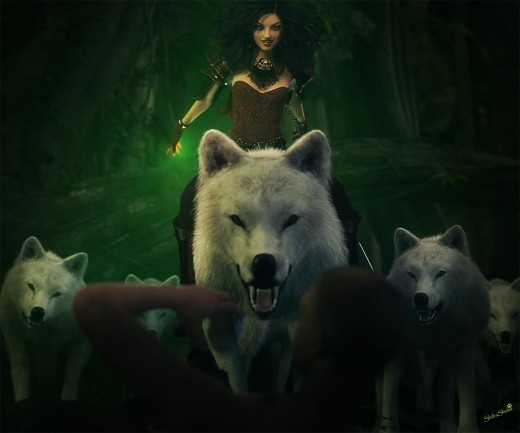
AtmoCam also works great for creating spell effects or providing atmosphere around emissive light surfaces. In the wolf pack image below, I rendered a volumetric light layer for a green point light on her right hand. This casts a nice green glow behind and to the side of my figure. The wolf pack is created using Wolf 2.0 by AM.

3. UHT Hair Shaders for Iray
Just as the Pd Iray Shader Kit allows me to make cloth materials look good in Iray, UHT Hair Shaders allow me to make 3Delight and Poser hair look good in Iray with just a few clicks. I especially like all the extra controls for adding displacement maps, back-scatter, shine, transparency, and more.

I have tried other hair shader products, but so far, I like the render results I get from this one best. Note however, that these shaders work best on hair surfaces that are mapped to straight hair pieces. I usually continue to use the original hair textures for scalp surfaces and surfaces that have special (non-straight) hair patterns. Nevertheless, even there, I can still apply displacement, shine, and other hair options, to the original textures.
Another important thing to note is that the transparency options may not work on all hair surfaces. In these cases, we will have to edit the original transparency image maps, and strengthen it in an image processing program such as Photoshop. More details on hair transparency here.
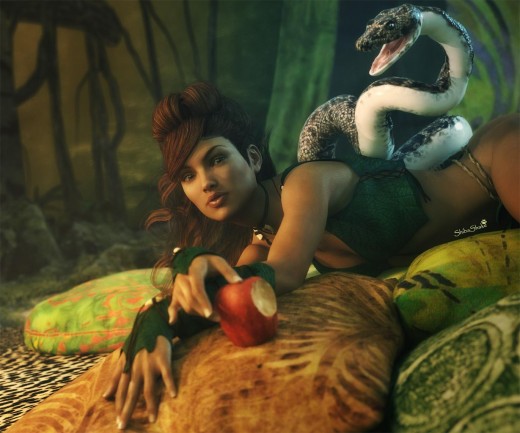
In the image below, we apply UHT Hair Shaders to Tatiana Hair by 3Dream and Mairy.

4. Iray Fashion Leathers
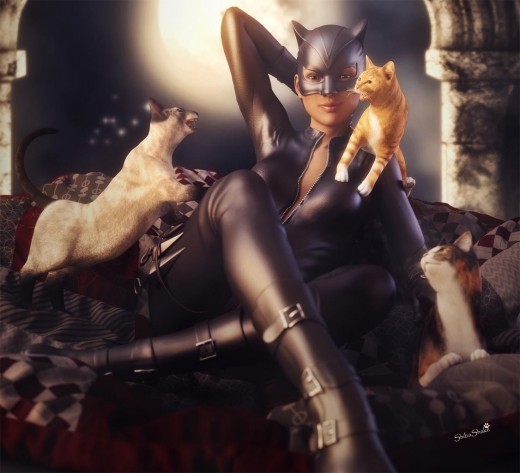
Another very common outfit shader are leather shaders. This is where Khory’s Iray Fashion Leathers comes in handy. In the Catwoman image below, I applied a black shader from the set to 3D-Age’s Cats outfit. The only additional thing I did, was to adjust UV tiling for the surfaces of the outfit so that I get the leather texture that I want, and so that the texture pattern is consistent throughout the outfit.

5. Iray Skin Shader
The truth is, I am still searching for a good Iray skin shader solution for older generation figures, especially Gen4. Currently, I am using JM HumanShader for Iray. However, the skin settings are a bit too glossy/shiny for my taste. I usually reduce the Top Coat Layer and Glossy Layered Weight values. Still though, the figure skins tend to have an air-brush quality to it.

The Iray Converter for Genesis and Generation 4 Bundle by V3Digitimes looks like it could be an interesting and flexible solution. However, I am still waiting for a good sale before I can try it out.
Hi! So I got the AtmoCam for Iray, but can’t for the life of me figure out how to use it 😉 Doesn’t really come with instructions. Any tips you can provide? Also, I had a questions for you. Do you have any step by step tutorials on how exactly you postwork in photoshop? Do you render all the lights seperately then add it all together in PS? Love your art and all the tutorials you provide!
Hi Lisa,
1. Atmo-Cam
– It adds a camera and a prop that is parented to the camera.
– Use that camera as your main camera.
– After we have everything in our scene set up and the camera set properly, then switch to wireframe.
– Switch to top-view and turn the prop on.
– Then we adjust the position of the prop, so that it encapsulates our scene properly (the prop needs to cover all scene areas that appear in our render window). In most of my scenes, I only need to adjust z-translate here.
– All lights that we want to render with volumetric effects need to be inside the prop.
– However, it is important that the camera is outside the prop, so when adjusting z-dimension, make sure that the camera is still outside.
– Volumetric effects will be applied to *all* lights inside the prop. Therefore, we only want to turn on the lights that we want volumetric effect on, and turn off all the rest (including the environment map).
Hope this helps. I have a diagram of this in my recent tutorial on soft lighting effects. Pretty much every one of my scene files also contains an atmo-cam that is set-up to work with a spotlight in the scene, so that can help serve as an example.
2. Lights and postwork tutorials
Yes, I do exactly this. In Photoshop I can more easily and quickly adjust the intensity and color of my lights.
In terms of postwork tutorials, I would start with my Iray lighting tutorial. At the end of that tutorial, it points to the next one which is a purely Photoshop one, on how I combine the different light layers. For me, the postwork process is very integrated with the lighting process.
I plan to start working on a stage 2 postwork tutorial, where I adjust tone, contrast, add glow, and add my volumetric light layer etc. This tutorial will build on previous tuts on adding glow and soft lighting effects.
You rock! Thank you so much for the step by step. I just was not getting it! Ill go through your tutorials again. I most likely didn’t spend enough time on them 😉
So I tried following the photoshop tutorial 😉 I rendered my pic without lights, with “front lights” and “back lights” we’ll call them. All rendered with my figure, is that correct? So when I bring them into PS, if I load the front lights first, then add the back lights on top, the front lights disappear of course because they weren’t on when I rendered the back lights. I’m just not getting it. I hope I don;t sound too stupid 😉
Try setting the Blending mode of each layer to screen. This will allow each light to be added to the whole. The blending mode is the drop-down menu on top of the layers panel that is usually set to Normal.
Please feel free to ask more questions. I always ask lots of questions too. 🙂
Thank you, I’ll try that. Another question, lol, why do you fill the background with black?
Oh, good question! I do that so that I can control the intensity of my background light/environment map. The black background provides a solid backdrop that I can then add light to by setting my light layers blend mode to Screen and changing their opacity.
Try turning off the black background layer and turning down the opacity of the environment map. You will see that the scene starts to partly become transparent. The black background prevents that, and keeps things solid by mixing in the parts that are less lighted with black.
Gotcha. How did you learn all this, trial and error? You are very good! I’ve been playing around with light layers for a few days now. We’re moving this weekend so I may not have time to get a pic in for the April challenge, although I’ve been working on three and if I can get the post working done I’ll submit them, or at least one hopefully!
Thank you Lisa. I learned a bunch of Photoshop stuff from PSDbox.com. They do mostly photo manipulation, but are very talented and many of the techniques can be applied to DS rendered images. I also do like playing around with new tools like the Nik collection, and there are also some cool effects tools at Graphic River.
I want to thank you so much, ShibaShake. I have become a Patreon Supporter and have studied your site and your tutorials. I’ve been a 3d artist for 17 years, but this year, I left Poser and became a DazStudio enthusiast. I really appreciate your in-depth knowledge and your willingness to freely give information. Thank you again, Denise
Thank you very much Denise, for your wonderful and motivating comment. Also thank you very much for your Patreon support, it is greatly appreciated. I have had to deal with some not very pleasant people lately, and your comment is a much needed ray of sunshine! Big hugs to you. If there are particular tutorial topics you would like to see, please let me know. 😀