One very interesting and useful shader parameter in Daz Studio Iray is Emission Color. By setting this value to something other than black, we can make any surface in our Iray scene emit light. Light emitting surfaces are fun, add spice to our compositions, and help create dramatic lighting effects. Many people also use this feature to create mesh lights.
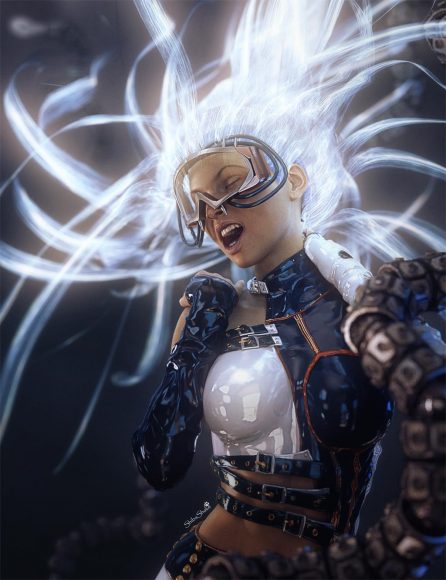
In this tutorial, we learn more about emissive shaders or surfaces by applying it to hair! 🙂 Of course the shader settings are general and can be applied to anything. Hair is used here, together with the Sci-fi girl image below, to provide a fun example.
1. Picking the Right Type of Hair
The first step, is to pick the right type of hair. I want something that is long and dynamic, with lots of movement morphs. The hair should be infused with energy, so much so that it emits light. A great example of this is SWAM’s Laguna-Naoko Hair.
It is long, with many separate strands, and some great movement morphs. It was created for a mermaid theme, so the many moving strands that make it look good in underwater scenes also make it especially suitable for light emitting hair.
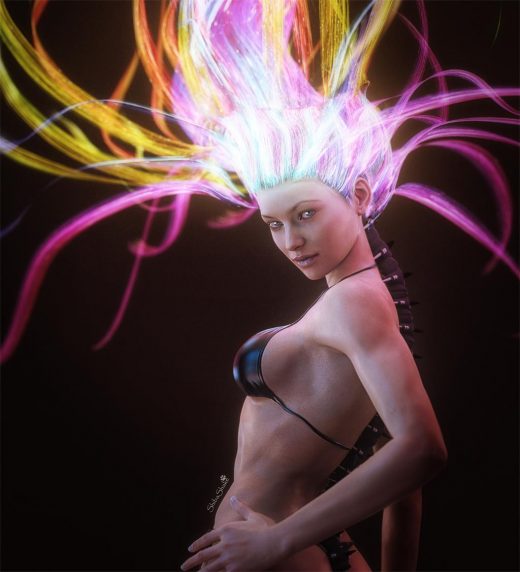
In addition, Laguna-Naoko Hair comes with a variety of interesting and colorful textures, which make for a striking emissive surface. In our Sci-Fi girl example, we used the Electric Blue material setting. There are also fun colorful textures (see below) that produce very striking light effects.
2. Iray Emissive Surface Shader Settings
Now that we have settled upon a hair, comes the interesting part of playing with the Iray emissive shader settings.
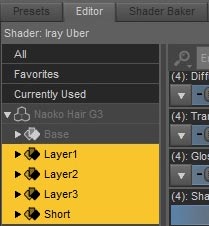
- Pick the hair surfaces that we want to make emissive. In this case, I pick all of the hair strand layers. The only surface I leave-out is the base cap surface.
- I scroll down the shader parameters until I get to Emission Color. I set Emission Color to white and set the image map to the same one as my Base Color map.
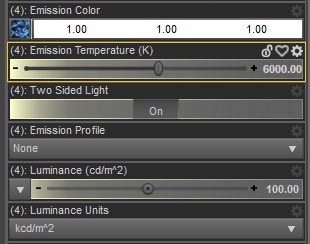
- Notice that as soon as we set Emission Color to something other than black, a new set of parameters become available to us including Emission Temperature, Two Sided Light, Emission Profile, Luminance, and Luminance Units. Here are some short descriptions from Daz as to what each of these parameters mean.
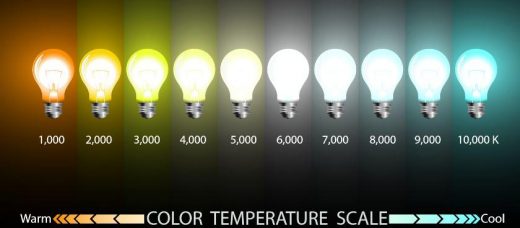
- Emission Temperature allows us to set the color temperature of our light emitting surface(s). Different temperatures will tint out light differently (see below). In this example, I do not want any tinting, so I set Emission Temperature to 6000K.
- We leave Two Sided Light to the On position because we want our hair to emit light from both sides.
- Emission Profile controls the shape of the light. We do not need to use it for emissive hair, but this Daz forum thread has a good discussion of it.
- Luminance controls the strength or intensity of our light. In this case, we set Luminance Units to kcd/m^2 so that we can use smaller values in our Luminance setting.
3. Render Emissive Surface Light Layers
To get the glow and lighting effects that I want, I create three different light layers for my emissive Iray hair:
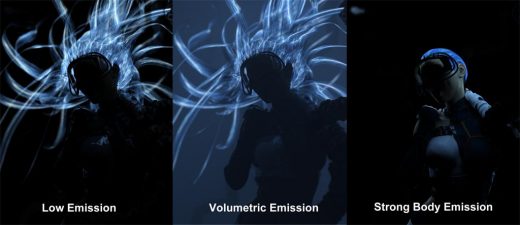
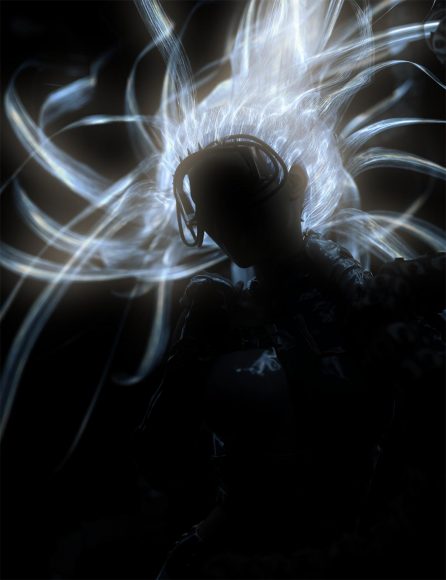
1. Low hair emission – I set luminance to 100 and render a light layer with just the hair (below-left).
2. Volumetric light – I leave luminance at 100, activate my volumetric container/prop, and render a volumetric light layer for my emissive hair (below-middle).
3. Strong hair emission – I set luminance to 3000 so that my light emitting hair will have a strong effect in lighting my figure’s body. However, at such a strong luminance setting, the hair itself becomes too bright. In this case, I only want the body lighting without the overly bright hair. I achieve this by setting Cutout Opacity to 0.0001 (below-right).
4. Putting it All Together in Photoshop
Here, we follow our usual 3 stage post-work process.
Stage 1 – Combining Lights
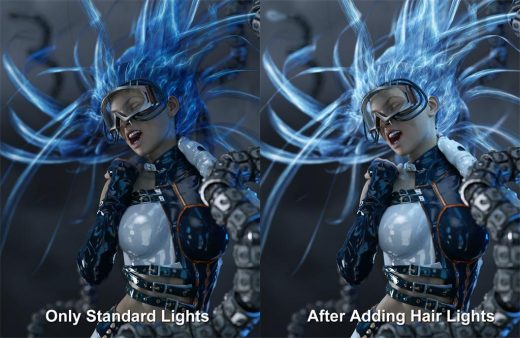
We combine our IBL, key, fill, and back lights in the usual way. In addition, we include the Low hair emission and Strong hair emission light layers we generated above. For the Strong hair emission layer, I mask out the hair cap.
Below, we show the image with just our usual lights (left). To the right, we have added in our two hair light layers. Now, it looks more like our hair is emitting light.
Stage 2 – Post-Work Effects (Glow, Contrast, & More)
In this stage, we further emphasize our Iray emissive hair by adding glow. To do this, we create a separate glow layer just for our hair.
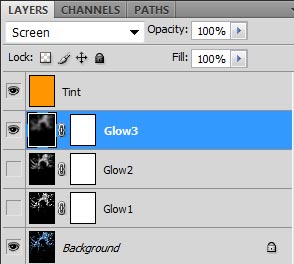
- Open our Low hair emission file.
- Apply glow effects on just that layer.
- Adjust our glow according to taste. In this case, I only enabled the Glow 3 layer, but I set it to 100% opacity.
- Now I have a Hair Glow Layer that I can Copy Merged (Shift + Ctrl + C) into my Stage 2 file.
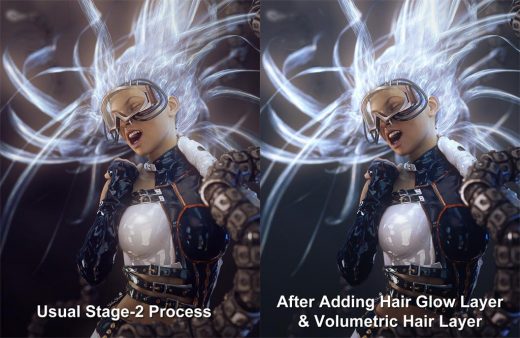
In the left image below, we perform our usual Stage 2 operations. The right image has our Hair Glow Layer, the Volumetric Hair Layer (generated in section 3), as well as some added contrast. Note that there is more glow and atmosphere in the image to the right.
Finally, we perform our Stage 3 operations as usual, adding detail by running Color Efex Pro 4 from the Nik Collection. We also make a small collision fix. The final result is shown below.
