Think, Draw, Art!

for art lovers

  • Home
  • Gallery
  • Contact
  • Recent Articles
  • Article Categories
    • Daz Studio
    • 3D Art
    • 2D Art
    • Contest
You are here: Home / 2D Art / How to Transform Your 3D Art into a Charcoal Sketch

How to Transform Your 3D Art into a Charcoal Sketch

We are a Daz3d affiliate and we use affiliate links in our pages.

by Guest Writer 1 Comment

This article and all of the images within were created by the very talented Alex Ledante. Copyright © Alex Ledante. Check out his gallery here.
This tutorial is the first in a series designed to highlight and showcase the powerful abilities of the the Nik Collection, which is a suite of 7 plug-ins that provide an impressive array of photo editing capabilities: from color correction, retouching and creative effects to image sharpening and a wide range of special effects.

While they used to retail for $500 (and worth every penny) the good folks at Google are making it available to everyone free of charge because that’s their way.

Grab a copy here and let’s get started!

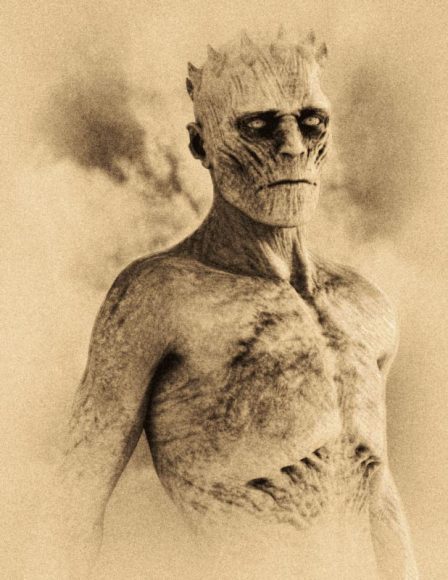
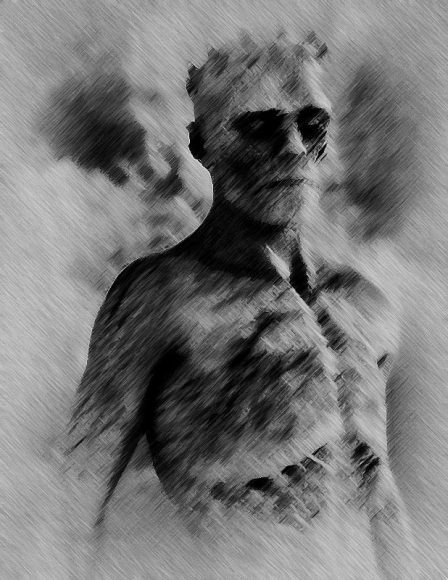
Daz Studio render of Antfarm's Walker after it has been converted into a charcoal sketch using Google's Nik Collection toolset.
How to Transform Your 3D Art into a Charcoal Sketch

1. Using Silver Efex Pro 2 (Nik Collection)

In this installment, we will be using Silver Efex Pro 2 to turn this render of Antfarm’s Walker HD (see below) into a fine art charcoal study. For the duration of this tutorial, Silver Efex Pro 2 will be referred to as SEP2. Brace yourselves; technique is coming…

Daz Studio render of Antfarm's Walker HD
Basic Daz Studio 3Delight render without any additional lights.

I’ve taken a basic 3DL render without any additional lights, but obviously you can do this with any image (even a photograph) that has the proper value range into the SEP2 suite and run Antique Plate II (preset 36) with the default settings. Since you want it to look like a sketch, you mostly want a high contrast image without much midtones (those values will be lost).

Therefore, if your results aren’t looking like the example, just undo the SEP2 filter and adjust the levels until you get a good balance of lights and darks (in Photoshop). Then restore the filter with Ctrl+F. Rinse, wash, repeat until you get the desired results. Alternatively, you may also adjust contrast and brightness from within the SEP2 interface.

Once you are happy with the results, Right click > Flatten Image.

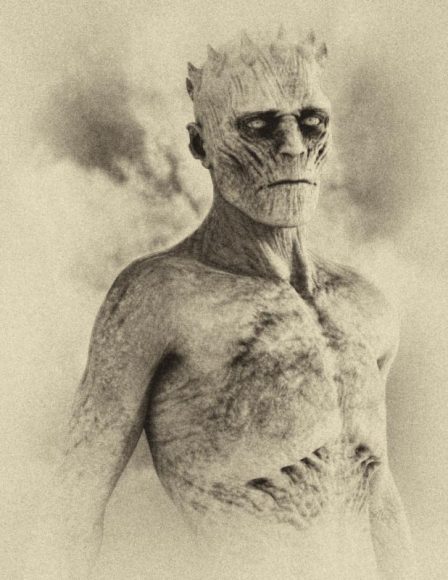
Result of our Daz Studio image after running Antique Plate II (preset 36) from Nik Collection tools.
Image after applying Antique Plate II (preset 36) from the SEP2 suite in Nik Collection tools.

2. Warming Filter and Increasing Contrast

Once you have a solid base, the edges are already fading out just like an unfinished sketch. Notice how the clouds have become abstracted, almost like a doodle and they’re getting lost in all the background noise which is starting to look like paper grain. You could almost stop here, but why not push it a bit further?

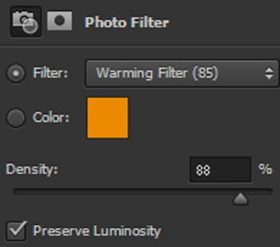
Screenshot of Photoshop warming layer filter interface.
Warming layer filter settings in Photoshop.

Create an adjustment layer/photo filter (in Photoshop) and select the Warming Filter(85). Ensure that Preserve Luminosity is ticked, then run the density up to around 88% or so.

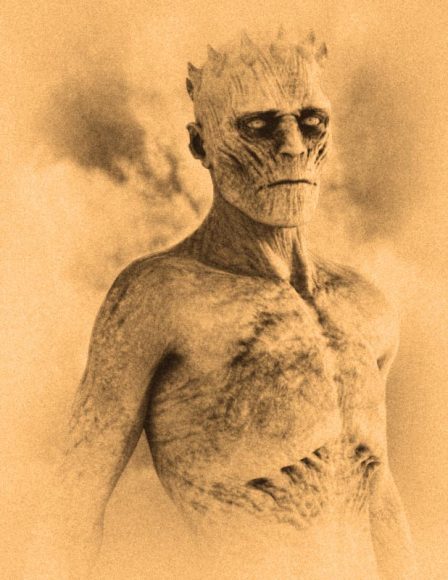
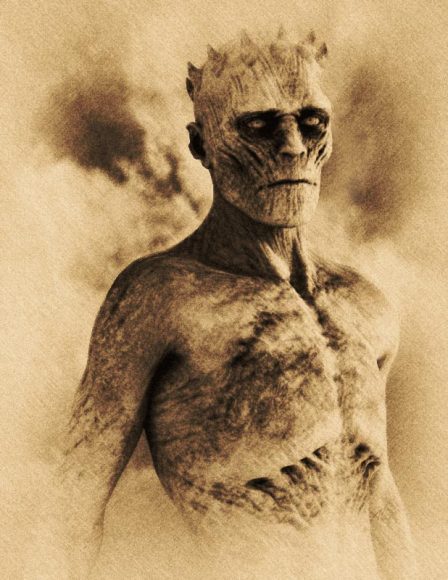
What our 3D-art image looks like after applying a warming adjustment layer in Photoshop.
Image result after applying the warming adjustment layer described above.

This is way too orange, but have no fear, we’re going to fix that now.

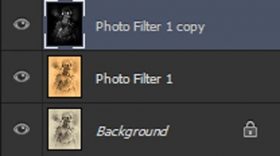
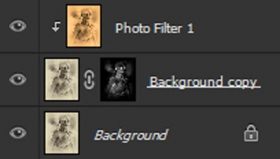
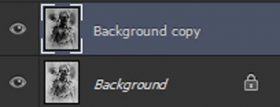
Screenshot of our Photoshop layer stack after desaturation and inversion.
Photoshop layer stack after these operations.
  • Copy the SEP2 (background layer) via Ctrl+J.
  • Desaturate with Ctrl+shift+U.
  • Invert with Ctrl+I.

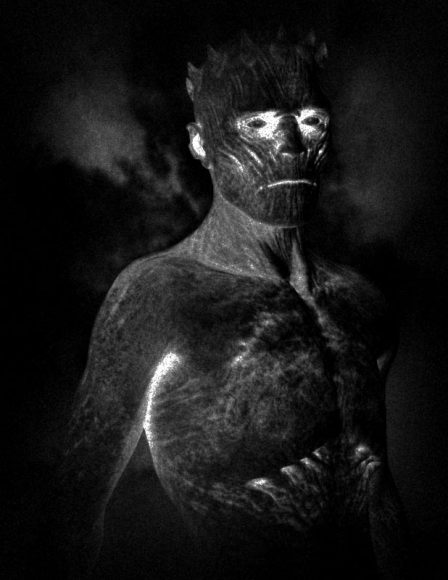
The end result is shown below. This will be your layer mask, so hit Ctrl+A to select all and then cut it with Ctrl+X

Result after desaturating and inverting our original Daz Studio 3D-art image.
Our image mask after desaturating and inverting our background (original) image.
  • Duplicate the Silver Efex Pro 2 (background layer) twice.
  • Apply a layer mask to the first one (Layer > Layer Mask > Reveal All).
  • Go to the channels tab and then paste the layer mask in the alpha channel with Ctrl+V. Note that visibility of the layer must be on before pasting, then turn it off after.
  • Set the layer to Multiply to punch up the shadows.

That’s nice but I want some more color in there, so

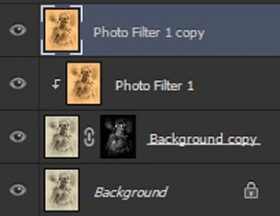
Screenshot of our Photoshop layer stack after punching up out shadows and add in more color.
Photoshop layer stack after operations to punch up our shadows and add in more color.
  • Merge the photo filter onto the other background layer copy. (Right click > Merge Down).
  • Set the layer to Linear Light.
  • Then Right click > Create Clipping Mask. See how rich those dark values just got?
Screeshot of our Photoshop layer tab after performing the actions described in this section of our tutorial.
Our Photoshop layer tab after performing the operations described here.

Still looks a little drab, so let’s duplicate the photo filter layer and reset the mode to Normal, but drop the opacity down to 40%.

Resulting 3D-art image after adding some warming filters and increasing shadows using Photoshop layers.
Our 3D-art image after adding in a warming filter and punching up the shadows in Photoshop.

3. Add Hatching

To make it look more like a sketch, let’s introduce some hatching. Save what you have so far and then flatten everything (Right click > Flatten Image). Launch SEP2 and use Wet Rocks (preset 23) to get this grainy looking result.

Grainy looking result on our 3D-art image after applying the Wet Rocks (preset 23) from SEP2, in the Nik Collection tool.
Image result after applying the Wet Rocks (preset 23) from SEP2, in the Nik Collection tool.
Screenshot of our Photoshop layer stack after adding in an Angled Strokes layer.
Photoshop layer stack after adding Angled Strokes operations.
  • Ctrl+L and enter 15/.75/255 to adjust the value range.
  • Set the layer to Overlay at 40% opacity.
  • Do Filter > Brush Strokes > Angled Strokes. I used 50/15/3 but if you’re doing your own image, just try for something like the image below.
Apply the Angled Strokes filter in Photoshop and adjust settings according to taste.
Adjust Filter > Gallery > Angled Strokes until we get something that looks like this. Settings will be different depending on your image.

If you want to add some color, now would be a good time to try Hue/Saturation or even just Alt+Ctrl+L. You can keep messing around with it, but I’m done…

Daz Studio render of Antfarm's Walker HD after it has been converted into a charcoal sketch using Google's Nik Collection toolset.
Final result of transforming our 3D-art render into a charcoal sketch using Photoshop and the Nik Collection tools.

Summary

While the Nik Collection was developed for photographers, any Photoshop user can tell you that Photoshop isn’t just for photographs and neither is the Nik Collection In fact, since 3D-art renders are really just simulated photographs, we will enjoy a much higher degree of overlap with the intended purpose than someone using the Nik Collection on colored line-art, for example.

I’ve began this series with a technique of turning a render into a charcoal sketch to underscore the concept that the Nik Collection has a much wider gamut of applications than mere photo editing, so you need not restrict yourself to using these filters only in the ways in which they were intended.

There are applications for the Nik Collection that the developers never even dreamed of!

In future installments, we will be exploring many different uses for the Nik Collection; some will cover the features much like a manual, while others will take it to a completely different level. Please look forward to it!

This article and all of the images within were created by the very talented Alex Ledante. Copyright © Alex Ledante. Check out his gallery here.
Related Articles

Step-by-Step Daz Studio Post-Work Tutorial

A step-by-step postwork tutorial on my Asian Girl with Pearls image. Scene was created in Daz Studio and initial light layers were rendered in Daz Studio Iray.

Daz Studio Octane Postwork Tutorial

How to make Daz Studio Octane skin look even better through postwork techniques in Photoshop. This tutorial is for beginners.

How I Combine Daz Studio Lights in Photoshop

Come see how I combine my various Daz Studio light layers in Photoshop, how I add color to lights, and how I modify light layers using Photoshop masks.

Check Out the Latest Sales at Daz3D

DAZ Studio FREE 3D MODELS AND SOFTWARE

Comments

  1. alex ledante says

    February 19, 2017 at 5:17 pm

    Let me know if you have any questions

    Reply

Leave a Reply Cancel reply

Your email address will not be published.

Recent Posts

  • Item used: VR X01 BYOS Modular by Studio360.3D-Art Contest Winners ~ April 2020
  • Qualifying item used Inside Linday's Daz Studio Iray Scenes by Linday3D-Art Contest Winners ~ March 2020
  • Qualifying item used –Z Beauty Poses for Kalea 73D-Art Contest Winners ~ February 2020
  • Qualifying item: - Li'l Scrap Boy HD for Genesis 8 Male by Pixeluna3D-Art Contest Winners ~ January 2020
  • Qualifying items used –Ancient Tomes by Merlin Studios3D-Art Contest Winners ~ December 2019
  • Shiba contest qualifying Item used: Mech Dancer Outfit3D-Art Contest Winners ~ November 2019
  • Shiba contest qualifying items used – Greeble City Blocks, Greeble City Blocks 2, Greeble City Blocks 3; and Greeble City Blocks 04 by Stonemason.3D-Art Contest Winners ~ October 2019
  • Shiba Contest Featured Vendor Petipet. Used: Car Edi, Unicycle Bob, Bus Maxis, Bus Pegasus & Motorbike ZAZ3D-Art Contest Winners ~ September 2019
  • Qualifying item for shiba contest - Z Almost Human Poses by Zedicuss3D-Art Contest Winners ~ August 2019
  • Qualifying items used – Rei HD for Genesis 8 Female by Mousso.3D-Art Contest Winners ~ July 2019

Recent Comments

  • Cute cat girl fantasy pin-up art with folded arms and standing in a forest or woods. Fantasy art rendered in Daz Studio Iray.Best Fantasy Women Skins, 3D-Art
    • - Can I ask how you got the Tigerlily skin on a G8F figure?
  • Girl reaching upward for a flying bird (signifying knowledge, dreams, or more) while another holds her down to earth.Daz Studio Iray Tips and Tricks
    • G.Carlo
      - Very Helpful, thanks!!!!
  • Blonde haired sci-fi elf girl with sword, standing next to an owl robot. Fantasy sci-fi woman art. Daz Studio Iray image.What Is Daz Studio?
    • Shanique
      - Hey please check your inbox on deviantart ASAP, I’ve been trying to reach out to you. Thanks
  • Screenshot of the Environment Map interface in Daz Studio Octane.How to Set-Up Camera, Lights, & Displacement in Daz Studio Octane
    • dmc
      - In my case I turned up the intensity of the spherical light. In Octane:(1) Select the Sphere-Default ...
  • Girl with pink hair, pink dress, and pink petals blowing in the wind. Daz Studio dForce Iray picture. Fantasy Art.How to Save a Daz Studio dForce Frame as a Morph
    • emu
      - I have been trying to apply this to dForce hair, but the result does not really match the original simulated ...
    • Esse
      - Just great! Thank you so much.
  • Warrior woman riding on a tiger while shooting a bow and arrow.How to Combine Multiple Poses in Daz Studio
    • Jan Freeman
      - Totally awesome tutorial!! I was able to lock Mavka in DS in her violin playing pose, then pose her ...
  • Catwoman sitting on a papasan chair with several cats around her. Moon in the background.How to Save a Single Frame in Daz Studio
    • Perficimus
      - Well thanks for this!Problem + good solution poster = happy user!!! ;-)
  • Queen Elsa with ice wings and forming the heart or love sign with her hands. Magic or spell lights in the background and around her hands.How to Create Frozen’s Queen Elsa in Daz Studio
    • lord lethris
      - I been looking at doing this myself, and trying to find the right dress was impossible - until I stumbled ...
  • Woman exercising with two weights and covered in sweat. Daz Studio Iray render.How to Get Wet Skin in Iray
    • sreenivassan T
      - select skin under "character name" in the surface box.

Copyright © 2021 · Genesis Skins by ShibaShake · Terms of Service · Privacy Policy ·