This article and all of the images within were created by the very talented Brian Sains. Copyright © Brian Sains. Check out his gallery here.
What I want to achieve here is to give you the ability to set up a simple light rig and basic camera within Octane. I also describe how to add in displacement maps for increased realism.
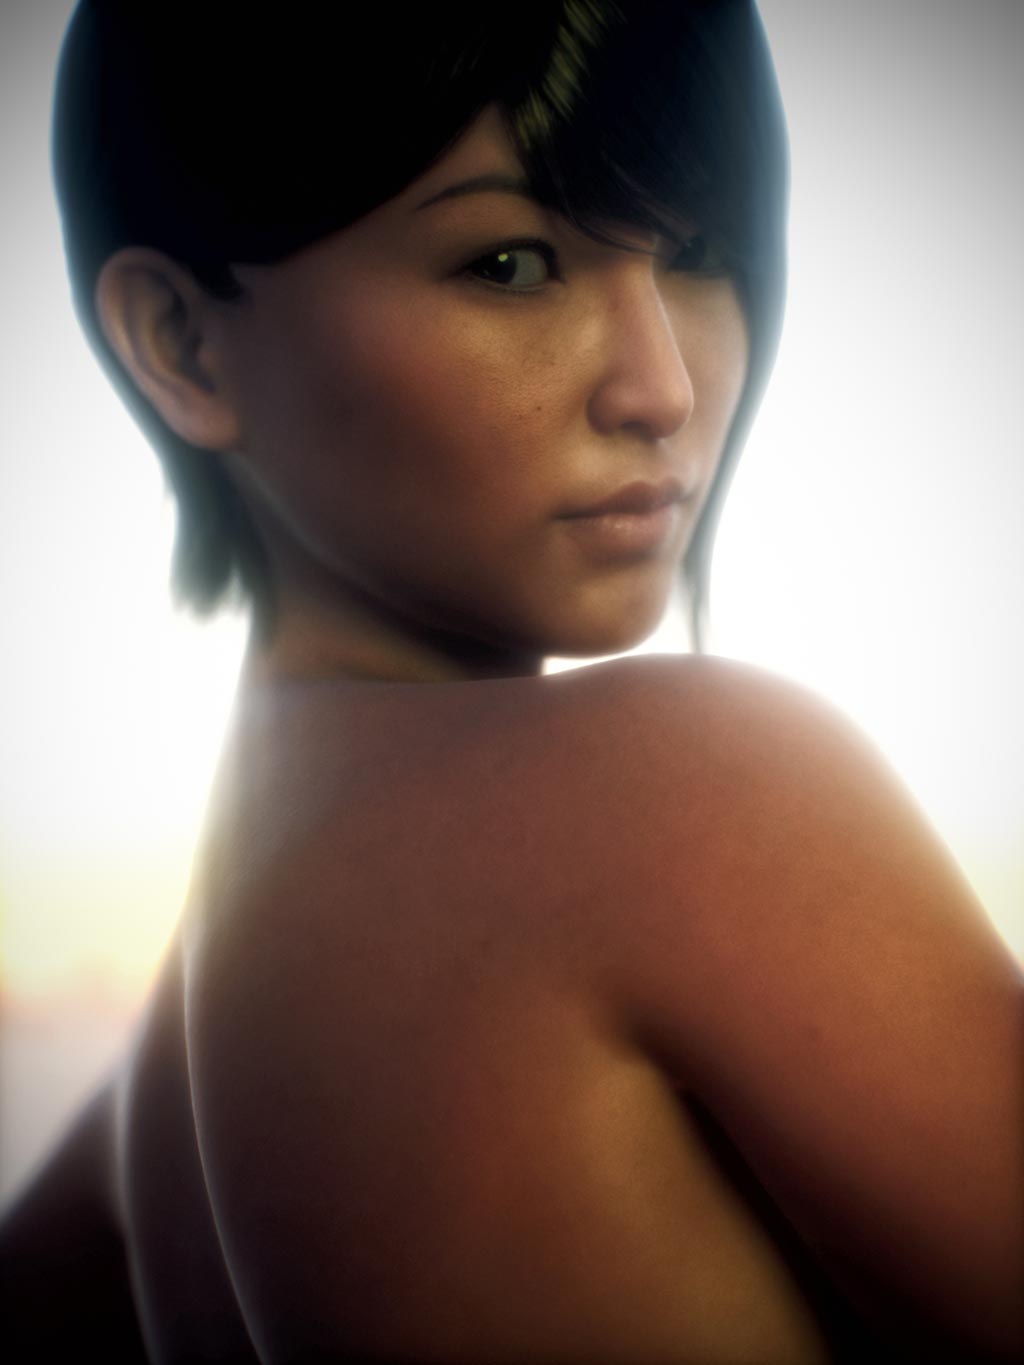
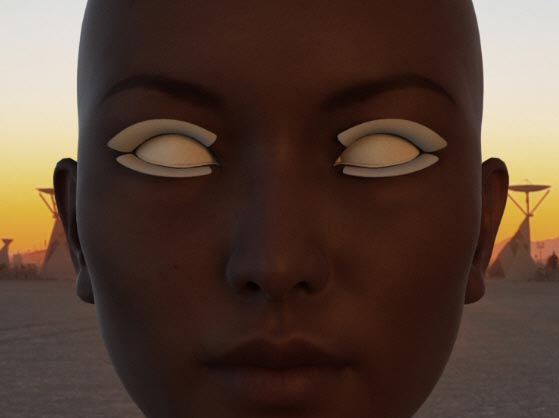
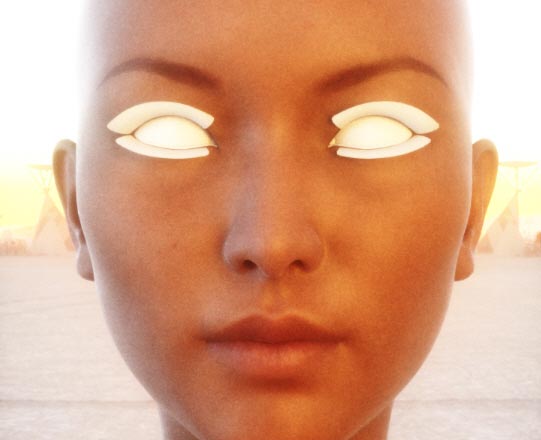
In this tutorial, I will continue to use the Mei portrait image below as an example. For more on how I created a realistic skin shader, please refer to this tutorial. If you are new to Daz Studio Octane, there is an introduction article here.
1. Daz Studio Octane Lights
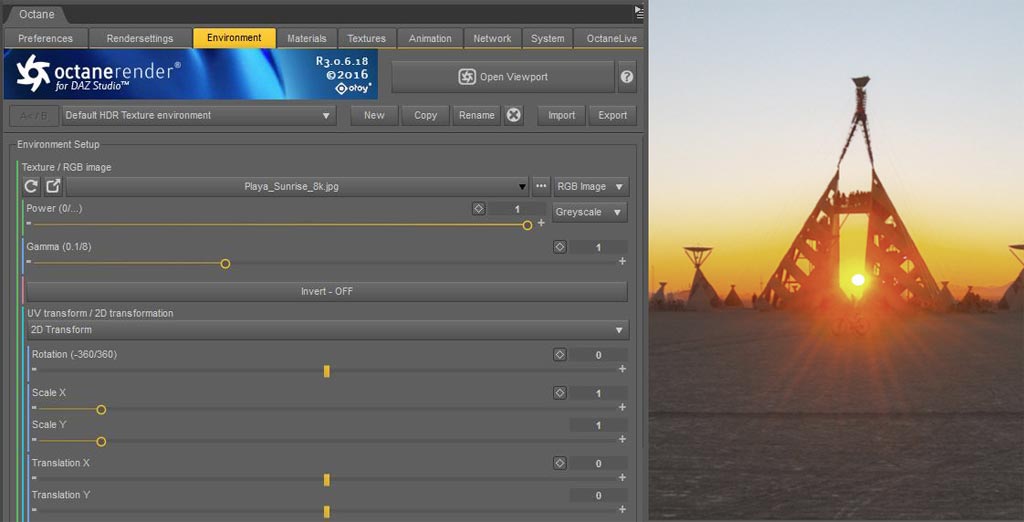
Lighting in Octane can be achieved from the Environment Tab (Octane daylight environment or HDR Texture environment) and through emissive textures. For my image, I used a single emissive key light and an HDR image (Playa Sunrise) from the fantastic sIBL archive.
Open the Environment Tab, set the image to the Playa Sunrise HDRi and adjust the settings as shown below (making sure the Gamma is set to 1). That’s all you need to do to set up the environment light. You can rotate the image using the Translation X setting. This is best done with the render window open and all objects hidden (from within Daz). I will leave it as it is, because I want the sun in the image as the back light for my subject.
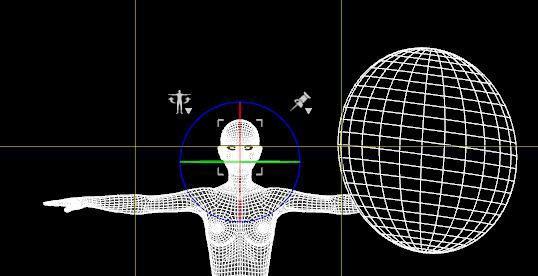
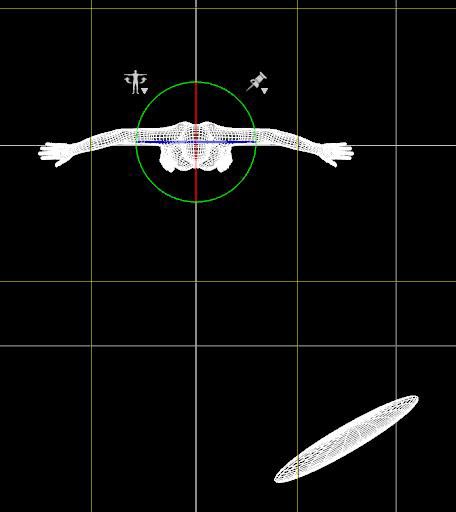
Now let’s set up a simple emissive light in the scene. Most people tend to use a plane primitive for emissive lighting, but I prefer to use a flattened sphere as a key light (I prefer the reflection you get in the eye). I place the primitive as illustrated below.
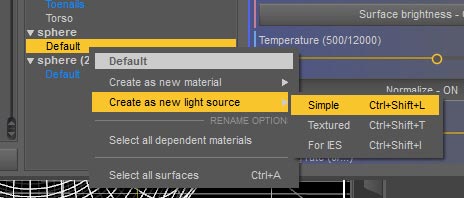
To create the emissive material you need to return to the Octane material tab. Right click the Sphere primitive and select Create new light source > Simple.
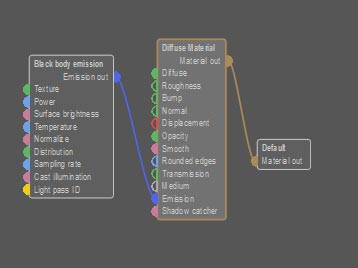
Open the newly created material in the Node editor, right click on the diffuse node and select Smart Unfold. This breaks down a node into its constituent parts so you can see how it is built. As you can see, an emissive texture is simply a Blackbody Emission node plugged into a Diffuse node (you cannot have an emissive glossy or specular material).
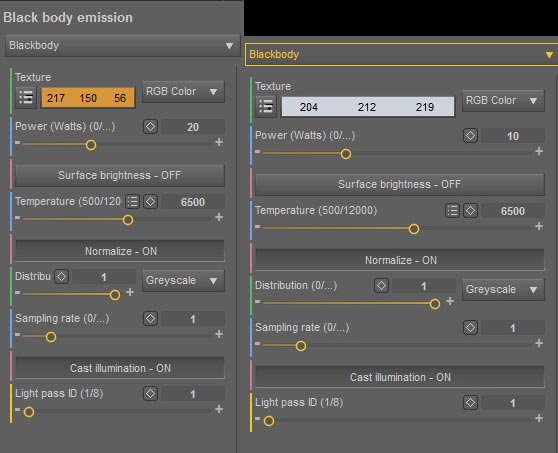
Select the Blackbody node and update the settings as is shown in the left image below. The orange texture colour is from the horizon of the Playa HDR image, selected using the colour picker tool that is available when you edit the colour. If you like, repeat the process and create a second primitive to the left side of the character as a fill light. This time select the blue colour from the sky in the HDRi (below right).
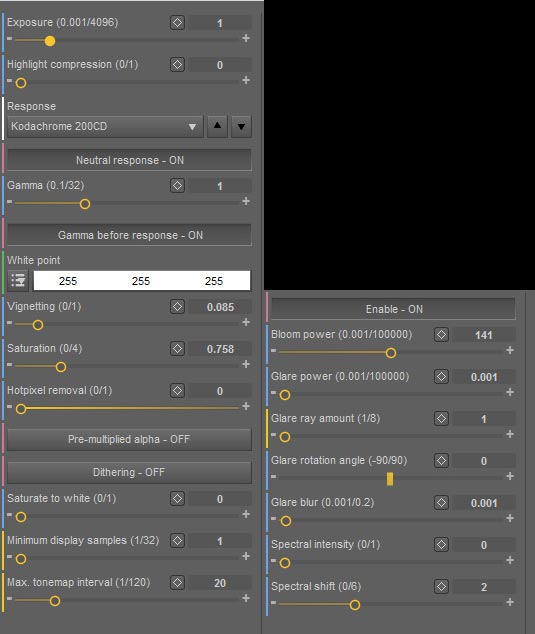
Now, we can fine tune our lights from within the render viewport itself, even when the image is rendering. Let’s start with the Camera Imager and Post Processing tabs. The following are the settings I used in my Mei portrait:
Choice of settings in the Camera Imager comes down to personal preference. As I have said previously, I’m a big fan of the Agfachrome, Ektachrome and Kodachrome filters. I also find adding bloom improves the natural lighting and softens the image.
2. Daz Studio Octane Camera Settings
- Create a camera in Daz and make sure that it’s selected within the Daz viewport.
- Position it so the face is in full portrait view.
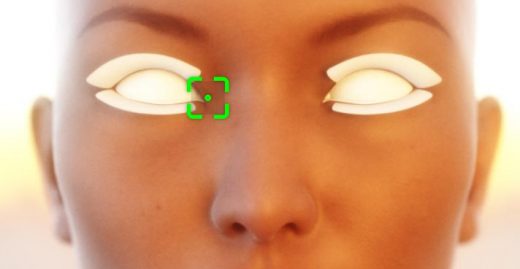
- Now open the Octane viewport again. Use the ‘Autofocus’ tool to select an area of focus (I tend to use the eye or nose as my focal point). This gives us a nice quick DOF effect.
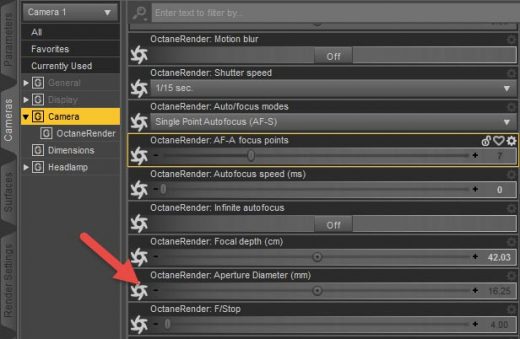
- To adjust the degree of focus, you need to select the camera within Daz and open the Cameras pane. Use the Aperture Diameter setting in that pane. I usually set it between 5-15mm (the f-stop is altered automatically).
I am sure this will probably cause photographers to scream “that’s not how to do it!” – but it works for me 🙂
3. Daz Studio Octane Displacement Maps
Some of you may have noticed that in the skin tutorial, we only used a diffuse map – no bump, normal or displacement maps. The reason I leave it to now is that I prefer to use displacement maps, which can slow down render time. Therefore, I wait until I am happy with the scene, then add displacement and tweak as necessary.
I used a displacement map in the Mei portrait. It needs to be a greyscale image and ideally 4k and above. In this case I used the standard bump map that came with Mei 7, but in the past have used dedicated displacement maps (though rarely supplied) or have made my own from the diffuse map ( tutorial on making displacement maps ).
The important thing here is that the black parts of the map are the parts that depress into the object (like pores) and the white bits extrude (like spots or eyebrows). Ultimately, I find a displacement map produces a much better result as it physically alters the shape of the object, thus giving you subtle shades and shadows.
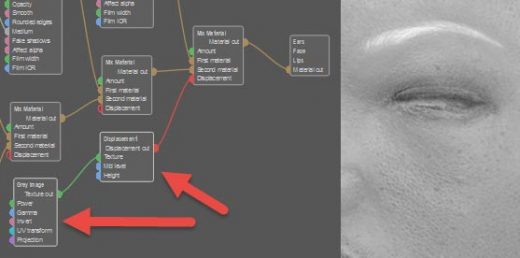
To add a map to the displacement node, return to the Material pane in Octane and open the face material in the node editor.
You will notice there is already a greyscale image node waiting to be filled. This is attached to the displacement node, which in turn drives the displacement for the combined nodes before being applied to the surface. If you have a bump map that has white eyebrows and black pores then you should be able to use it here. Use the grayscale image node to load the bump map.
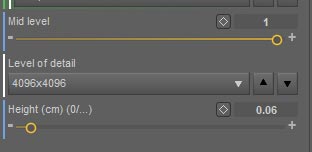
Next, select the Displacement node and check the level of detail corresponds to the image you have used (normally 4k). The only other adjustment required is the height. This is very sensitive, and you wouldn’t want to go beyond a height of 0.12cm.
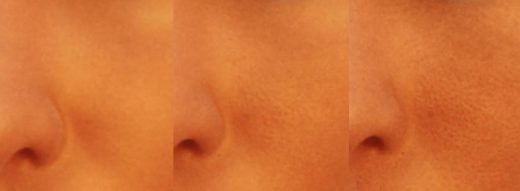
The image below shows (from left to right) no displacement, 0.06cm and 0.12cm.
You will need to go back and update all of your skin materials for torso and arms accordingly, and make sure they are set to the same mid-level and height (but with different image maps). Otherwise, the seams between the UV areas will become visible.
I have found that adding bump or normal maps alongside a displacement map adds very little if anything. However, displacement maps can be very fiddly and more render intensive. If you wish to use a bump map then create a new image node (greyscale with a gamma setting below 0.1) or normal map (RGB image node) and attach it to the appropriate connecter on the 3 specular and 1 diffuse nodes.
In the next tutorial I will cover a couple of other node adjustments you may find useful, and then cover briefly the other materials I used in the Mei render.
