Think, Draw, Art!

for art lovers

  • Home
  • Gallery
  • Contact
  • Recent Articles
  • Article Categories
    • Daz Studio
    • 3D Art
    • 2D Art
    • Contest
You are here: Home / 2D Art / Photos / How to Remove Your Photo Background with PhotoShop

How to Remove Your Photo Background with PhotoShop

We are a Daz3d affiliate and we use affiliate links in our pages.

by shibashake 14 Comments

Why would we want to remove our photo background?

By removing the background, we can isolate our favorite photo elements and combine them with other pictures, drawings, or 3D art, to create something creative, unique, and compelling.

For example, the dog pictures below were created by combining photos of my Siberian Husky Lara, with various fantasy backgrounds. Puppy Lara is starting to contribute a lot to HubPages, so I wanted to honor her hard work and efforts with these special picture awards!

This tutorial explains in detail, how we can remove the background from any photo using PhotoShop. We can also remove backgrounds using GIMP and evenMicrosoft Office, but the PhotoShop tools are easy to use and allows me to remove a background in about 12 minutes.

Dog-Artistic4c

Dog-Writer1c

Husky-Dog-on-computer1

Husky-Dog-on-computer2

How to Remove Our Photo Background Using PhotoShop

Step 1

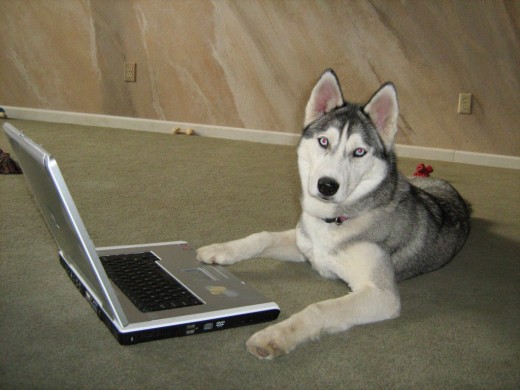
Load our picture into PhotoShop.

Step 2

Create a new layer by going into the Layer Menu at the top of the screen and selecting New >> Layer.

Step 2 - Create a new layer by going into the Layer menu at the top of the screen and selecting New Layer.
Step 2 – Create a new layer by going into the Layer menu at the top of the screen and selecting New Layer.
Pop-up window for creating a new layer.

Step 2 will produce a pop-up window for creating a new layer (see right).

Make sure that color is set to none, and mode is set to normal.

Click on OK, and a new layer (Layer 1) will be created, which we can see on the right side of the screen.

We will build a background mask in this layer.

Step 3

Make sure that the photo layer is selected by clicking on it.

A new layer (Layer 1) has been created, which we can see on the right side of the screen.
Step 4
Step 4 - Right click on the Brush Tool at the left of the interface and select the Pencil Tool.
Step 4 – Right click on the Brush Tool at the left of the interface and select the Pencil Tool.

Now, we want to trace the edge between our foreground element(s) and the photo background.

To do this, right click on the Brush Tool at the left of the interface and select the Pencil Tool (see right).

We can set our pencil width by clicking on the width button at the top of the interface (circled red in the picture below). I usually use a size-9 pencil width.

We can set our pencil width by clicking on the width button at the top of the interface. I usually use a size-9 pencil width.
Step 5 - Set the opacity of our background mask to 70%.
Step 5 – Set the opacity of our background mask to 70%.
Step 5

Set the opacity of our background mask to 70%. I find that this makes it easier to trace out the foreground objects.

Step 6

 – To effectively trace the edge, we may want to zoom in on our photo by clicking Ctrl+. Ctrl- will zoom out of the photo.

Once we are zoomed in, we can carefully paint over the appropriate edges (see below).

Step 6 - To effectively trace the edge, we may want to zoom in and then carefully draw around our foreground elements.
Step 6 – To effectively trace the edge, we may want to zoom in and then carefully draw around our foreground elements.

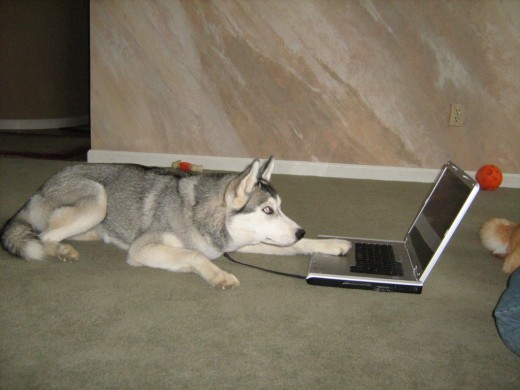
After we finish edge tracing, we get a black outline around our foreground objects (puppy Lara and her computer).

After we finish edge tracing, we get a black outline around our foreground objects.
Right click on the Quick Selection Tool at the leftside of the interface. Select the Magic Wand Tool.
Step 7

Next, we want to paint over the rest of the background area.

To do this, right click on the Quick Selection Tool at the leftside of the interface. Select the Magic Wand Tool (see right).

Step 8

Click the Magic Wand Tool anywhere on the photo background. This will select the rest of the background area, as defined by our edge line.

In the picture below, there is a dotted line showing the background area that is selected by the Magic Wand Tool.

Step 8 - There is a dotted line showing the background area that is selected by the Magic Wand Tool.
Step 8 – There is a dotted line showing the background area that is selected by the Magic Wand Tool.
Select the fill-color of our choice and click OK.
Step 9

Now we want to fill in our selected background area with a solid color. We do this by going into the Edit Menu at the top of the screen and selecting Fill (see below). Pressing Shift + F5 is a faster way of achieving the same results.

This opens up a pop-up window that lets us select our fill-color (see right). We want to use the same color as our edge-line. Black works best for me, but some people prefer using bright red or blue. Select the fill-color of our choice and click OK.

This will fill our selected background area with a solid black color. Note – we are filling in the background areas in our new mask-layer (Layer 1) and *not* our photo layer.

Step 9 - We fill in our selected background area by going into the Edit Menu and selecting Fill.
Step 9 – We fill in our selected background area by going into the Edit Menu and selecting Fill.
Step 10 - Reset the opacity of our mask layer (Layer 1) to 100%.
Step 10 – Reset the opacity of our mask layer (Layer 1) to 100%.
Step 10

Reset the opacity of our mask layer (Layer 1) to 100%. In this way, we can clearly see our background mask and whether it is properly defined.

At this point, we may make whatever adjustments to the background mask by repainting over certain areas using the Brush Tool or erasing certain areas using the Eraser Tool.

At this point, we may make whatever adjustments to the background mask by using the Brush Tool and Eraser Tool.
Step 11

Select our mask layer (Layer 1) by clicking on it.

Step 12

Go into the Select Menu, and choose Load Selection.

Step 12- Go into the Select Menu, and choose Load Selection.
Step 13 - Click on the Invert check-box.
Step 13 – Click on the Invert check-box.
Step 13

This gives us a Selection pop-up menu. Click on the Invert check-box (see right).

This will select our foreground object, i.e. it will select all the areas that are not colored black.

The dotted line in the picture below shows our selection.

Step 14

Select our photo layer by clicking on it using the layer interface to the right of the screen.

The dotted line in the picture below shows our selection.
Step 15 - Remove our photo background by clicking on Add a pixel mask button at the top right of the screen.
Step 15 – Remove our photo background by clicking on Add a pixel mask button at the top right of the screen.
Step 15

Remove our photo background by clicking on the Add a pixel mask button at the top right of the screen.

Note – This only works when we have our foreground object selected, and our photo layer active.

Step 16

 – Turn-off our background mask by clicking on the eye icon next to the layer.

Success!!

Now, we can integrate puppy Lara and her computer with whatever backgrounds or artistic effects that we want.

Success!! We have now removed our photo background.

The process above may seem like a lot of work, but once you get used to it, it actually goes rather quickly. It takes me about 12 minutes to remove a photo background.

I created the picture below, after spotting a group of deer while walking with puppy Lara. I think Lara and her young deer friend look very peaceful together.

Let’s go wild and unleash our creativity on some really cool dog art!

Siberian Husky Lara and her young deer friend look very peaceful together.

Check Out the Latest Sales at Daz3D

daz sale banner
DAZ Studio FREE 3D MODELS AND SOFTWARE

Leave a Reply Cancel reply

Your email address will not be published. Required fields are marked *

Comments

« Previous 1 2
  1. Roedingers Cat says

    January 2, 2013 at 5:23 am

    Interesting technique – but if You use the pencil to go around Your dog, You could also use a rubber with soft edge the same way. Works for me better and there are fewer steps : First cut out only the dog (mark, ctrl-c, paste from clipboard [background transparent]), so that only the important area is left. After going around the dog with the rubber tool, just increase the diameter of the rubber and erase everything else. Finished. Duration 9 minutes ;-)))

    The best thing is, that it is exactly the same technique in GIMP, Paint Shop and every other program that has a rubber. I like GIMP since version 2.8 very much.

    Just a thought.

    Reply
  2. Happyboomernurse says

    December 10, 2011 at 11:59 pm

    Have never used Photoshop or any of these other programs but this was a nice overview of what can be done. Thanks for sharing this information.

    Reply
  3. shibashake says

    November 10, 2011 at 11:58 pm

    I am glad it was helpful. Thanks for visiting!

    Reply
  4. sestasik says

    November 10, 2011 at 11:57 pm

    This is really helpful. Thanks!

    Reply
« Previous 1 2

Recent Posts

  • Duality of life and death represented by a day of the dead girl with black flowers and butterflies on her headdress surrounded by skeletons. Gothic fantasy woman art. Daz Studio Iray image.What Does Our Art Say About Us?
  • Side by side face comparisons of out-of-the-box Millawa 8 face and skin and multiple tweaked Millawa 8 face and skin.Making Skin Pop with the Daz Studio Iray Uber Shader - Part 2
  • Side by side Victoria 8.1 face comparison of Daz Studio's PBR Iray Skin Shader and the Iray Uber Shader..Making Skin Pop with the Daz Studio Iray Uber Shader - Part 1
  • Item used: VR X01 BYOS Modular by Studio360.3D-Art Contest Winners ~ April 2020
  • Qualifying item used Inside Linday's Daz Studio Iray Scenes by Linday3D-Art Contest Winners ~ March 2020

Recent Comments

  • Side by side face comparisons of out-of-the-box Millawa 8 face and skin and multiple tweaked Millawa 8 face and skin.Making Skin Pop with the Daz Studio Iray Uber Shader – Part 2
    • Adil
      - Hi,I hope everything is good at your end. Please if you can help me with light scene duf file for ...
    • jane
      - I can not write 0.24 or 0.24 after 0. doesnt work. would you share your settings?
  • Duality of life and death represented by a day of the dead girl with black flowers and butterflies on her headdress surrounded by skeletons. Gothic fantasy woman art. Daz Studio Iray image.What Does Our Art Say About Us?
    • Plaiades
      - Dear Shiba,i am a long time admirer of your art and have missed you in the DAZiverse. Over a year ...
    • K Smith
      - Thank you for sharing this, a lot of it resonated with me and I know some of the pain you have been through. ...
  • Side by side Victoria 8.1 face comparison of Daz Studio's PBR Iray Skin Shader and the Iray Uber Shader..Making Skin Pop with the Daz Studio Iray Uber Shader – Part 1
    • Foxy
      - Hi, can you save your settins and share with us?

Copyright © 2023 · Genesis Skins by ShibaShake · Terms of Service · Privacy Policy ·