Think, Draw, Art!

for art lovers

  • Home
  • Gallery
  • Contact
  • Recent Articles
  • Article Categories
    • Daz Studio
    • 3D Art
    • 2D Art
    • Contest
You are here: Home / 2D Art / How to Make a Fantasy Background – Fantasy Sky

How to Make a Fantasy Background – Fantasy Sky

We are a Daz3d affiliate and we use affiliate links in our pages.

by shibashake 12 Comments

Here, we focus on how to make a simple fantasy background consisting of a fantasy sky and some simple background elements. Feel free to use any of the backgrounds in this article for your own creations.

I made all the fantasy backgrounds in this article by using various Photoshop brushes and effects. This tutorial is for beginners and does not require advanced Photoshop knowledge.

How to Make a Fantasy Background.

Make a Fantasy Background Step 1 – Create Color Palette

The first step in making a fantasy background is to create a color palette. One easy way to do this, is to use the gradient feature in Photoshop. Below, I created a pastel blue and yellow gradient using the layer blending functionality.

Create a color palette using gradients.
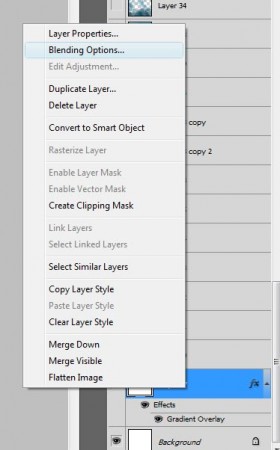
Select Blending Options for the layer.
  • First, create a new layer. Go into the Layer dropdown menu at the top, then choose New >> Layer.
  • Fill our newly created layer with a white color by selecting the whole layer (Ctrl-a) and then going into Edit >> Fill.
  • Right click on our layer thumbnail at the right of the interface and select Blending Options from the menu that appears (see right). This creates a Layer Style pop-up menu.
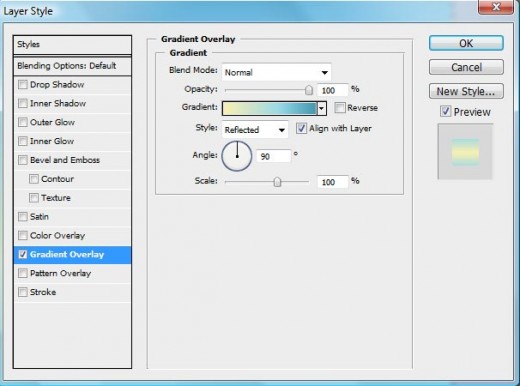
  • Click on the Gradient Overlay style to the left. The gradient menu will be similar to what is shown below.
  • Choose an appropriate color gradient and set the gradient style to Reflected.
  • Choose an appropriate color gradient and set the gradient style to Reflected.
    Choose an appropriate color gradient and set the gradient style to <em>Reflected</em>.
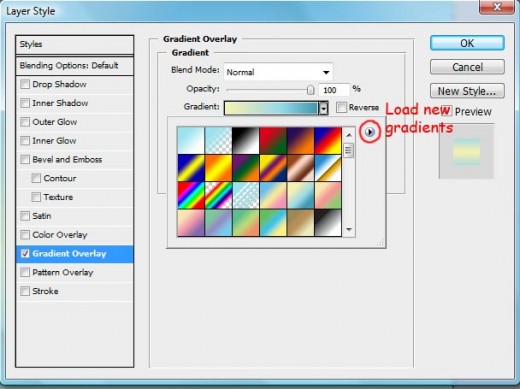
  • Note, if we do not see a gradient that we like, we can load new gradients by clicking on the arrow button to the right of the gradient selection interface (shown below).
  • Click on the arrow button to load more gradients.
    Click on the arrow button to load more gradients.

Make a Fantasy Background Step 2 – Add Texture

  • Switch to brush mode (Shift-b).
  • Press and hold the Alt key. Doing so will allow us to temporarily sample colors while in brush mode. Click on an area between the yellow and blue color of our gradient to get a melding of the two.
  • Load in our favorite smoke brushes. There are many free smoke brushes on the web. Otherwise, we may purchase smoke brushes from Daz3D. Just do a search for “smoke brushes”.
  • Select an appropriate smoke brush and use it to add texture to our background.
  • Repeat the process above with different colors from our gradient until we are happy with the results. I usually use a different layer for a different color.
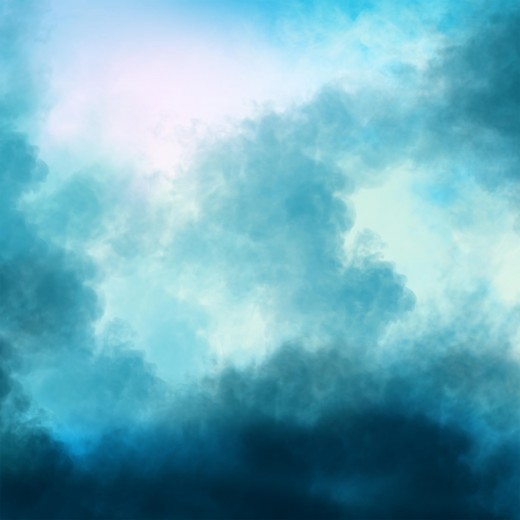
  • Fantasy background after adding in some yellow and blue texture/smoke.
    Fantasy background after adding in some yellow and blue texture/smoke.

Make a Fantasy Background Step 3 – Add Another Color

Sometimes, we may want to highlight a particular area in our background, or simply add in another color.

  • Create a new transparent layer.
  • Select a new foreground color to add.
  • Switch to gradient mode (Shift-g).
  • Select the transparent gradient, i.e. the gradient that goes from the foreground color to a fully transparent color. Also select the radial option from the gradient controls at the top of the screen.
  • Select the transparent gradient and radial option.
    Select the transparent gradient and radial option.
  • Create our gradient starting from the mid-point of our fantasy background.
  • Switch to Move mode (Shift-v) and move our new color layer around until it is in the desired position.
  • Added a new pink gradient on the top-left.
    Added a new pink gradient on the top-left.
  • Add some pink-blue smoke brushes to meld the new pink area into the background.
  • Add some pink-blue smoke brushes to meld the new pink area into the background.
    Add some pink-blue smoke brushes to meld the new pink area into the background. Click on image to get an enlarged version.

Make a Fantasy Background Step 4 – Adjust Saturation, Brightness, and Hue

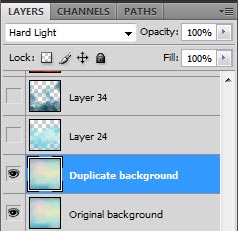
Duplicate background and set blending more to Hard Light.

Our current fantasy background is of a very mild, pastel shade. One simple way to make our background pop more is to do the following-

  • Select our entire background (Ctrl-a).
  • Duplicate our current background (Shift-Ctrl-c) and paste a duplicate version on top of our current background.
  • Select the duplicate background layer and switch the layer blending mode to Hard Light (see right).
  • This creates a bright and saturated background instead of our previous pastel colored one. However, we have lost much of our interesting texture from the middle of the image.
  • Bright and saturated fantasy background.
    Bright and saturated fantasy background.
  • Sample a color from our saturated background and add new smoke textures as appropriate.
  • Add appropriate texture to our new saturated background.
    Add appropriate texture to our new saturated background. Click on image to get an enlarged version.

In addition to using layer blending, we may also adjust the hue, vibrance, and saturation of our image to get a different colored background (Image >> Adjustments). The Photo Filter option can also be very useful.

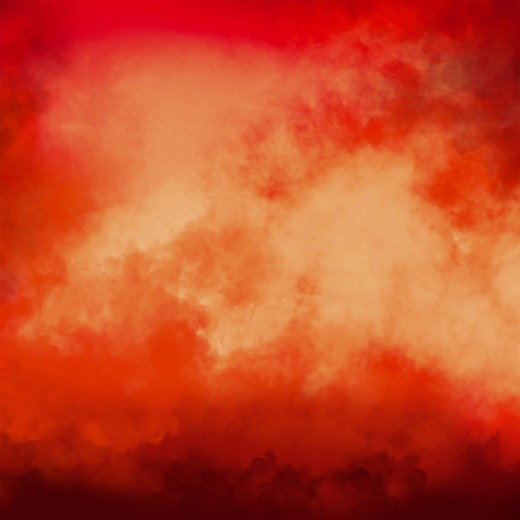
Created a red sky by adjusting hue, vibrance, saturation, and photo filter.
Created a red sky by adjusting hue, vibrance, saturation, and photo filter. Click on image to get an enlarged version.

Make a Fantasy Background Step 5 – Add Moon and Stars

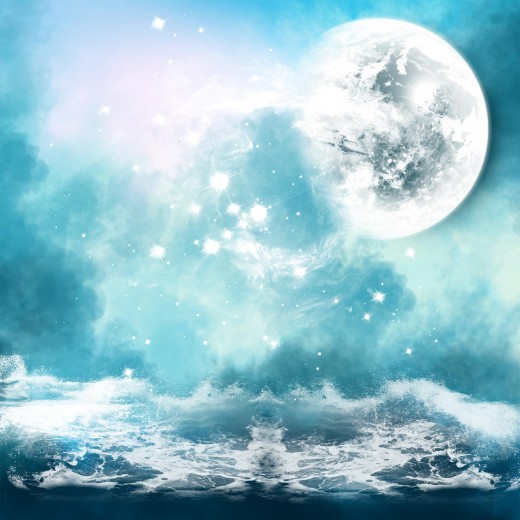
Finally we just need to add some objects to our fantasy background which may include a moon, some stars, and some ocean waves below.

Add a moon, some stars, and some ocean waves below.

All the above were added using Photoshop brushes. We may purchase brushes, download free brushes, or create our own moon and stars. There are a fair number of tutorials for creating these heavenly bodies.

Here is a fantasy piece created with our completed fantasy background.
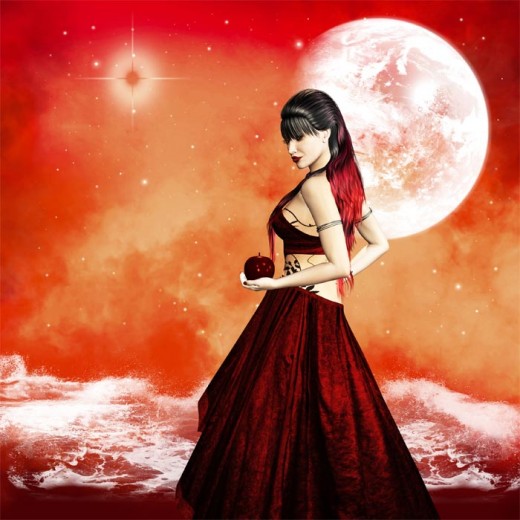
How to Make a Fantasy Background - Blue Sky, Stormy Seas

Check Out the Latest Sales at Daz3D

daz sale banner
DAZ Studio FREE 3D MODELS AND SOFTWARE

Leave a Reply Cancel reply

Your email address will not be published. Required fields are marked *

Comments

  1. Lisa says

    May 4, 2016 at 1:09 pm

    Great tutorial, thanks! However, I have limited blending options when I get to that step and I can’t figure out why. I’m using Photoshop CC 2015. I have another question for you, what color settings do you use? Should I be using 8, 16, or 32 bits per channel?

    Reply
    • Lisa says

      May 4, 2016 at 1:21 pm

      Oh, I think I just figured it out! Yay Google. I’ve been using 32 bits per channel. Once I switch to 16 it’s working now. I got so frustrated yesterday, started over about 5 times before I gave up. I’m still curious about color settings though, and what I should have the RGB set to. I read a bunch of different articles on it yesterday.

    • shibashake says

      May 4, 2016 at 1:59 pm

      I save my render files mostly into JPGs (for smaller files), so I use 8 bits per channel. This article has a good explanation on pixel depth.
      http://photography.tutsplus.com/articles/bit-depth-explained-in-depth–photo-8514

      I also compress my image files for the web in the end, so 8 bit works well for me. I don’t usually get obvious banding patterns, so I go for the smaller file size and better load time.

    • Lisa says

      May 4, 2016 at 1:24 pm

      Heh, I was following your Combining Iray lights in Photoshop tut last week, and couldn’t get it to work right either. I betcha it was because of the 32 bits per channel I was working in. Gonna go back and follow that tut again. Can’t thank you enough for all your tutorials and insights. So much fun to follow your work.

    • shibashake says

      May 4, 2016 at 2:08 pm

      You are very welcome. Btw. I also made the Shiba Glow action available to all Tier 4, and added a new softening action too. πŸ˜€
      https://www.patreon.com/posts/shiba-glow-orton-5396373

      It is good to know that the options are different with 32 bit. What in particular didn’t work? I should put a note in there somewhere so it is clear.

    • Lisa says

      May 4, 2016 at 6:23 pm

      lol, I already grabbed your actions πŸ˜‰ Thank you! I really like them. So if I use 32 bit, Blending Options only allow me to select Normal, Dissolve, Darken, Multiply, Darker Color, Lighten, Linear Dodge, Lighter Color, Difference, Subtract, Divide, Hue, Saturation, Color, Luminosity. The others are grayed out. Thanks for the link.

  2. Jayne Wilson says

    April 13, 2016 at 5:22 pm

    Wow – thanks for this! Great resource.

    Reply
  3. Marlon Thomas says

    April 10, 2015 at 8:07 am

    Thank you!

    Reply
  4. Grace says

    May 26, 2014 at 4:05 pm

    Hi, good tutorial. However, I am having a few issues trying to follow along. When I tried to change the blending mode to hard light nothing happened. I also noticed that in your tutorial you can see the gradient in the layer window that you can see a preview of your gradient. All I see is white. What could be the reasons why?? I would like to follow this tutorial but I am not able to.

    Reply
  5. Jessica says

    October 31, 2013 at 5:21 am

    Very useful tutorial! I’ve always wondered how graphic artists make such beautiful backgrounds and judging from your tutorial it doesn’t seem too hard.

    Thanks!

    Reply
    • shibashake says

      November 3, 2013 at 9:03 am

      judging from your tutorial it doesn’t seem too hard.

      Yeah, and its a lot of fun. I love Photoshop! πŸ˜€

  6. Werner says

    October 21, 2013 at 6:16 am

    Thank you for the tutorial.

    Reply

Recent Posts

  • Duality of life and death represented by a day of the dead girl with black flowers and butterflies on her headdress surrounded by skeletons. Gothic fantasy woman art. Daz Studio Iray image.What Does Our Art Say About Us?
  • Side by side face comparisons of out-of-the-box Millawa 8 face and skin and multiple tweaked Millawa 8 face and skin.Making Skin Pop with the Daz Studio Iray Uber Shader - Part 2
  • Side by side Victoria 8.1 face comparison of Daz Studio's PBR Iray Skin Shader and the Iray Uber Shader..Making Skin Pop with the Daz Studio Iray Uber Shader - Part 1
  • Item used: VR X01 BYOS Modular by Studio360.3D-Art Contest Winners ~ April 2020
  • Qualifying item used Inside Linday's Daz Studio Iray Scenes by Linday3D-Art Contest Winners ~ March 2020

Recent Comments

  • Side by side face comparisons of out-of-the-box Millawa 8 face and skin and multiple tweaked Millawa 8 face and skin.Making Skin Pop with the Daz Studio Iray Uber Shader – Part 2
    • Adil
      - Hi,I hope everything is good at your end. Please if you can help me with light scene duf file for ...
    • jane
      - I can not write 0.24 or 0.24 after 0. doesnt work. would you share your settings?
  • Duality of life and death represented by a day of the dead girl with black flowers and butterflies on her headdress surrounded by skeletons. Gothic fantasy woman art. Daz Studio Iray image.What Does Our Art Say About Us?
    • Plaiades
      - Dear Shiba,i am a long time admirer of your art and have missed you in the DAZiverse. Over a year ...
    • K Smith
      - Thank you for sharing this, a lot of it resonated with me and I know some of the pain you have been through. ...
  • Side by side Victoria 8.1 face comparison of Daz Studio's PBR Iray Skin Shader and the Iray Uber Shader..Making Skin Pop with the Daz Studio Iray Uber Shader – Part 1
    • Foxy
      - Hi, can you save your settins and share with us?

Copyright © 2023 · Genesis Skins by ShibaShake · Terms of Service · Privacy Policy ·