This article and all of the images within were created by the very talented Brian Sains. Copyright © Brian Sains. Check out his gallery here.
We will need a working version of the Daz Octane plugin installed (full or demo). This can be downloaded at www.otoy.com. Please note – if you are using the demo version then image size is restricted and will be watermarked, and you will not be able to access the material database. If you are not familiar with Daz Studio Octane, this introduction article will give you an overview.
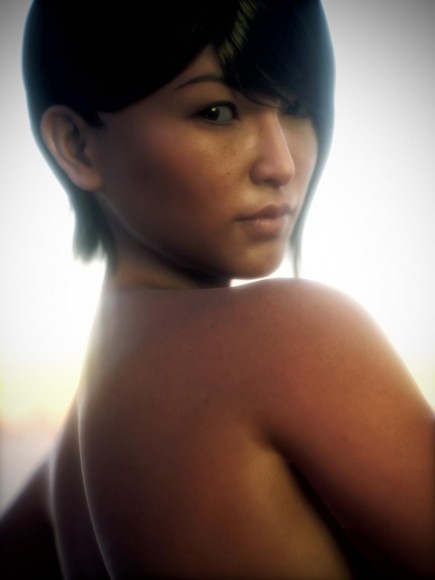
In this tutorial, I will use the Mei portrait image below as an example.
- Start by downloading this .duf file.
- Open Daz Studio. If the plugin is installed correctly, you should have the following icons in your toolbar

- Make sure the icon on the right is set to ‘Duf’ (click on it to cycle through the options) – this setting will make sure that all Octane settings and materials from the Duf file are loaded (Manual loads no Octane settings, Auto will try and build materials based on the settings within Daz).
The left icon is for the Main Octane Settings, the middle opens the render viewport. - Unzip and open the SkinShader.duf file you just downloaded. You should find a simple scene with a Sphere primitive. If you open the render viewport the sphere will be rendered, but will be quite dark and not look very much like skin at the moment.
- Now import a model – I have used Genesis 3 model (Mei Lin 7) in this example but you can use any model you have. Note that the available surfaces will be different for earlier generation models, but the same principles will apply – e.g. Torso in Gen 3 is Head, neck, hips etc. in Gen2. For best results try and use a model that has a diffuse map that is photo-referenced, and not hand painted – Mei Lin 7, Olympia 7, Michael 7 and Michael 6 are good examples.
- With your chosen model loaded, open the Octane Settings window, and select the materials tab.
- Now apply the skin material to the model – click and drag SkinShader from the left and drop it on the Face surface. Apply the same material to the Lips and Ears. You can now delete the sphere from within Daz Studio. It should now look like this:
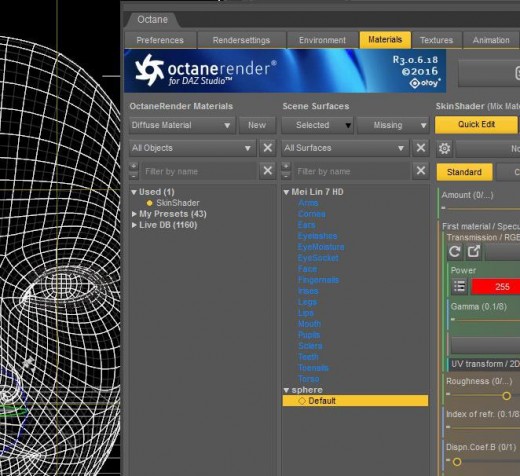
The left part lists all available/used materials, the middle part lists current scene models with their available surfaces. When you select a surface a yellow dot will show you which material is attached.
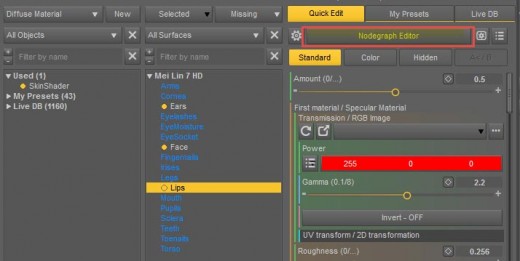
Now you have the material applied open the render viewport. It will still look a little dark and not skin like yet. We need to add a few more things to the material using the Nodegraph Editor (highlighted with a red rectangle in the image above).
Exploring Our Octane Skin Material
When rendering an object using a PBR (physically based renderer) like Octane, the material needs to replicate its real world equivalent. With skin this involves creating layers for the deep scatter (blood vessels), hypodermis & dermis (fatty tissue), and epidermis (the outermost layer). At the very least I feel you need the first and last if you want that lovely red translucency (scattering) in the ears.
One way is to generate independent layers on the model (each with its own material), but this is cumbersome and from my experience does not add anything. I prefer to generate all the layers within one material.
I do this by combining different nodes. Octane has four primary nodes – Diffuse (solid matt surface), Glossy (solid shiny surface) and Specular (clear or transparent surface). The fourth is a Mix Node where you can combine two or more of these surface nodes.
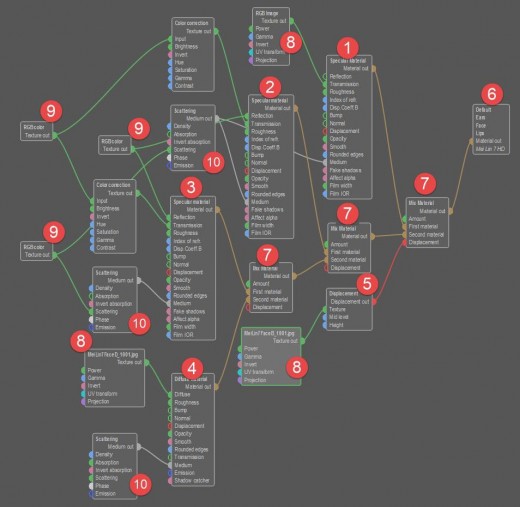
The above is the node structure of the skin material I used in the Mei portrait. Nodes 2 & 3 are adapted from the amazing skin material developed by TonySculptor (freely available in the Octane library) . I have added the other nodes around it, and they loosely represent the layers of skin as follows:
- Specular Material (blood vessels, or deep scatter)
- Specular Material (skin mid-layer)
- Specular Material (skin mid-layer)
- Diffuse Material (skin surface)
- Displacement map (add texture and definition to the surface)
- Output node – the item/s that the material is applied to
- Mix material node – used to combine two material nodes
- Image node – used to place an image within a marterial
- Colour node – used to set an RGB/Greyscale setting to a node
- Scattering node – used to set the scattering parameters for specular or diffuse nodes
In isolation, each of the five nodes will look like the following (Figure 6 is all combined):
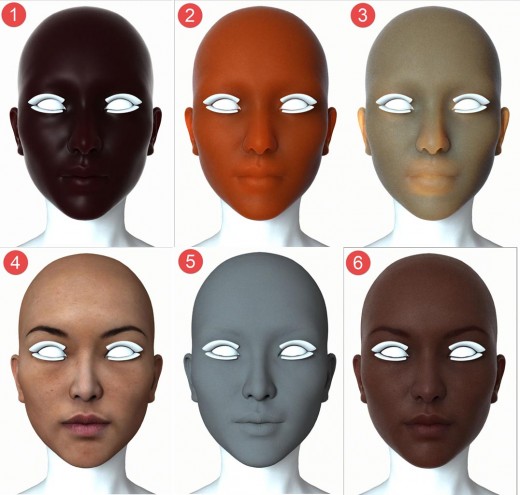
The additional nodes in the skin material are:
Note however, that our current skin material does not contain any texture maps. We will need to put in appropriate texture maps according to the nodes described above.
In particular, there is a Diffuse map in the 4th picture – let’s go ahead and put that into the skin material. Select the RGB Image node connected to the Diffuse node. The following settings should appear on the right of the editor:
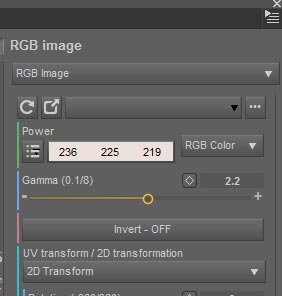
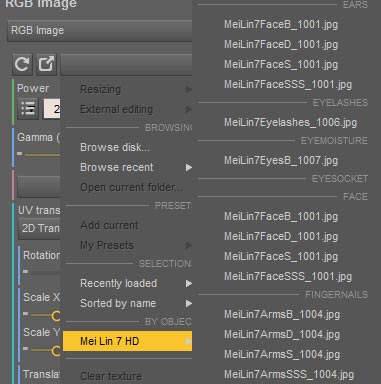
It’s all set to receive the diffuse map – simply select the drop down list and either Browse to the diffuse map location, or (if loaded) from the map list that is generated (in this example, the maps available for Mei are offered). I want the MeiLin7FaceD_1001.jpg image.
Now let’s return to the Material tab and generate two more skin materials – one for the torso, and one for the arms. Right click on the SkinShader material and Copy as new material.
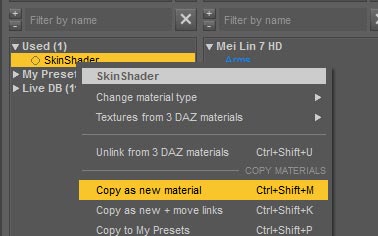
A copy will be created in the unused section (blue – not assigned). Now drag this material over to the torso surface to assign it. With the torso selected, open the Nodegraph editor and change the diffuse map we set before to the appropriate Torso diffuse map image. The RGB node should now look something like this.
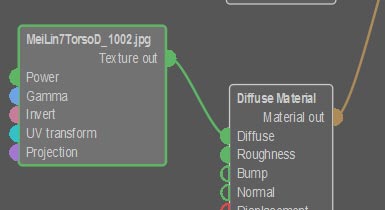
Repeat this again for the arms. We can ignore the legs and nails as they will not be visible. Your completed skin material list should look like this:
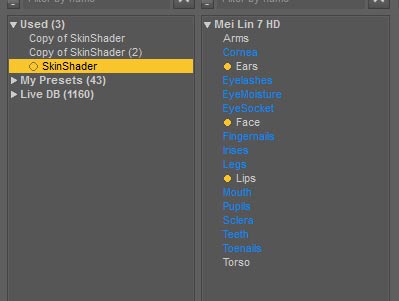
You can right click each material and rename it if you wish, always useful when scenes get more complicated. You can also save them as pre-sets so they are available in other projects.
We Are Done!
Congratulations! You have just created a Daz Studio Octane skin material. Open the render viewport again, and the image should start to look more like skin now.
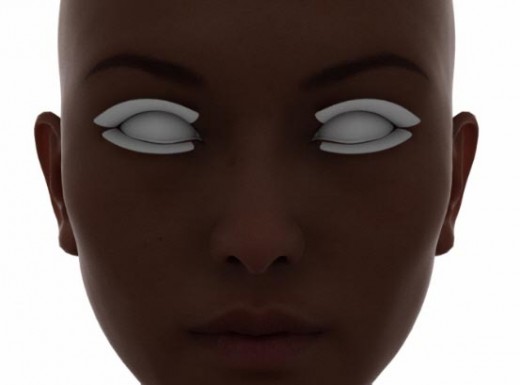
To transform this image to a finished portrait, we will need to work on setting up displacement, lighting the scene and then setting up the camera. We will discuss how to do this in our next Octane tutorial.

This article and all of the images within were created by the very talented Brian Sains. Copyright © Brian Sains. Check out his gallery here.


Thank you for the eye and hair tips Brian. I will give them a try.
…and thanks again for creating this Octane tutorial. 🙂
This is magnificent!
Thank you for taking the time to put this tutorial together.
BTW. Do you have any material tricks for Octane render eyes or hair? A tutorial on these items would also be greatly helpful.
Thanks again. 🙂
Hello Johnny! This terrific tutorial is written by Brian Sains (Sainsy). He has done some great stuff with Octane. I will pass your wonderful comment on to him. 😀
Hey Johnny
Thank you also for taking the time to leave such amazing feedback. These are my first ever tutorials, so it means so much to hear they have been useful 🙂
Eyes, teeth and clothes are a big weakness for me – why most of my models are naked and don’t smile much 😉 To start with the eyes, do a search for the ‘Clear Cornea’ material in the database and use for the eye reflection and eye moisture. I then load an iRay material in for the eyes and auto-convert them. The ‘tonysculptor sclera’ material in the database is also good, but a bit dark as soon as you add any texture.
Hair – I would definitely recommend the Redspec hair shader, and use them in conjunction with the amazing OOT hair shaders. This might make a nice tutorial for the future as it is fiddly
Many thanks again and best wishes
Brian