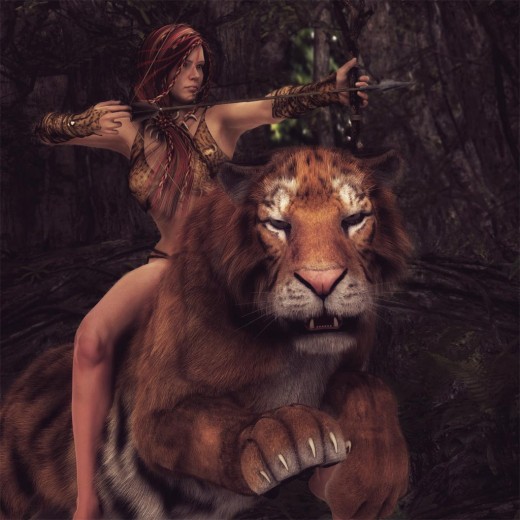
In the image below I combined together a riding pose at the bottom and an archery pose at the top. By combining these two poses together, I was able to create a more unique render, without too much effort.
Doing so will also allow us to significantly expand our pose repertoire, simply by just using our existing poses in new ways.
In this tutorial, I talk about how I combine poses in Daz Studio. It is quite simple to do, and I was able to start generating interesting fantasy art with it, even as a Daz Studio beginner.
How to Combine Poses in Daz Studio
To pose the Jungle Warrior figure in the image above,
- I first applied a horse riding pose.
- Next, I placed her properly on top of the tiger.
- Then, I open up my figure (Olympia 6) node in the Scene panel.
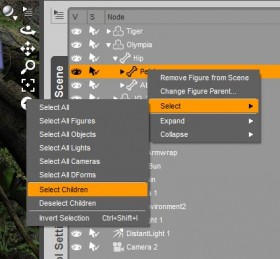
- I select the Pelvis section, right click, and choose the Select All Children option (see right). This selects the pelvis, right and left thighs, all the way down to the feet.
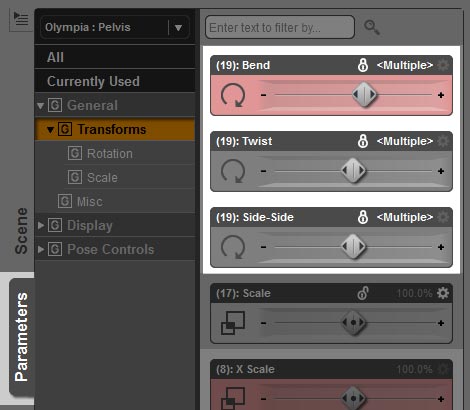
- After making the selection, I open the Parameters tab and lock the values for Bend, Twist, and Side to Side. This locks my figure pose from pelvis downwards (see below).
- Now, when I apply poses to my figure, only her upper body will be affected. I am now free to try out various archery poses until I find one that fits. Some tweaks may be necessary to make the resulting pose look natural.
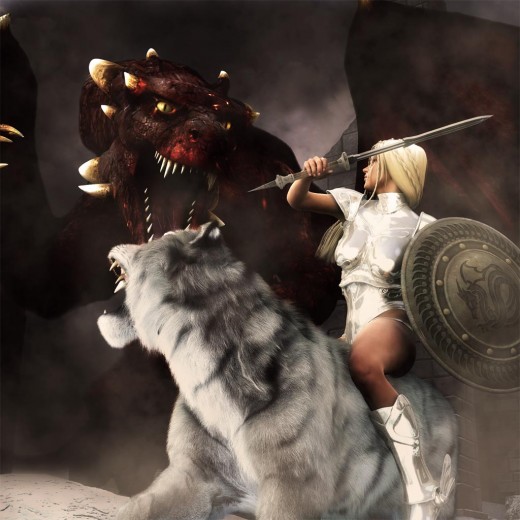
Finally, I get a cool and unique pose of an archer girl riding a tiger. Below, I use the same process to create a sword wielding warrior girl, riding on a Siberian Tiger, while battling a fierce dragon.
How to Pose Only One Part of a Figure
Another nifty trick is to lock an entire figure, then only release a small part, for example a hand or leg for posing. To do this-
- Right-click on the root of a figure, and choose Select Children.
- Go to the Parameters tab and select the Transform option.
- Lock the values for Bend, Twist, and Side to Side, similar to what we did before. This will lock the pose of the entire figure.
- Finally, we select the section of the figure we want to alter (e.g. right arm).
- Right-click and choose Select Children.
- Unlock the values for Bend, Twist, and Side to Side.
- When we apply a new pose, it should only affect the right arm of our figure.
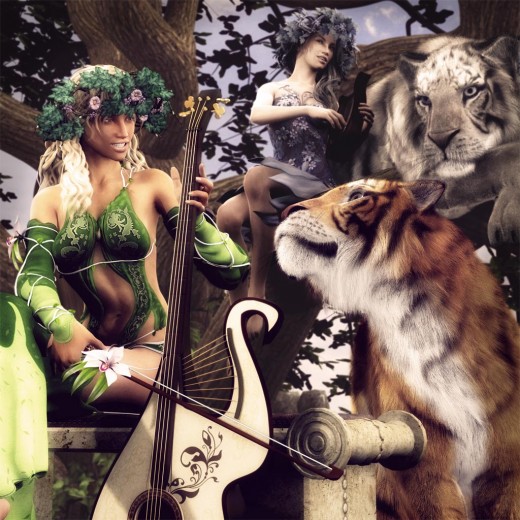
For example, in the One Sweet Song image below, I used this process to pose my summer girl’s arms so that she is properly holding the cello.
How to Zero-Out Only One Part of a Figure
Suppose I just want to zero out an arm all the way down to the fingers.
- Right-click on the target arm, and choose Select Children.
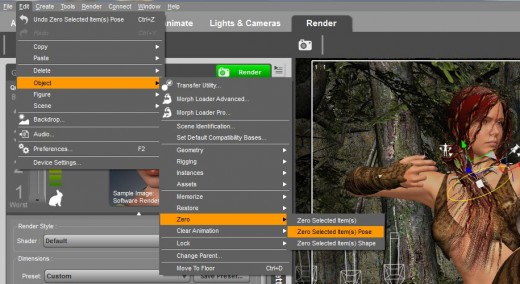
- Go to the Edit menu at the top of the Daz Studio interface. Then select Object >> Zero >> Zero Selected Item(s) Pose.
Saving Partial Poses
We can save partial poses by drilling down on our selected figure, and just picking the parts that we want to save. For example, suppose I just want to save the bow-grip pose of my figure.
- I would select the target parent figure in my scene.
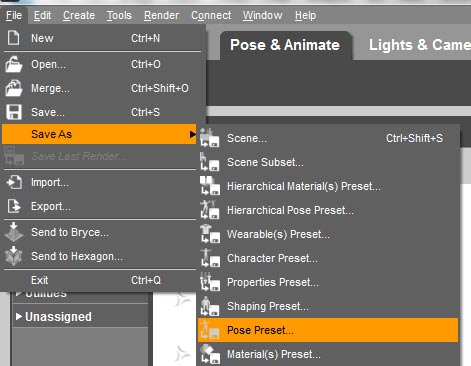
- I go to File >> Save As >> Pose Preset.
- I type in my pose present filename.
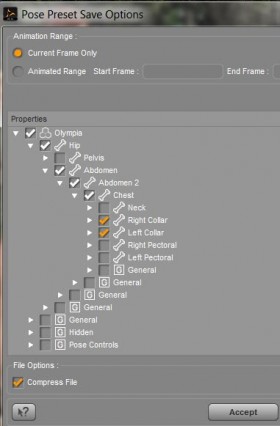
- After this, I get a pop-up menu titled Pose Preset Save Options. I deselect Olympia, and then drill down on the figure until I get to the parts I want to save. In this case, I only want to save the pose of both arms so I select Right Collar and Left Collar.
- Once I am done selecting the parts of my figure I want to save in my pose present, I click on the Accept button. This saves out a partial pose.
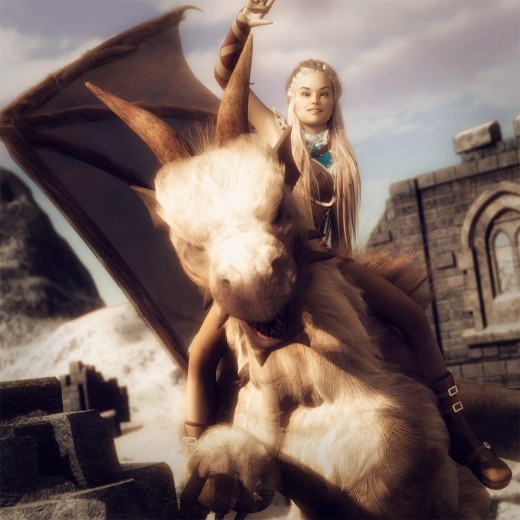
Finally, below is another combined pose with a girl riding on a dragon, and waving goodbye before she takes off.
