Think, Draw, Art!

for art lovers

  • Home
  • Gallery
  • Contact
  • Recent Articles
  • Article Categories
    • Daz Studio
    • 3D Art
    • 2D Art
    • Contest
You are here: Home / 2D Art / How to Add Glow to Daz Studio Images Using Photoshop

How to Add Glow to Daz Studio Images Using Photoshop

We are a Daz3d affiliate and we use affiliate links in our pages.

by shibashake 6 Comments

Adding glow can significantly enhance a Daz Studio image. Glow helps to make our images look more realistic, by softening up our lights and simulating a natural atmosphere. In this tutorial, I describe how I add glow to my Daz Studio images using Photoshop.

I use the Piano Bar scene (shown below) to illustrate how I do this. In this scene, there is very strong light coming in from behind the figure through the windows of the building. This light also creates interesting patterns on the table surface of the bar, which makes for a fun lighting environment.

The scene uses Bar Interior by Soulless Empathy and the Sultry Noir Bundle.

Woman sitting on top of a black piano in a bar. Warm light glow coming through the windows.
How I Add Glow to My Daz Studio Images

How I Add Glow to My Daz Studio Images

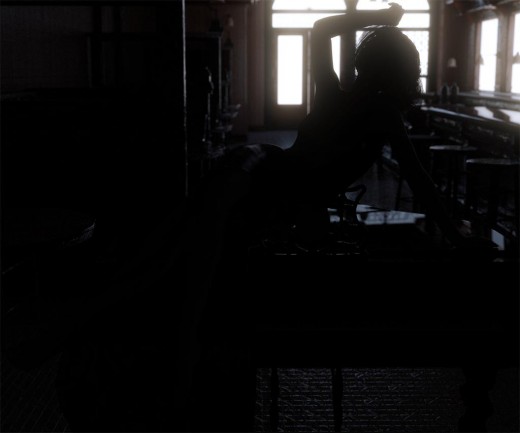
  1. I start, as usual, by creating my standard light layers in Daz Studio Iray. This includes an IBL (Environment Map), Key, Fill, and two Back lights. Here is a more detailed tutorial on my Iray lighting process.
  2. Next, I want to create an outside glow layer using just my Environment Map light (IBL). Therefore, I open my IBL light layer in Photoshop.
  3. I right-click on my IBL layer and choose Duplicate Layer. I change the name of my duplicate layer to Glow Base.
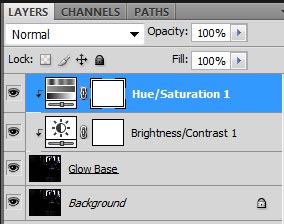
  4. Screenshot of my Photoshop layers after adding adjustment layers to my Glow Base layer.
    My layer stack after adding Brightness/Contrast and Hue/Saturation adjustment layers to my Glow Base layer.
  5. I select my Glow Base layer and do Layer > New Adjustment Layer > Brightness/Contrast. I click on Use Previous Layer to Create Clipping Mask so that the adjustment only applies to my Glow Base layer.
  6. I also do Layer > New Adjustment Layer > Hue/Saturation (with clipping mask).
  7. Now I can control both adjustment layers to properly set my glow base. In general, I want to set Contrast very high so that I enhance the highlights in my original image. By changing Brightness, I can increase or decrease the area of glow.
  8. Make sure to check the Use Legacy option in the Brightness/Contrast adjustments area.

    This will allow us to make the brighter areas much brighter and the darker areas much darker, thus clearly separating out our glow spots. Note however, this is not an option we want to generally use because it causes loss of image information. This article has more a comprehensive discussion of the Use Legacy option.

    Screenshot of my Glow Base layer after making contrast/brightness and hue/saturation adjustments.
    My Glow Base layer with contrast 100, brightness -60, and saturation -100.
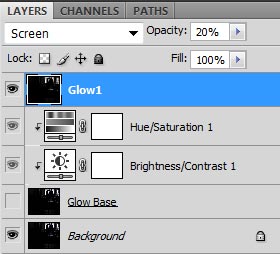
    Screenshot of my first glow layer (Glow1) with blend mode set to screen and opacity set to 20%.
    Creating my first glow layer (Glow1) from my Glow Base layer.
  9. After I am done adjusting my Glow Base layer, I duplicate the combined image by doing Ctrl+Shift+Alt+E. I name the new layer Glow1 and turn off the visibility of the Glow Base layer.
  10. I select my Glow1 layer and do Filter > Blur > Gaussian Blur. I set my Gaussian blur radius to 10 pixels. I set my Glow1 layer blend mode to Screen. I set my layer opacity to 20%.
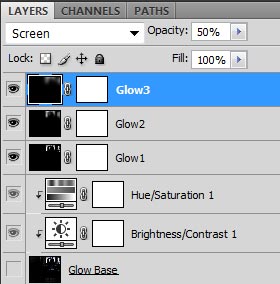
  11. Screenshot of my three glow layers with increasing Gaussian Blur and increasing opacity.
    My Photoshop layer stack after creating all three glow layers.
  12. I duplicate my Glow1 layer and call it Glow2. I do Filter > Blur > Gaussian Blur and set my Gaussian blur radius to 50 pixels. I set my layer opacity to 30%.
  13. I duplicate my Glow2 layer and call it Glow3. I do do Filter > Blur > Gaussian Blur and set my Gaussian blur radius to 120 pixels. I set my layer opacity to 50%.
  14. Now I can control the amount of glow in my image by changing the opacity level of my three glow layers.
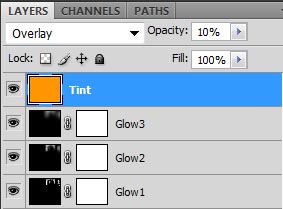
  15. Screenshot after adding in a tint layer, with blend mode set to Overlay and opacity set to 10%.
    Give my glow a warm tint to simulate sunlight.
  16. Finally, I want to give my light a warm tint so that it simulates sunlight. To do this, I create a new layer (Layer > New > Layer). I select the new layer and fill it with an orange color (Edit > Fill). I set blend mode to Overlay, opacity to 10%, and name the new layer Tint.
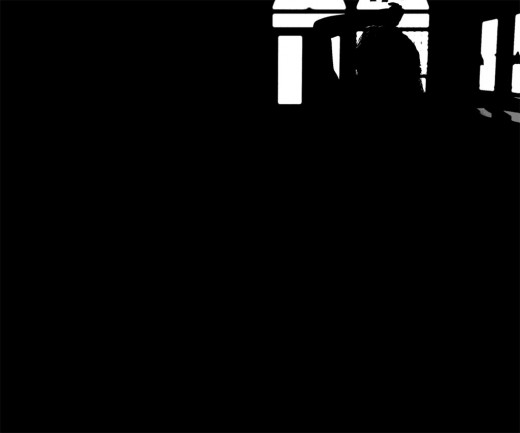
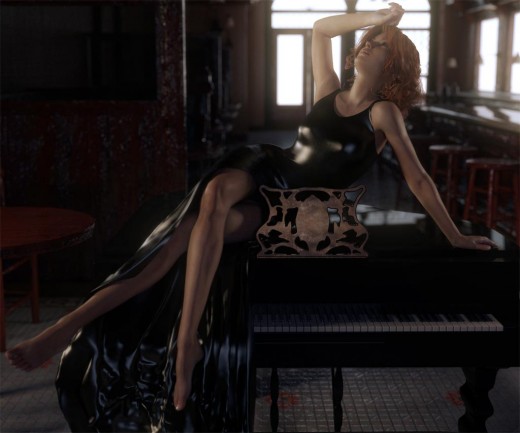
Screenshot of my IBL/Environment Map with glow added in Photoshop.
Final image of my IBL/Environment Map light with three layers of glow applied. Glow1 = 50%, Glow2 = 60%, Glow3 = 70%.

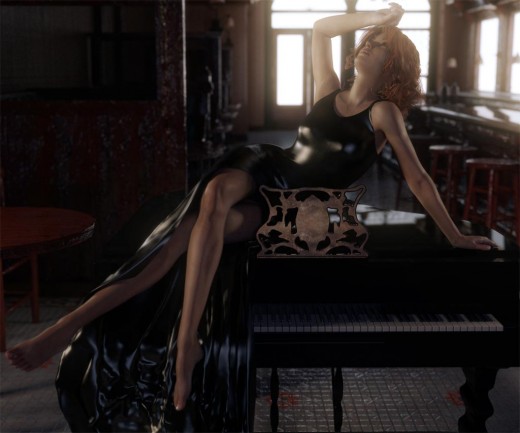
The reason why I added glow separately to my IBL layer is so that I can control the level of glow there separately from the rest of my other lights. However, we can also apply glow to all our lights at once. In the image below, I applied my glow technique to the full Piano Bar scene (with all lights present).

Screenshot of the finished image after applying glow to all the lights in my Piano Bar scene.
Applied the above glow process to all the lights in my Piano Bar scene.

Note that while the front glow is appropriate, the back glow is a bit weak. To add that extra punch to our composition, we want to increase the glow coming in from our IBL layer. Since we have already created a separate glow layer for this, we can simply make a merged copy and paste it into our full scene. Set the blend mode to Screen, and adjust opacity to suit our liking. In this case, I set opacity to 50%.
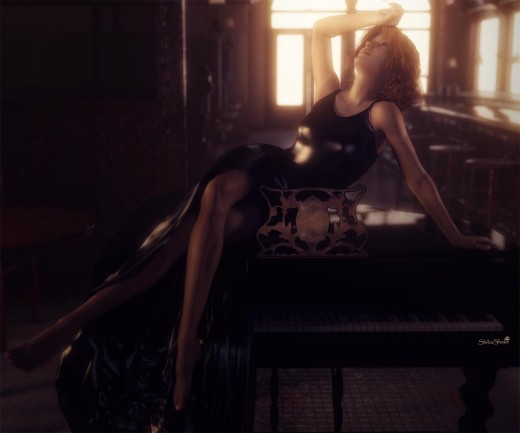
Screenshot of image after adding extra glow from our IBL layer.
Added extra glow for the IBL light layer.

Check Out the Latest Sales at Daz3D

daz sale banner
DAZ Studio FREE 3D MODELS AND SOFTWARE

Leave a Reply Cancel reply

Your email address will not be published. Required fields are marked *

Comments

  1. TC says

    October 7, 2019 at 3:54 am

    Used your glow technique on this. Would appreciate your feedback if you’ve the time. Don’t worry about hurting my feelings. Please be frank. 🙂

    https://ibb.co/6thj6rG

    Reply
    • shibashake says

      October 9, 2019 at 5:55 pm

      Truth is, I am totally rubbish at critiques. General impression is that I like the glow and warmth on the girl. Probably would be good to see some extra light on the man, maybe some stronger back light, to separate him from background.

  2. Shinji says

    June 29, 2019 at 2:20 am

    Hi,
    I tried a few attempt using your well written tutorial. Please help me review if the results below are reasonable, or need a stronger setting.

    https://imgur.com/x9h0IaV

    Reply
    • shibashake says

      June 30, 2019 at 10:55 pm

      Looks good to me! 🙂

  3. shinji says

    June 28, 2019 at 2:42 am

    Hi,
    I’m trying to create a base art similar to what you have, so that I can practice the steps as you have written in details.

    I’m trying to figure out the prerequisites which you have already created but not specifically mentioned here. That would be:
    a) The ‘normal’ layer that was rendered. I’m under the assumption that this is rendered with only interior light, similar to a standard 3 point light. This one you will specifically render with ‘Scene only’, is that correct? To avoid additional light spillage from the windows.
    b) Another question would be, how bright do you set the interior lights to be, is there a chart, a guideline you follow, or just eyeball it and then correct the exposure through PS or Lightroom.

    Reply
    • shibashake says

      June 30, 2019 at 10:55 pm

      a) The 3 point lights I render singly and yes as ‘Scene only’.
      b) I mainly adjust light intensity when I combine them in PS.

Recent Posts

  • Duality of life and death represented by a day of the dead girl with black flowers and butterflies on her headdress surrounded by skeletons. Gothic fantasy woman art. Daz Studio Iray image.What Does Our Art Say About Us?
  • Side by side face comparisons of out-of-the-box Millawa 8 face and skin and multiple tweaked Millawa 8 face and skin.Making Skin Pop with the Daz Studio Iray Uber Shader - Part 2
  • Side by side Victoria 8.1 face comparison of Daz Studio's PBR Iray Skin Shader and the Iray Uber Shader..Making Skin Pop with the Daz Studio Iray Uber Shader - Part 1
  • Item used: VR X01 BYOS Modular by Studio360.3D-Art Contest Winners ~ April 2020
  • Qualifying item used Inside Linday's Daz Studio Iray Scenes by Linday3D-Art Contest Winners ~ March 2020

Recent Comments

  • Side by side face comparisons of out-of-the-box Millawa 8 face and skin and multiple tweaked Millawa 8 face and skin.Making Skin Pop with the Daz Studio Iray Uber Shader – Part 2
    • Adil
      - Hi,I hope everything is good at your end. Please if you can help me with light scene duf file for ...
    • jane
      - I can not write 0.24 or 0.24 after 0. doesnt work. would you share your settings?
  • Duality of life and death represented by a day of the dead girl with black flowers and butterflies on her headdress surrounded by skeletons. Gothic fantasy woman art. Daz Studio Iray image.What Does Our Art Say About Us?
    • Plaiades
      - Dear Shiba,i am a long time admirer of your art and have missed you in the DAZiverse. Over a year ...
    • K Smith
      - Thank you for sharing this, a lot of it resonated with me and I know some of the pain you have been through. ...
  • Side by side Victoria 8.1 face comparison of Daz Studio's PBR Iray Skin Shader and the Iray Uber Shader..Making Skin Pop with the Daz Studio Iray Uber Shader – Part 1
    • Foxy
      - Hi, can you save your settins and share with us?

Copyright © 2023 · Genesis Skins by ShibaShake · Terms of Service · Privacy Policy ·