This article and all of the images within were created by the very talented Brian Sains. Copyright © Brian Sains. Check out his gallery here.
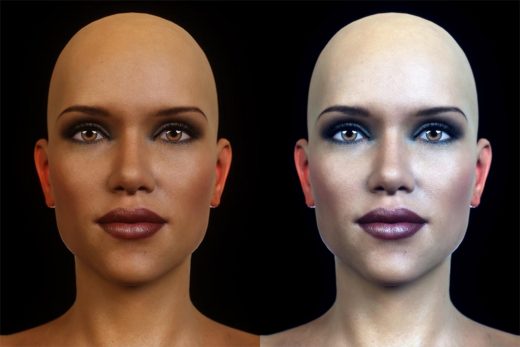
In my final tutorial of this series, I will cover the postwork steps I generally use in Photoshop when working with skin. As with using Octane, this isn’t a recipe, and some tweaking is required depending on the render I am working on. That being said, I do routinely use these steps as a starting place with nearly all my renders.
They are also quite rudimentary – I only started learning Photoshop shortly after learning Daz Studio – so less than a year. Therefore, this will be a tutorial mainly aimed at beginners.
Step by Step Photoshop Postwork Process
To start off with – you can download the original 4k render here.
You can also download the .duf file for the Daz scene. You will need to own Olympia 7 and Olympia 7 HD Add-On (if you don’t, go buy her, she’s fantastic). I tweak my skin textures on almost every new render, so this scene includes a newer skin texture from the one included with the previous Octane skin tutorial.
Go ahead and open the original render file in Photoshop (if you use Gimp, almost all of the following can still be applied)
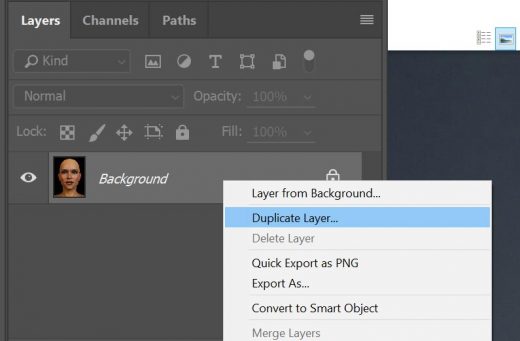
- Duplicate the Background layer – right click layer > duplicate layer > OK
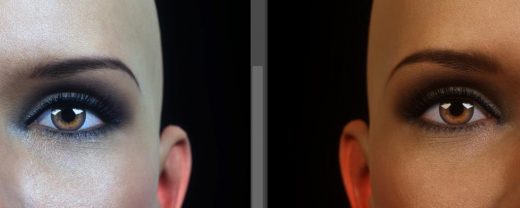
- From the main menus select image > auto tone. Then repeat with image > auto colour. Select Edit from the main menu and fade auto colour to 80%
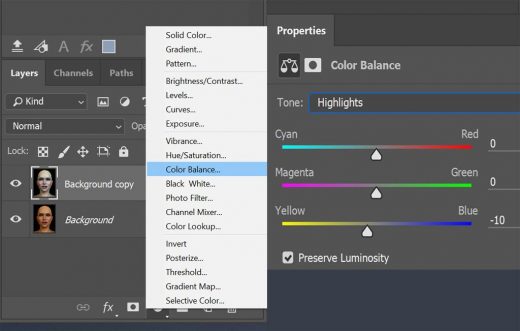
- Create a new fill/adjustment layer using the circular icon underneath the layers, and select colour balance. With the new window that opens choose the shadows tone and adjust the yellow/blue slider towards the blue by no more than 10. Repeat by setting the midtones towards cyan by 10, and the hightlights towards yellow by 10.
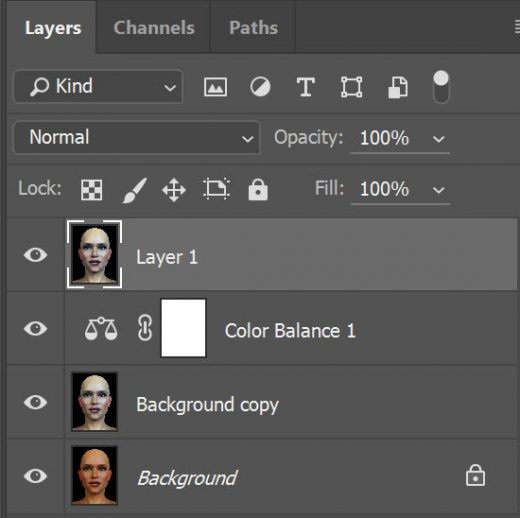
- Create a new merged layer (shift+ctrl+alt+e) – this will copy all of the layers and merge them into a new layer, thus preserving the original layers if you need to return to them (this is called a non-destructive workflow). Your layers tab should now look like this:
With the newly created layer selected, select image > adjustments > brightness/contrast. Set the brightness to -70 and the contrast to +70, then OK. Now select image > adjustments > hue/saturation and set the saturation to -40.
Select filter > blur > gaussian blur, and set the radius to 8.
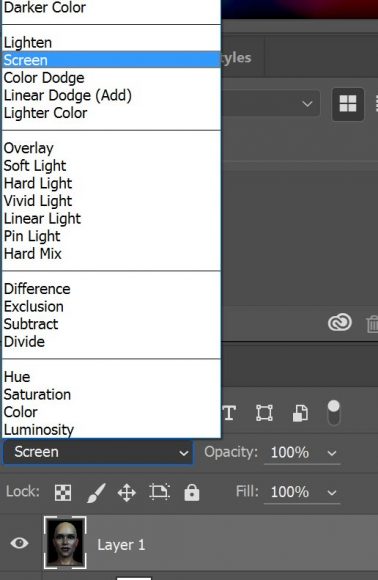
Finally select the blending mode (drop down menu at top of layer window) to screen, and set its opacity to 50%.
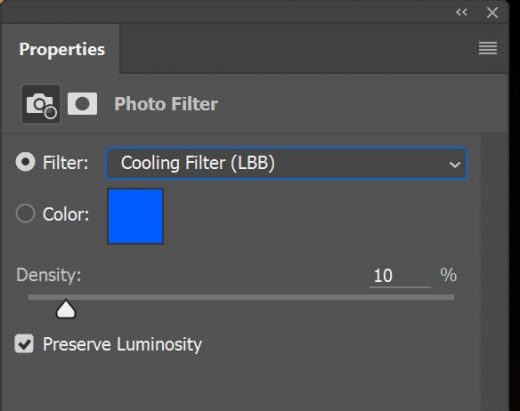
- Create a new fill/adjustment layer like in step 3 but this time select a photo filter layer. Set the filter to cooling filter (lbb) and adjust the density to 10%
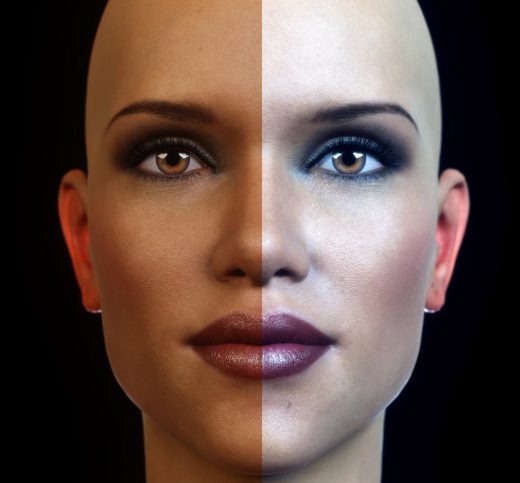
- The final step is to create a new merged layer (shift+ctrl+alt+e) like in step 4. Perform a final auto-tone like in step 2.
Summary
I hope you have found this series of Octane tutorials useful, and they have encouraged you to try the octane demo. Octane is a very different beast compared with iRay, and it can be a daunting prospect when you first open it up and see the node based system.
However, you can get pretty good results by using the auto-convert texture tool or using pre-built shaders from the library. To get the most out of it though, you really need to overcome your fears and dive into the nodes – where with time you will be rewarded with a plethora of ways to enhance your renders. And did I say, it is really, really fast!
This article and all of the images within were created by the very talented Brian Sains. Copyright © Brian Sains. Check out his gallery here.
