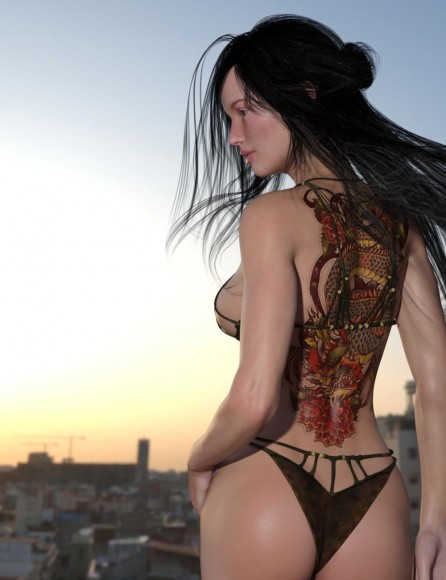
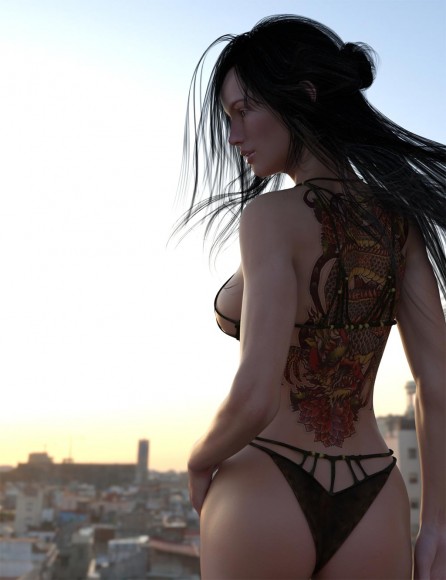
I am starting to play around more seriously with the Iray renderer in Daz Studio. The great thing about Iray, is that we can create realistic looking renders without having to muck around too much with lighting. Another really big advantage of Iray, is that we can get pretty good render results in a fairly short amount of time, if we have a good nVidia graphics card.
In this tutorial, I will describe how I started out with Daz Studio Iray, and how I created a simple realistic render from start to finish. This tutorial is intended for Iray beginners who are already familiar with the standard Daz Studio Interface.
If you are only starting to use Daz Studio, then check out this Daz Studio for Beginners tutorial.
1. Creating the Scene and Materials
I create the scene in the same way as I would in regular Daz Studio. However, one very important aspect of getting a scene to look right in Iray is in using the right materials.
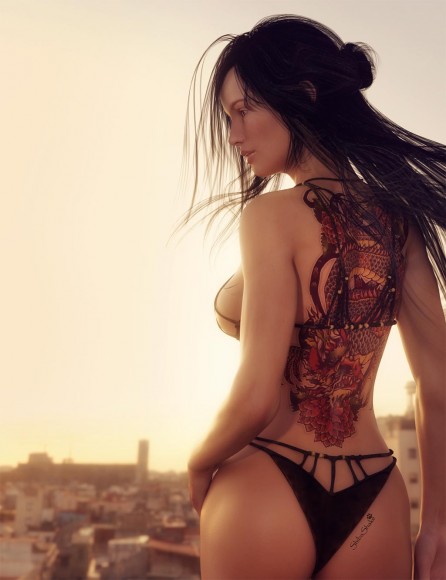
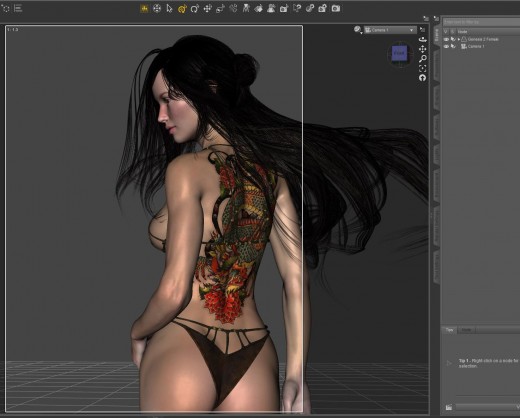
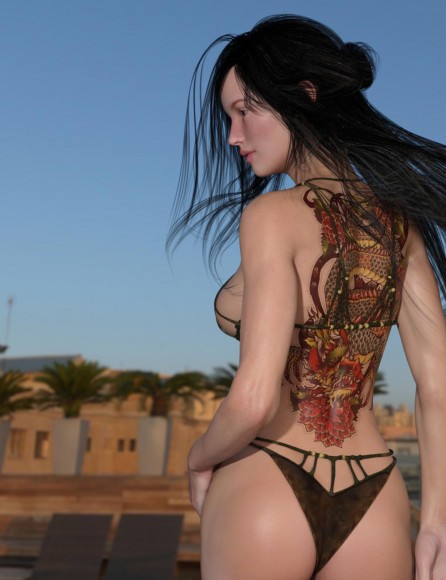
In this tutorial, I make a very simple scene with a female figure and a dragon tattoo on her back. She has interesting, long, wind-blown hair and is wearing a bikini. I make sure to use a highly detailed and realistic looking skin on my human figure. In this example, I am using the Bambolina skin by Tempesta3d. I also get pretty good results from the Daz3d Elite skins that I got from Michael 6 HD Add-On and Victoria 6 HD Add-On.
This simple scene allows me to focus on learning the basic material and lighting aspects of Iray.
After I finish creating my scene, I need to apply Iray shaders to all of my scene objects (figures, clothing, props, environment). One simple way to do this, is to –
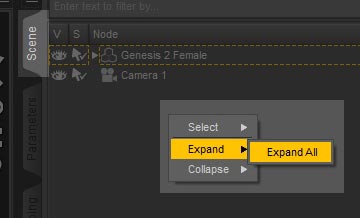
- Click on the Scene Tab. Then, right-click on the Scene pane, and select Expand > Expand All.
- I do Ctrl-A to select all items in my scene pane. Then I Ctrl-click to un-select lights and cameras.
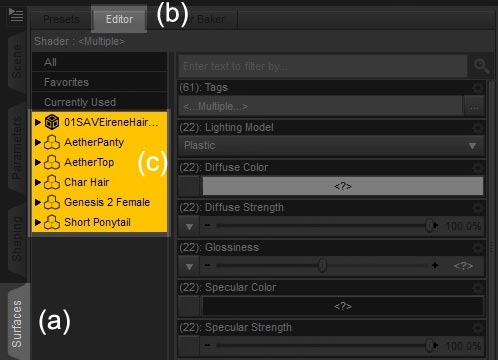
- Next, (a) I click on the Surfaces Tab, (b) click on Editor, and (c) select all the objects within it
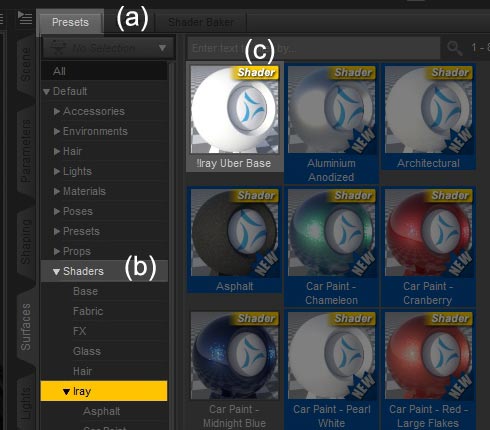
- Now, (a) I click on Presets. Within the Presets pane, (b) I select Shaders > Iray. If you are not using the Smart Content functionality within Daz Studio, you can get at the Iray shaders through your Content Library by going to Shader Presets > Iray > DAZ Uber in your Daz Studio directory. Finally, (c) I double click on the !Iray Uber Base shader to convert all the objects in my scene to using Iray shaders.
- Note that Iray also has specialized shaders for glass, metal, water, fabric, leather, and more. At this point, I identify any special surfaces in my scene that fall into these categories, and assign them accordingly.
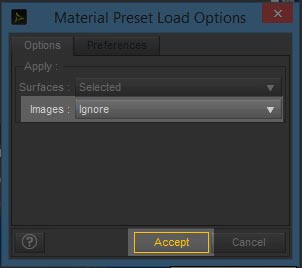
- I do Ctrl-double click if I want to keep the original textures of my selected objects. This will open up a pop-up window. I select Ignore, and then click on Accept.
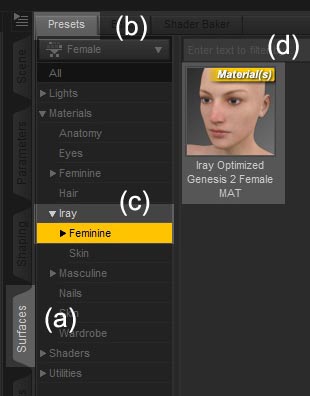
- There are also specialized shaders for Genesis 2 males and females. These shaders will use the existing skin textures that we have on our figure. Therefore, I select my female figure in the Scene pane, (a) go to the Surfaces Tab, (b) click on the Presets button, and (c) select Materials > Iray > Feminine. (d) I double click on the Iray Optimized Genesis 2 Female MAT to apply this shader on my figure.
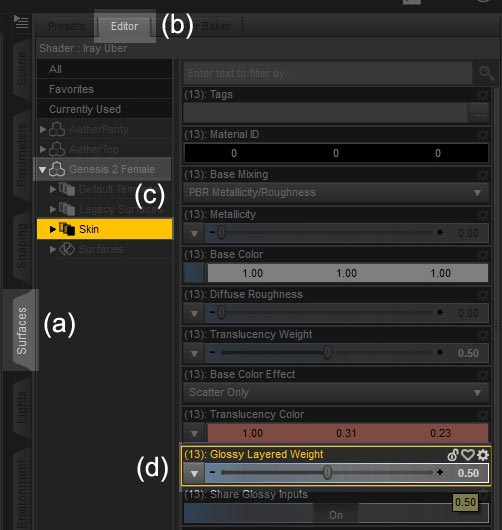
- Finally, I tweak my surfaces as needed. I find that the Iray skin shaders are a bit too glossy/shiny for my taste. Therefore, I select my G2F figure, go to Surfaces > Editor. Open up Genesis 2 Female and select Skin. Then I change the Glossy Layered Weight to 0.5.
This finishes the material setup of my simple scene. As I learn more of Iray and create more complex scenes, I will probably want to do more here to get the best render results. However, that is for a later time and tutorial. 🙂
2. Iray Image Based Light
A very simple way to light my Iray scene in a realistic way, is to use an image based light (IBL). To do this –
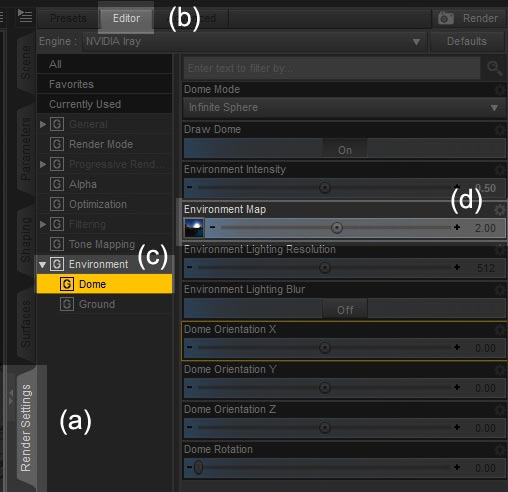
- I go to (a) Render Settings > (b) Editor.
- I select (c) Environment > Dome.
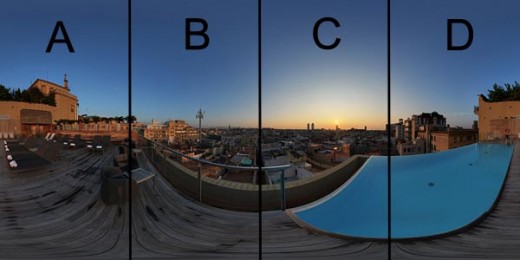
- I assign an appropriate image to light my scene in the (d) Environment Map control. In this example I am using Barcelona Rooftops that I got from sIBL Archives. That is a great site to get free IBL images. Dimension Theory also has some great HDRI packs in his DAZ store.
As far as I can tell, the Environment Map slider also controls IBL intensity. For example, rendering at Environment Intensity 1 and Environment Map 1 gets me the same result as rendering at Environment Intensity 0.5 and Environment Map 2.
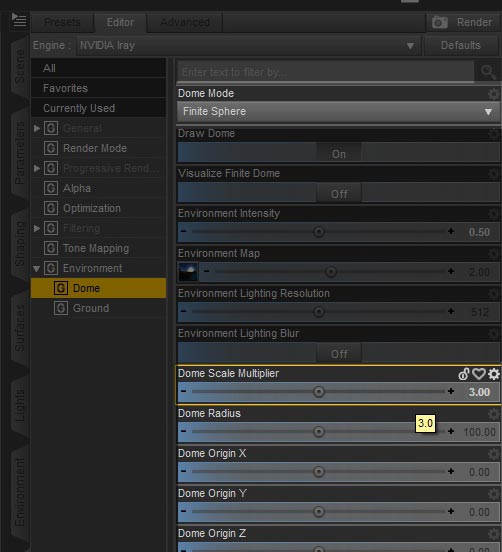
- Next, I set Dome Mode to Finite Sphere so that I have more control over how the image map is used in my scene. When I do this, additional controls appear including Dome Scale Multiplier, Dome Radius, and Dome Origin XYZ.
Dome Scale Multipler and Dome Radius allows us to scale our environment map, and Dome Origin allows us to reposition our environment map. I set Dome Scale Multiplier to 3 so that I can see more of the image in my scene.
- Next, I want to position the sun in the image map at the right place so that it casts a nice rim or silhouette on my figure. To do this I need to better understand how my image maps onto the 3d-dome in my scene.
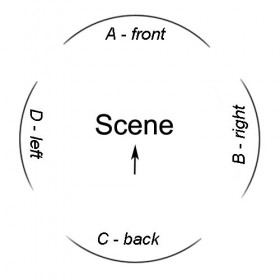
A simple way to think about it is to divide our image into four segments.
- Section A maps to the front of the dome (what we see in the scene).
- Section B maps to the right of the dome.
- Section C maps to the back of the dome.
- Section D maps to the left of the dome.
Essentially, the left of the image maps onto what we see, and then it goes clock-wise from there.
The sun in our image is in section C (back of the dome). Therefore, to move it to the front of my image, I rotate the dome by 180 degrees. This gives me a nice rim or silhouette effect on the left of my figure. Rotating 270 degrees shifts the light-rim to the right of my figure.
However, it looks like there is also too much light in my scene, and there does not seem to be enough contrast between the rim set by the setting sun and the rest of the image. This is because of the camera headlamp.
In particular, if there are no lights in the scene (other than the IBL), Daz Studio automatically adds a headlamp to the top of the camera to light our scene. This headlamp is adding too much light and reducing the contrast of the IBL that I want. To turn off this headlamp, I simply add a Daz Studio light to the scene, and then turn that light off. In this way, the only light source is my image based light (IBL).
3. Postwork and Done!
Finally, I add some glow to my image, tone it to a more orange sunset color, lighten the figure a little bit, and I am done!
With an nVidia GeForce GTX TITAN X card, I was able to render a 1000×1300 version of the image in under 5 minutes.
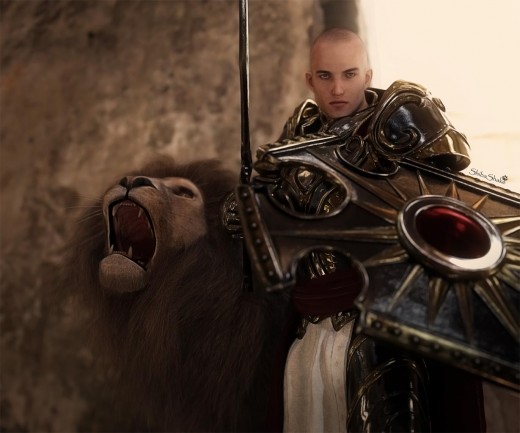
Below is a more complex second scene that I made. I set the armor to the Iray iron shader (keeping my original textures), and I exported the lion hair as OBJ from the Look at My Hair plugin.
