Making human skin look good can be very challenging. When I look at my hand, I see lots of different things. There are creases on my skin, I can see some of the veins and redness below, and the surface has many different skin-toned hues. Depending on pose, I can also see the shape of bones and muscles. If I tilt my hand and catch the light differently, the look changes.
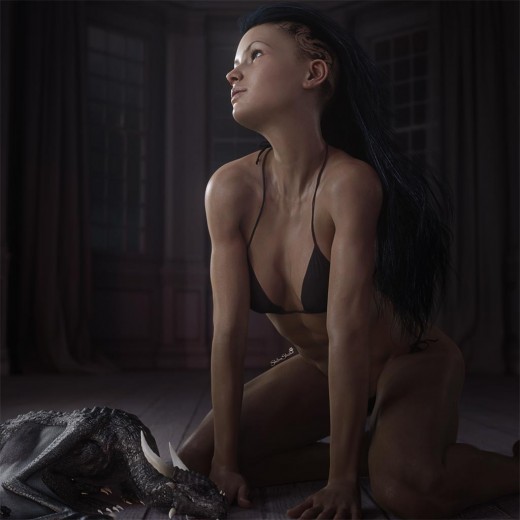
Good looking skin need not be fully realistic. When I look at skin from the paintings of Boris Vallejo, the thing that jumps out at me is that it is many hued. This helps to create muscle definition on the body.
My goals for skin are as follows –
- I want to emphasize differences in skin hues, which will in turn accentuate body shape and definition.
- I want to emphasize creases and bump details on skin.
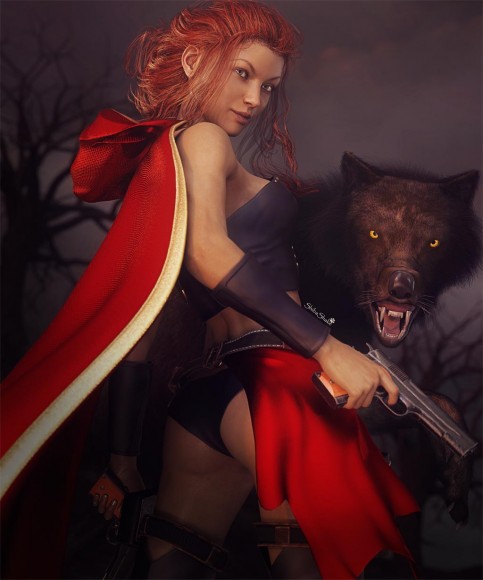
The Dragon and Girl image below gives a rough idea of what I mean. Full image can be viewed here.
The first thing I realized when I started playing around with skin shaders in Daz Studio Iray, is there is no one “right way” to shade skin. The way skin looks in a render will depend on three key things –
- The skin textures used. This includes not just the base textures, but also the very important translucency, specular, and bump texture maps.
- The scene lighting. Materials (including skin) interact with scene lights to produce the final render result. Part of getting skin to look good, is to light it well. This tutorial has more on how I light my Iray scenes.
- The shader settings. This is mostly what people talk about in discussions of creating realistic skin and will also be the main topic in this tutorial.
However, shader settings interact with both textures and light to create the end result. This is why there is no single right or best skin shader. Different texture maps will likely require different skin settings and lights to get optimal results. Similarly, changes in skin settings may require different lights, and changes in light may require different skin settings.
Daz Studio Iray Skin Settings
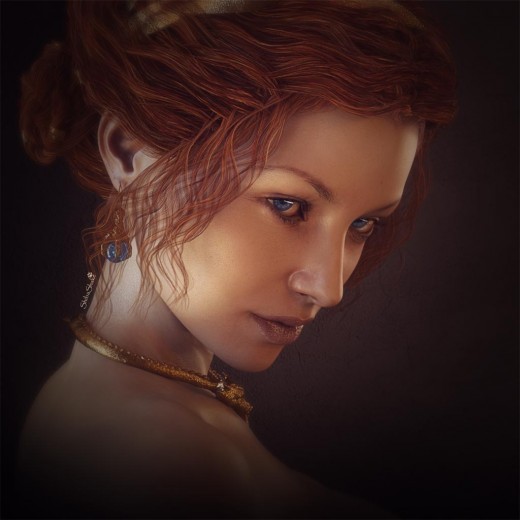
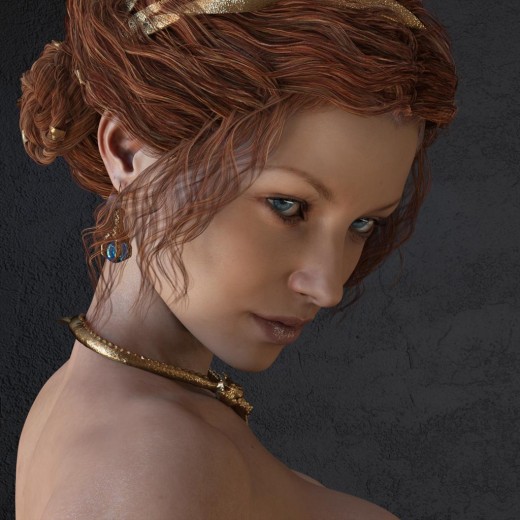
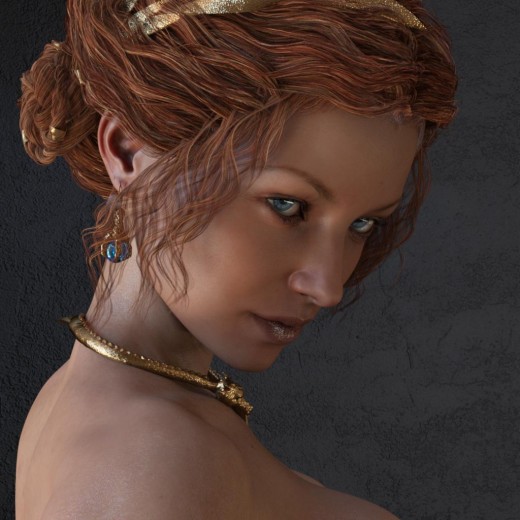
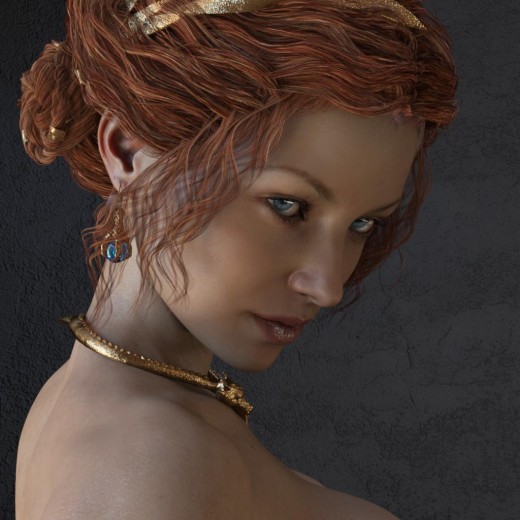
In this tutorial we focus mainly on skin shader settings, with a small discussion on lights. We will be using the simple portrait composition above to illustrate the different skin setting effects. Full skin tutorial image can be viewed here.
For texture maps, we use the Eva 7 base maps throughout. This is because there is nice detail in the translucency, specular, and bump maps, which are all very important in creating good looking skin. In general, I have gotten good results from Daz base figure textures, so those are the ones that I tend to use.
For initial lights, I use the Tropical Ruins image from sIBL Archives. I use the HDR version of the image , and I set the rotation to 220 degrees. I place a darker wall in the background to emphasize my figure’s face.
For shader settings, I start with the initial ones from Eva 7.
1. Translucency Weight
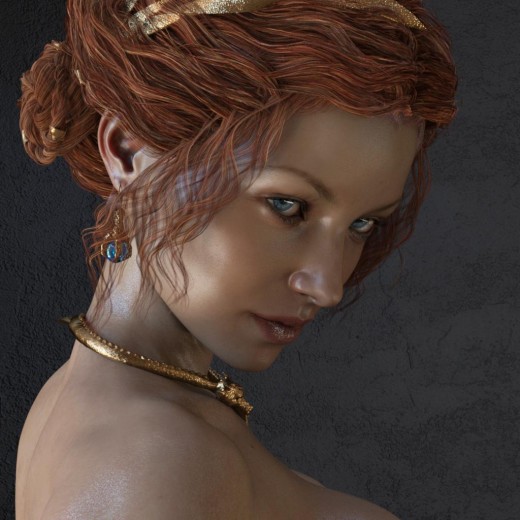
One of my key goals for Iray skin is to have greater differences in skin hues. To that end, I have found that Translucency Weight can be very useful. Currently, Eva 7 skin settings come with two translucency options (medium and high). Medium translucency sets the Translucency Weight to 0.5 and high translucency sets the Translucency Weight to 0.65.
I really want to push skin contrast, so I set my Translucency Weight to 0.8. Since this is a portrait, I select the Face, Ears, and Lips surfaces, and increase the Translucency Weight parameter accordingly. Setting it to 1.0 will cause only the translucency map and color to show through, with none of the Base Map and color, which is not what we want. Instead, we want a mix of the two.
Note that increasing the Translucency Weight in this way, increases the skin contrast but it also makes the face look overly red. In addition, the face looks darker, so we may need to increase the amount of light.
2. SSS Reflectance Tint
One easy way to reduce redness of the skin is to reduce the “red” component of the SSS Reflectance Tint parameter. I right click on the first number, and reduce the red component to 0.7. I also increase the other two components to lighten my skin. In the render below, the face redness has been significantly reduced. This is something that you can play with to get the skin tint that you want. I prefer a more bluish tint, because I always warm up my images later in post (Photoshop).
Note that the SSS Reflectance Tint parameter will only appear if Base Color Effect is set to Scatter & Transmit.
3. Glossy Roughness and Glossy Layered Weight
I can further increase the skin contrast on her face by changing Glossy Roughness and Glossy Layered Weight. In particular, I reduce Glossy Roughness to 0.4 and increase Glossy Layered Weight to 2.0. Both of these, increase glossiness or highlights on the skin.
I greatly emphasize highlights here because it will later get reduced when I increase bump strength. In addition, remember that highlights (specular) will change based on light. More focused light sources, for example a spotlight, will bring out skin highlights, while a more diffuse light will have weaker highlights.
For more general cases where more of the body is shown, a Glossy Layered Weight of 1.0 is probably more appropriate. However, for a portrait, we may want greater contrast as we are zoomed in very closely to the skin. Be careful though, that overly high glossiness can make skin look unrealistic, and have a plastic feel to it.
4. Base Bump
Now that I have significantly increased skin contrast, I move on to increasing skin detail, through the Base Bump parameter.
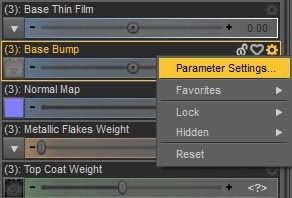
- First, I click on the wheel icon to the side and select Parameter Settings.
- This will open the Parameter Settings pop-up window. I uncheck the Use Limits box for this parameter.
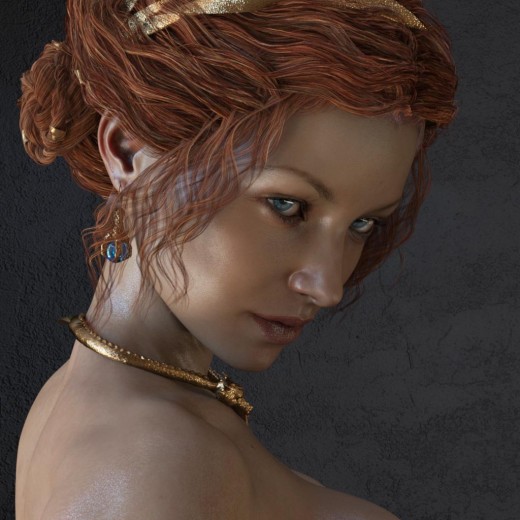
- This allows me to increase bump to much higher values, and I set it to 5.
Note that increasing the bump strength increases the roughness of the skin, which reduces the glossiness effect. Increasing the bump will also emphasize lines on our figure’s face, which ages her. I leave the bump value on my figure’s body as is, because it looks more natural with a lower bump.
5. Set Skin for Arms, Legs, Torso, and Nails
Once I am happy with skin settings for my figure’s face, I replicate those settings on arms, legs, and torso. I set everything to the same values, for otherwise, the seams may become visible where two surfaces connect. The only thing I set differently is the Base Bump strength. I have a higher value on my figure’s face (5.0), whereas I leave it at its default value (1.5) on the torso, arms, and legs.
For nails, I increase the Translucency Weight value by 0.15 (to 0.65), which is the same amount that I increased my skin Translucency Weight. However, the final value will be less than that of my skin. This is natural, as nails are less translucent than skin.
Daz Studio Iray Scene Lights
After creating my new Iray skin shader, I also had to change the way I light my scenes and do postwork. I still use my three point light system, but I have added another back light, and I combine lighting from multiple IBLs or Environment maps.
I like combining both cold and warm lighting, so I generate a cold light layer using DTSol-NightTimeE from Skies of iRadiance – Night Sky HDRIs for Iray, I generate a warm layer using DTSol-SunsetL from Skies of iRadiance – Sunset HDRIs for Iray, and finally one using the more neutral Tropical Ruins HDR.
The cold and warm lights help to bring out the different skin hues and also accentuates my figure’s shape and musculature. I also want there to be enough light to bring out the effects of my new Iray skin settings. This, I get with my Tropical Ruins HDR.
In postwork, I reduce my softening and glow effects, so that I preserve more skin detail. I have also started rendering larger images (minimum width or height of 3000 pixels). In this way, when I reduce the size of my image, I get a sharper picture with more details.
These are my current settings. I will continue to evolve my light setup and skin settings as I render more images, and learn more of what works and what does not.
