There are a fair number of WordPress wedding themes out there, but it is difficult to personalize them to exactly suit your needs.
Here, I describe how you can easily customize your wedding WordPress blog with a variety of image and color options. You can also use your own wedding photographs, or mix and match them with the existing graphics in the wedding theme below.
Picking a good WordPress theme is very important as you want to make a good first impression with your blog visitors.
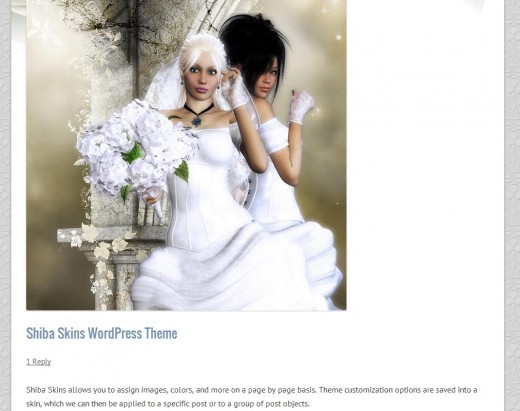
Wedding Themed Images
To create your wedding theme, the first thing to do is to find some compelling wedding graphics or use your own beautiful wedding photographs.
To help get you started, I have included a variety of images that you can use for your wedding themed blog. Just click on the images to view them in full size. Then right click on the pop-up window to save the image onto your computer.
These images are properly sized to fit the Shiba Skins Theme, so you will not need to do any image cropping or resizing to use them in your blog. If you are looking for a wider range of computer generated images, visit Renderosity or generate your own using free 3D models & software.
Once you have collected all the wedding images that you want to use, go back to your WordPress blog dashboard.
Header Wedding Theme Images
Footer Wedding Theme Images
Shiba Skins WordPress Theme
To enable the range of theme customizations described in this article, first download and install the Shiba Skins WordPress Theme.
- Download the Shiba Skins WordPress Theme onto your local computer.
- Log into your blog, and go to your WordPress blog dashboard.
- Click on the Appearance menu on the left of your Dashboard screen and choose the Add New Themes option.
- Click on Upload at the top of your Install Themes screen and choose the zip files that you just downloaded. Then click on the Install Now button. This will install the Shiba Skins Theme onto your blog.
- Once the Shiba Skins theme is installed you will be given the option toActivate it or to Return to the themes menu. You can activate or delete a theme anytime you want by going to the Appearance menu on your WordPress dashboard.

Source: Beautiful Brides Art
Insert the Wedding Themed Images into Your WordPress Blog
To do this, make sure you have the Shiba Skins Theme activated.
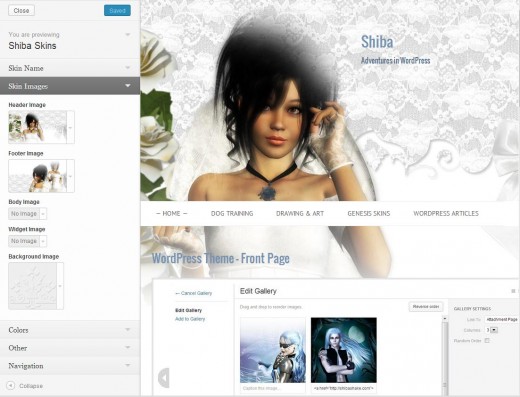
- Go to Shiba Skins >> Add New in your WordPress dashboard.
- There, you will be given the option to upload the header and footer images that you just obtained above. Pick the ones that you like best, or combine them with your own wedding photographs.
- Refresh your blog page and it should be updated with your new wedding images!
- You can come back to the Edit Skin menu at any time to tweak or change the images on your wedding blog.
Customize the Colors on your Wedding Blog
The wedding images provided here go well with a white background. However, you may personalize the colors of your blog to anything you want –
- Go to the Shiba Skins menu on your WordPress dashboard.
- Pick the Wedding themed skin you just created.
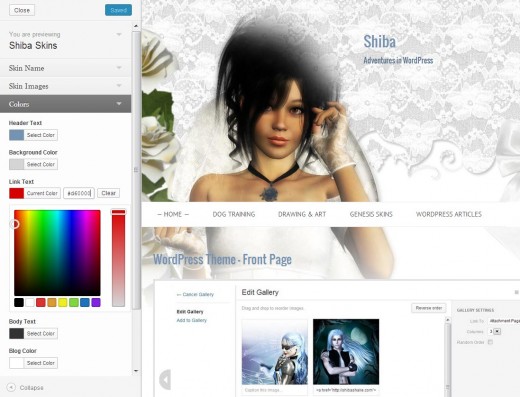
- Open up the Color menu to the left of the interface. This allows you to change the Body Text, Header Text, Link Text, Blog, and Background colors of the skin. To pick a color, just click on the Select Color button of your choice.
- Next, click on the color of your choice on the color palette that will open up below. Clicking on the different colored squares in the interface will select the general color group. Clicking on the color palette itself will select the specific color you want to use. When you do this, the example blog page to the right will change to reflect your new color selection. Try it out. You can test a variety of color choices quickly and easily.
- Once you are happy with your chosen colors, click on the Save button at the top of the screen. This will save your color choices to the skin, and send them to your blog.
- Refresh your blog page and you should see your new color scheme.
Assign Skins to Posts
Skins can be assigned to posts in a variety of ways –
- We can edit the post, and assign the relevant skin using a drop-down menu.
- We can edit a post-category or tag, and assign a skin to the category. In this case, all posts belonging to that category will adopt the skin of its category class.
- We can also assign skins to all posts, all pages, only the front page, and more.
There is much more you can do with the Shiba Skins WordPress Theme such as adjust header and footer heights, assign and use blog fonts from Google, and much more. None of these are necessary, but they offer you the flexibility to extend and customize your blog later on if you desire.

