This article and all of the images within were created by the very talented Brian Sains. Copyright © Brian Sains. Check out his gallery here.
Sub-surface scattering (SSS)
In the introduction to this series I explained how Physically Based Render engines work – simulated light bouncing around interacting with surfaces.
SSS is the process that defines –
- How light passes through a translucent object,
- How it interacts with the properties of that object, and
- How it exits the object (at a different point – hence scattered).
In practical terms, particularly with skin, it is the effect where you see light pass through extremities like the ear, producing a reddening glow.
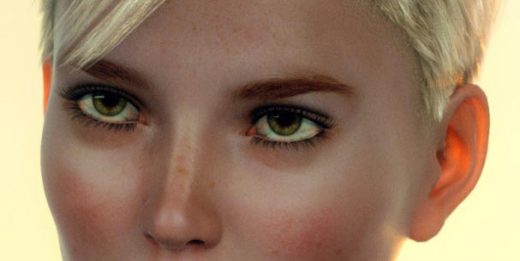
That is about as far as I can take the science, so let’s look at how SSS is controlled within Octane. SSS is applied to a material node using a scattering node, which can be applied to both diffuse and specular materials (but not glossy ones). If you look at the skin shader material in our previous skin tutorial, you will see there is a scattering node attached to all four material nodes (3 scattering nodes, as one is shared between two specular nodes).
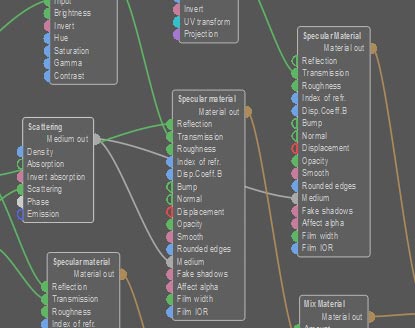
The diagram below shows the three scattering nodes controlling (from left to right) the skin’s deep/mid layer, the mid-layer and the surface layer.
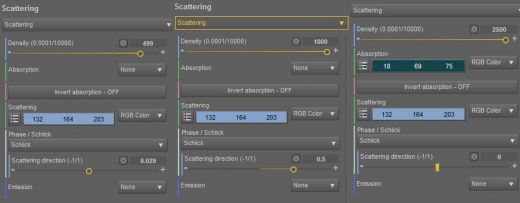
Octane Scattering Node Settings
1. Density
Density controls how fast light travels through an object, the higher the value the faster it travels (a value of 0 would result in no scattering). My interpretation of this is that the higher the value, the deeper light can penetrate a surface. When using other materials, particularly those from the online database, I have found this setting to be very low. It is very dependent on the size of the model, and therefore the scale used within Daz. Normally these materials have been developed for use within other 3d applications with a different scaling system, which is why they tend to be set lower.
2. Absorption
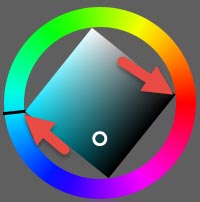
This setting defines which light is absorbed faster, in the case of the 3rd node it’s a green/blue. It took me a while to get my head round this, but essentially the effect is the scattered light will be the opposite of this colour (from a wavelength perspective). The image shown here is from the colour picker within octane – a colour set to absorb blue will scatter as red.
3. Scattering
Scattering is similar to absorption, but defines the speed at which light will be scattered when it passes through an object.
4. Phase/direction
This controls the direction the light is scattered:
- 0 – light scattered the same amount in any direction
- 1.0 – more light continues to travel in the direction it was originally traveling
- -1.0 – light backscatters in the direction it came from
5. Adjusting the scattering nodes
Sadly there is no one definitive setting that will work across all objects. It very much depends on scale, lighting, position, kernel settings and so on. It is very much a case of trial and error, and an area I still need to work on.
Practically, you may not need to worry about this setting too much, for example if the object is distant or if the ears are covered. But if you do need to, it’s a juggling act between getting the right amount of scattering across all skin materials.
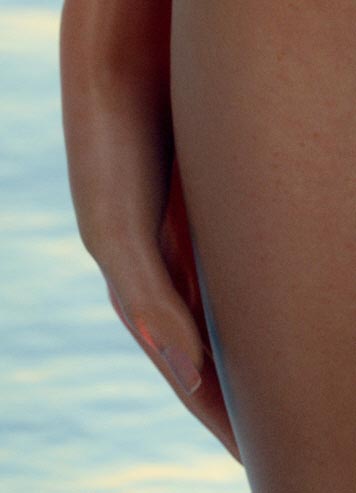
Note – any changes you make to one material (e.g. ears) will have to be adjusted in other skin materials (e.g. arms), otherwise the change will be visible in the UV seams. Consider the girl with the red ear above – she was one of my first attempts at SSS. Now look at her hand …
Light wouldn’t scatter like that through a hand. As a result I tend to pose a model with the hand next to the ear, and then adjust the density (starting with the deep scatter node). Density (from left to right) 1, 250, 500.

Glossiness
The last area I would like to cover regarding the skin material is gloss/reflection. This is for subtle gloss effect, so you wouldn’t use this for a wet skin look, but more for areas like the lips, nails, lacrimals, or eye socket.
Gloss is controlled in Octane using the Roughness setting in both specular and glossy nodes, but is not available in diffuse nodes. The scale between 0 and 1 determines the level – the lower the roughness, the more glossy/reflective the surface.
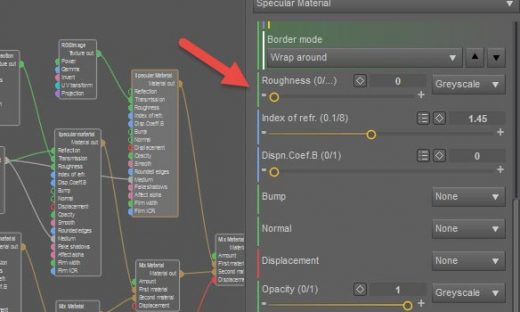
Let’s consider a practical example using the lips. The lips are currently sharing a material with the face and the ears, which is no good as we don’t want a shiny face!
- Return to the Material tab and select the Lips surface.
- Select the material assigned to the lips and copy as a new material.
- Now apply this new copied material to the lips. It now has its own material that we can edit.
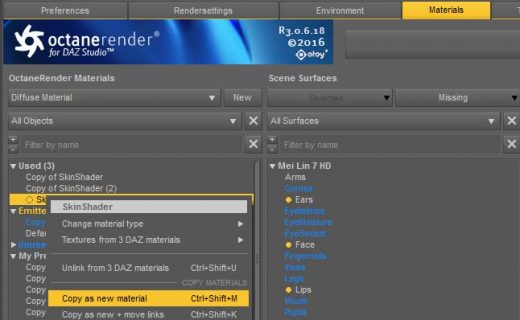
You can get away with this with the lips as they have a clearly defined line between the surrounding face surface, so the seam is less obvious.
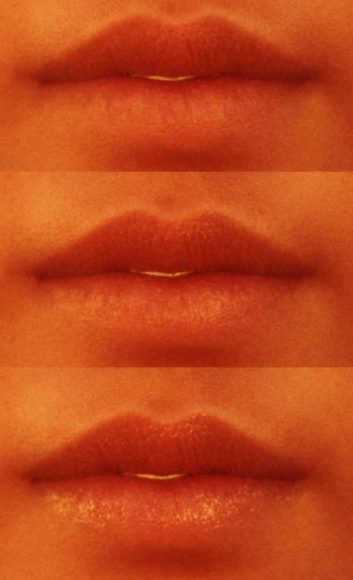
With the newly assigned lip material selected, open the node viewport. I have found, surprisingly, that the best place to adjust the roughness for the lips is in the uppermost scattering node (the one for the deep scatter), which to me, sounds counter-intuitive. The image below shows the lips with roughness set to 500,250 & 0 (top to bottom).
Finishing up in Daz
Octane comes with a free online material database containing 100s of organic and non-organic materials. I used the auto-material function in Octane for the eye-lashes. This feature takes the surface settings from within Daz and tries to convert them into Octane. The results vary, and it struggles with iRay materials (though it is getting better). Within the Material tab, right-click the item and select Create new material > Auto Material.
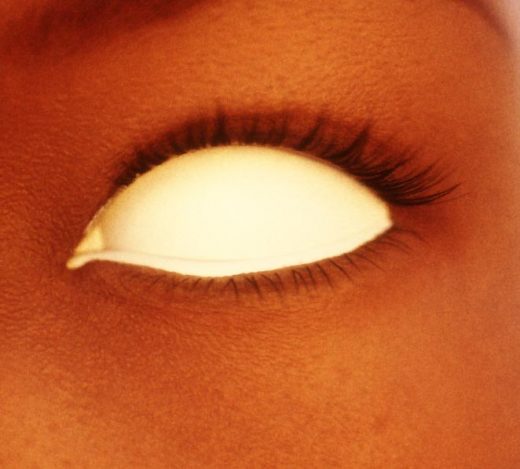
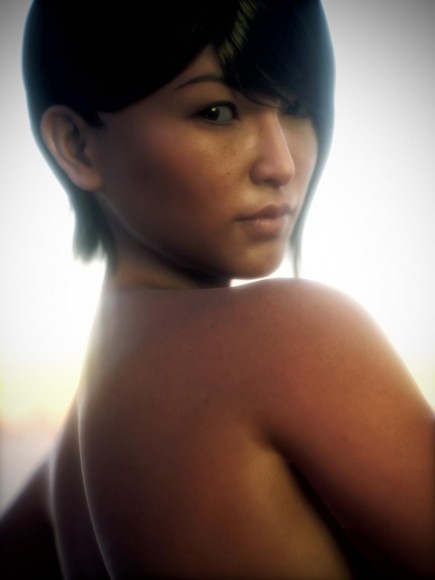
The other materials I used in the Mei portrait are:
- Cornea and Eye Reflection – Clear cornea shader (Octane database)
- Eyelashes – Auto-material
- Iris – RedSpec
- Pupils – RedSpec
- Sclera – TonySculptor Sclera (Octane database)
- Hair (Actual Hair 2) – RedSpec Hair Shader
The RedSpec materials are part of a set purchased from a 3rd Party.
I used the iRay OOT Hair Shaders for colour and transparency maps. I sometimes increase the smoothing value within Daz for hair as well.
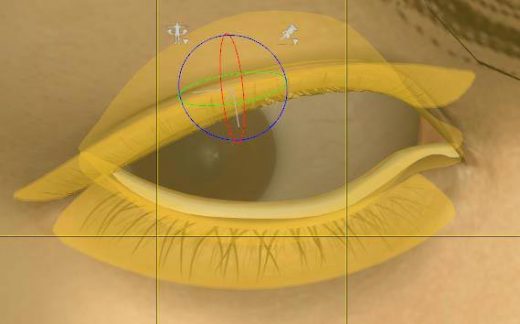
I have always had a real dislike of the Tear object around the eye, which is now part of the eye moisture object in Genesis 3 characters. I remove it in Daz by using the geometry tool.
- Click anywhere on the tear.
- Right-click and do Geometry selection > Select connected.
- With the tear now selected (see image below), you can right click Geometry assignment > Create surface from selected.
- Name it, and then repeat with the other eye.
- I then apply a null-shader (diffuse node with no settings, and opacity set to 0) to the tears, and there you have it, no more tears!
Summary
So that’s it for Daz Studio, Octane, and skin. I still have some work to do, in particular on skin reflection, index of refraction, Fresnel effect, falloff textures and more. I also want to break down the material a bit more and make it more processor efficient.
Having spent so much time on the skin, I also need to work on bringing the standard of my other materials up to scratch. You will notice many of my models don’t smile, simply because I am yet to develop a material I am happy with. Same goes for clothes.
Thank you for visiting my Daz Studio Octane tutorials. Hope you enjoyed them.
This article and all of the images within were created by the very talented Brian Sains. Copyright © Brian Sains. Check out his gallery here.
