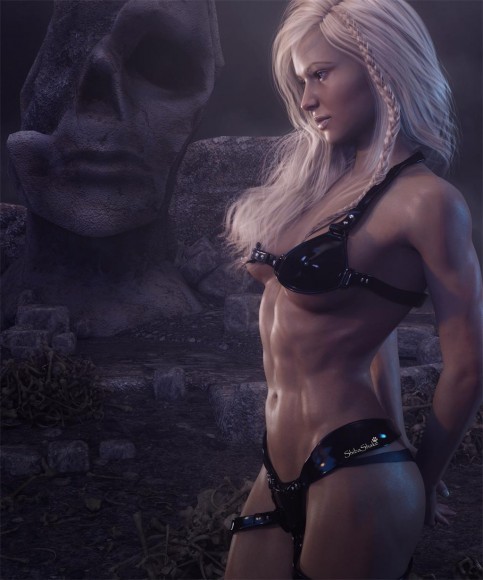
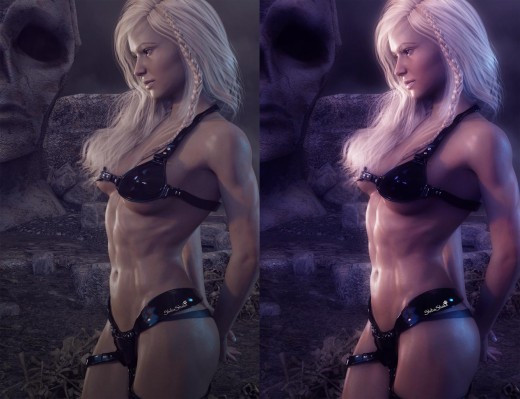
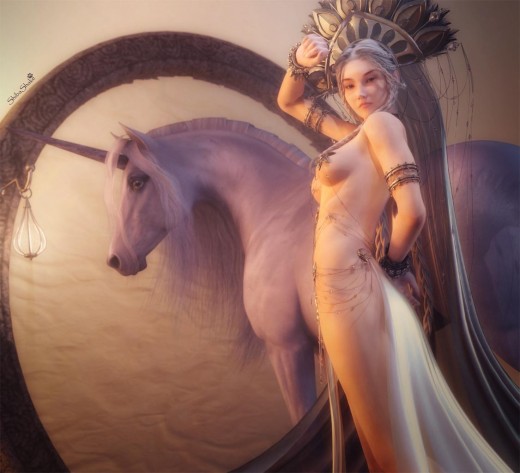
Softening a computer rendered image can make it look more interesting and realistic. However, softening an image will also cause details to be lost. Therefore, as with most things, we want to strike a good balance between the two. How much we soften, will depend in large part on composition, lighting, and artistic style.
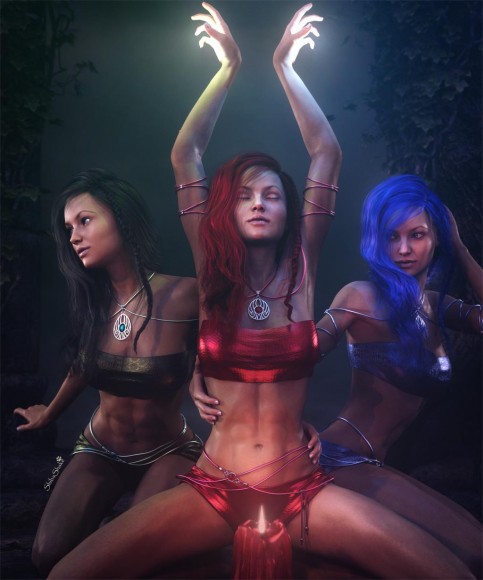
In this tutorial, we focus on softening effects that we get from camera, lighting, and atmosphere. We achieve these effects partly in Daz Studio and partly in Photoshop. We will use the composition below to illustrate the different effects. The background is Sacelleum of Corlyk, the hair is Sapphire Hair, and the outfit is Novariens Holy for V4.
1. Depth of Field
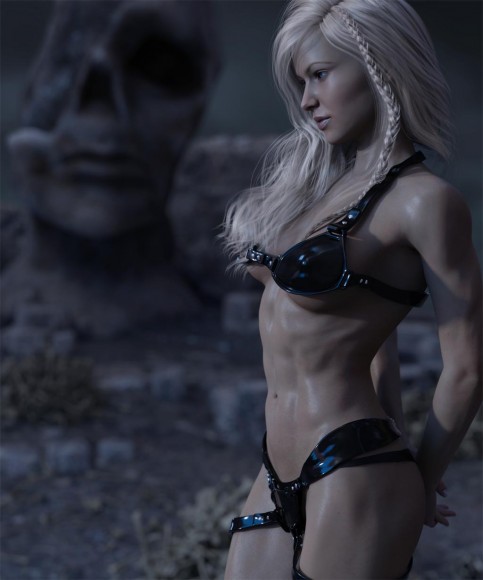
One of the easiest ways to soften our Daz Studio image is by adding depth of field effects. This is a camera effect that keeps objects that are in-focus sharp, and blurs everything else based on distance. For example, in the image below we have camera DOF turned on, with the F/Stop parameter set to 32. We set our camera focus point to be between our figure’s eyes. Notice that based on these settings, our figure is sharp whereas the background elements have been blurred-out.
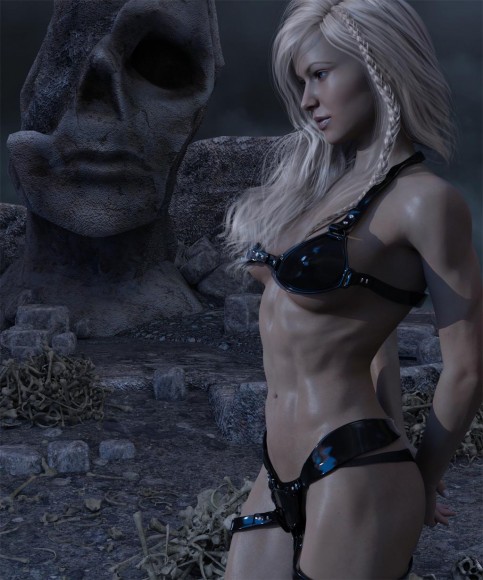
In the next image, we turn off depth-of-field to highlight the differences. Notice that the previous image is much softer because of the blurring effect, however, a lot of the background details (for example on the stone statue) is lost due to this blurring.
One very simple way to properly set camera depth of field in Daz Studio, is to use the framing tool. This great tutorial from Flipmode describes how you can do this.
Note that to get more accurate DOF effects, I add a null point to my scene (Create > New Null), parent it to my figure’s head, and place it right between my figure’s eyes. I can then use this null point as my camera framing point.
2. Mesh Lighs
Another way to soften lighting is to use mesh lights instead of spotlights. Here is a quick and simple way of turning a Daz Studio spotlight into a mesh light.
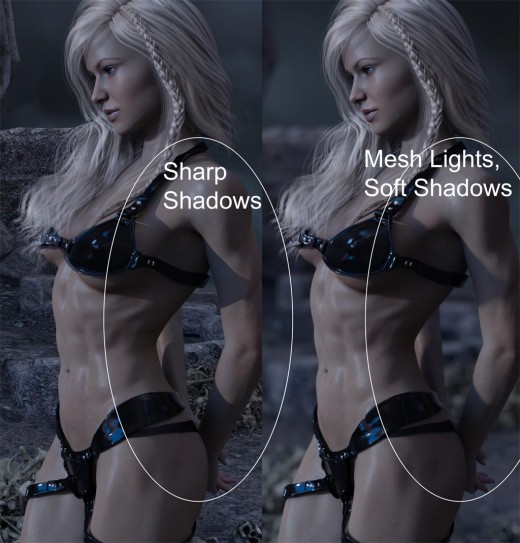
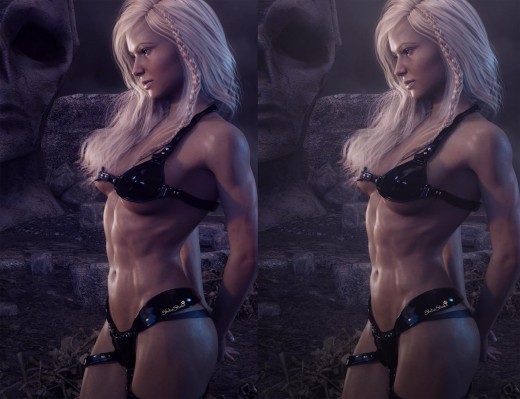
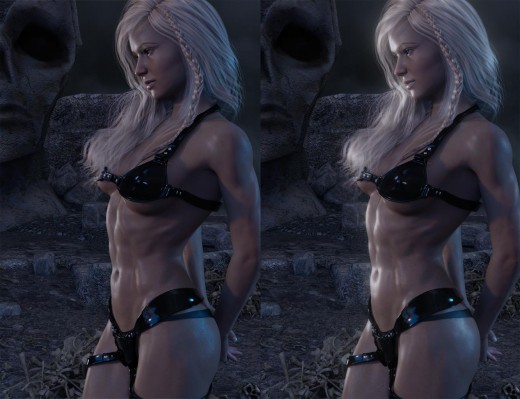
In the image below, the fantasy girl to the left is illuminated with a point-spotlight, creating very sharp shadows on her body. In contrast, the fantasy girl to the right is illuminated with a mesh light, in the same position, creating softer shadows. The larger we make our mesh light, the softer our shadows will be.
If we want to create softer lighting with an IBL or Environment map, we blur our environment map image.
3. Volumetric Lights
A great way to create atmosphere and soften scene lighting is by using volumetric lights. In the real-world, there are dust particles in the air. When light hits those particles, you get scattering effects that can make the light-ray appear visible to us.
Volumetric lighting is a technique used in 3D computer graphics to add lighting effects to a rendered scene. It allows the viewer to see beams of light shining through the environment; seeing sunbeams streaming through an open window is an example of volumetric lighting, also known as crepuscular rays.
~~[Wikipedia]
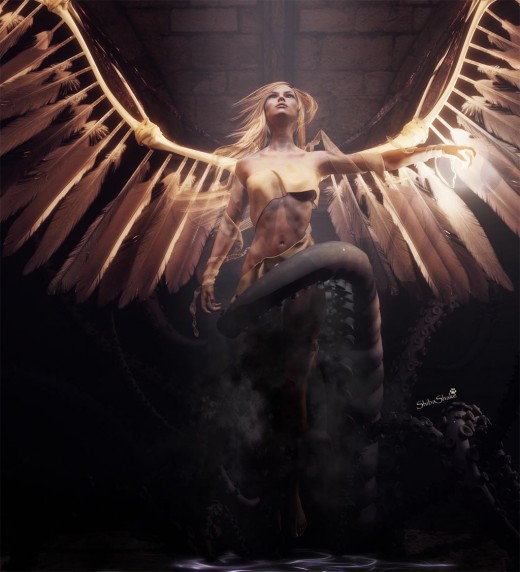
In 3Delight, I can get volumetric light effects by using Age of Armour’s Atmospheric Effects Cameras for DAZ Studio. The Volumetric Camera in this package allows me to select which lights to render atmospheric effects on. It is simple to use, fast, and I like the results that I get. The image above uses AoA’s camera to render the beam of light (from a spotlight) shining on the fallen angel. There is also a Fog Camera in the package that is useful for adding atmosphere to our images. Note that these AoA cameras only work in 3Delight.
In Daz Studio Iray, I get volumetric light effects by using AtmoCam for Iray by Marshian. Because Iray is a physically based renderer, we need to actually model our volume of air with scattering effects. Marshian’s package comes with a large volumetric prop that we use to encapsulate our scene, as well as a set of materials to get different scattering effects and colors. While this simplifies some of the volumetric-light setup for us, it is not as easy to use as AoA’s atmospheric cameras (in 3Delight only).
Some things to keep in mind while setting up Marshian’s AtmoCam –
- The volumetric prop is only visible in wireframe view.
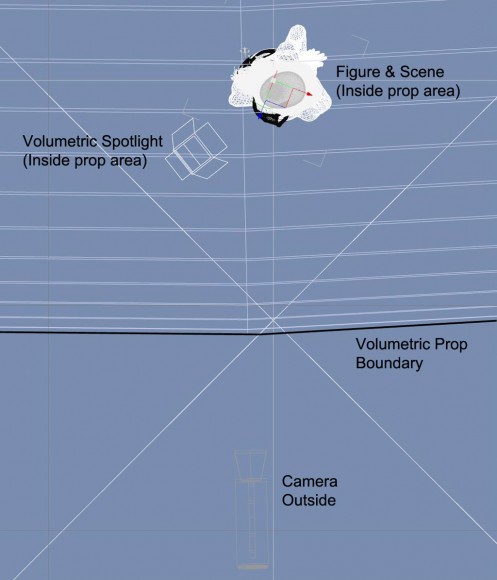
- To work properly, the volumetric prop needs to encapsulate the entire visible area. It also has to encapsulate all lights that we want to render with the volumetric effect.
- However, our render camera needs to be outside the volumetric prop.
- I find that the easiest way to properly adjust the prop is by using a Top Wireframe view (see below).
We can also create our own volumetric prop and shader by following the procedure outlined here in the Daz Forum.
I usually include at least one volumetric light in my images to get atmosphere and softening effects. In the image below, the fantasy girl to the right has an added volumetric light shining on her face, which helps to soften the overall scene.
Physically based volumetric lights can be time intensive to render, so I usually stop it before full convergence. I can then remove much of the noise in Photoshop by doing Filter > Noise > Despeckle. I repeat this operation until I get the results that I want.
A cheaper but less accurate way to get light rays in Daz Studio is through the use of props, for example the Simple Godrays props for 3Delight or the Expanded Godrays Iray props for Iray. These will render faster, but because they are just props, the light and shadow patterns may not realistically match the objects in the scene.
Another way to add light rays or fog into our images is to do it in postwork, for example with Photoshop brushes. However, we will need to make sure that our added 2D light rays properly match with the 3D lighting in our scene, which can be a challenge.
This is why my preferred method for adding volumetric light effects in Daz Studio is to render it, either through AoA’s camera (3Delight) or Marshian’s AtmoCam (Iray). This will give us realistic light and shadows according to our scene.
4. Glow
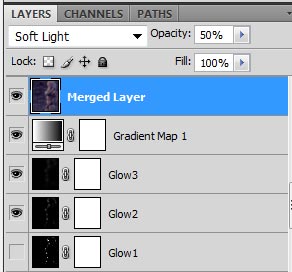
I add glow to my images in Photoshop. This earlier tutorial gives a detailed explanation on how I add and control the level of glow in my Daz Studio images.
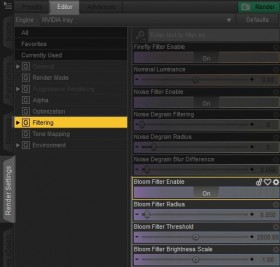
We can also get glow effects from the Daz Studio Iray renderer by turning on the Bloom Filter.
To do this,
- Go to Render Settings > Editor > Filtering.
- Click on Bloom Filter Enable. This will open up more options for controlling the strength and area of bloom.
Unfortunately, bloom can be expensive to render, thereby making even minor adjustments time intensive and painful. This is why I add glow in Photoshop, where I can quickly and easily control the area and strength of bloom.
5. Soft Light & Gaussian Blur
Finally, we can create a soft and dreamy look in our images by using the Gaussian Blur filter in Photoshop.
- Create a composite snapshot of our current image by doing Ctrl+Shift+Alt+E in Photoshop. This will create a merged image of all our current visible layers.
- Select our merged layer and change the blending mode to Soft Light.
- Go to Filter > Blur > Gaussian Blur. I usually set blur radius to 80 in the pop-up box. However, this will depend on image size and personal preference. Play around with this value until you find something you are happy with.
- To further strengthen the softening effect of this layer, we can change our blending mode to Overlay.
- Finally, we fine tune the strength of our softening effect by changing the opacity of our merged layer.
The image below shows the softening effect that we get from using Gaussian Blur in Photoshop. Note that the technique also increases the contrast of our image, making it appear darker and more saturated. Those are things that we will need to readjust for.
These soft lighting techniques are useful tools for enhancing our Daz Studio images. However, a softer image is not always better because when we soften, we also lose image details. How we choose to soften our image, in what areas, and by how much, will depend on our composition, the mood we are trying to capture, as well as personal style and taste.
